KomagTutT3 – Komag Tutorial for the Thief 3 editor T3Ed, by Komag (Ben Ramsey)
Current version – v0.95 beta (Nov 13, 2005) (WORK IN PROGRESS » 95%)
(see http://www.shadowdarkkeep.com for more information)
KomagTutT3
How to make a Thief 3 Fan Mission – Beginning to End!
BRIEF OUTLINE
i. INGREDIENTS
ii. INTRODUCTION
I. INSTALLING THE EDITOR
II. MAKING SURE IT WORKS
III. BASIC CONTROLS
IV. YOUR FIRST ROOM
V. STARTING INVENTORY
VI. LIGHTING
VII. STATIC MESHES
VIII. EXPANDING THE AREA
IX. AI, PATROLS, AND NAVMESH
X. LOOT!
XI. DOORS
XII. RAMPS, STAIRS, AND LADDERS
XIII. ZONING
XIV. TEXTURING
XV. SKYBOX
XVI. WATER AND FOG
XVII. DETAILING AND OPTIMIZATION
XVIII. SOUND
XIX. READABLES
XX. SCRIPTS
XXII. OBJECTIVES PART 1
XXIII. OBJECTIVES PART 2
XXIV. FINAL SETUP AND PACKAGING
XXV. APPENDIX
iii. FULL OUTLINE
1) WHAT YOU NEED (i. ingredients)
[Make sure you have the editor downloads and your original Thief 3 discs]
a) A PC that can comfortably run Thief 3 (obviously)
b) Your Thief 3 installation discs
c) The “thief3editorrelease_jan2005.zip” editor release file (download at Shadowdark or elsewhere)
d) The “thief3launcher.zip” file (download at Shadowdark or elsewhere)
e) Lots of time and patience, a desire to learn, and the courage to make mistakes!
1) HELLO AND CREDIT (ii. introduction)
[I have some experience, but I lean heavily on others, and they deserve credit]
a) Hi, I’m Komag, and I’ll be your guide throughout this lengthy season of enlightenment otherwise known as a tutorial.
b) I have been a part of the Thief series editing scene for a few years now, and along with many other fans I rejoiced when T3Ed was released last February.
c) Before I say more, I must first give credit to the brilliant taffers at the TTLG.com forums who have gone before and tackled this new editing beast, sometimes writing tutorials of their own along the way and helping us all to learn the ropes, including me. Here is just a short list of some of main ones:
- d’Spair
- scumble
- Nhivanye
- Null
- ascottk
- Krypt
- Ziemanskye
- ProjectX
- Rujuro
- AND MANY MORE – please don’t feel bad/mad if I forgot you!
d) Much of what follows is primarily drawn from their expertise, with some alterations and a lot of hot air of my own thrown in for good measure. You can find their works collected in the T3Ed Wiki FleshWorks, at http://www.ttlg.com/wiki/wikka.php?wakka=HomePage
2) TUTORIAL PREMISE (ii. introduction)
[I’ll walk you through step by step, follow the tutorial closely]
a) This tutorial is designed to walk you through the full process of making a small and simple but complete Thief 3 fan mission.
b) You may be an expert at using various game editors or even have specific experience with other Unreal based editors (which T3Ed is based on) or Dromed (many elements of which are apparent in T3Ed). But I’m going to assume you have never edited before, and I won’t be making reference to any of those other programs.
c) Basically, I’m going to treat you as a total and complete novice, walking you by the hand through each step of the way as easily and simply as possible!
d) Also, the tutorial is designed to be followed pretty closely. Please don’t wander off and do crazy things that aren’t in the tutorial. When you’re on your own time later on, you can do what you want, but for now just obey everything I say! Seriously though, stay close to the instruction and you’ll do well. Besides, there are later parts where I give you some free reign so your style doesn’t feel too cramped.
3) WHAT YOU GET (ii. introduction)
[You’ll make a nice little mission with lots of Thiefy goodies]
a) You will end up with a good looking, fun to play, small Thief 3 mission that includes:
- a basement
- a crypt
- a sewer complete with shallow water
- a city street with an open night sky
- patrolling guards, servants, etc.
- locked chests and doors
- some readables (parchments, books)
- various forms of lighting
- lots of objects and architecture to interact with
- mechanisms to operate via switches/buttons
- ambient music and triggered sounds
- objectives and notes
- inventory equipment
- ability to pick locks and climb walls
- ambient fog
- other things
- and lots of loot!
b) Your mission will be all wrapped up and ready for easy distribution, and simple for others to play regardless of whether they have the editing package or not.
4) DON’T PLAY FIRST (ii. introduction)
[Work through the tutorial without looking at the finished product and you’ll be better off in the end]
a) If you are planning to do this tutorial, I would advise that you not play the tutorial mission yet, but only after you are completely done. It’s probably best to not even open it to see how things were done for a certain section, but if you must then make it brief.
b) The reason is this: I believe that as a budding T3Ed designer you’ll be much better off not getting “spoiled” by the tutorial mission, which would tempt you to just repeatedly copy everything you see in there. If you already played it before you read this, immediately erase your memory!
c) Imagine yourself as a lately cocooned caterpillar about to burst forth as a beautiful new butterfly to flutter in the spring sunshine amongst happy flowers in the lovely bright meadow. Obey me and imagine it NOW! Okay, now realize that if I cut open your cocoon prematurely without allowing you to struggle a little to get yourself out, you won’t gain the strength needed to fly on your own, and you’ll be a sad little crippled butterfly who can only walk in the weeds!
d) So allow yourself to struggle in some parts (don’t worry, it won’t be too much), trying to come up with your own way of doing things, and you’ll become a much stronger level designer in the end.
[It will work out, relax]
a) My last piece of advice at this point is to just have faith that as you work and progress through this tutorial, you WILL learn T3Ed bit by bit, and by the end you’ll be a mean green unstoppable Thief 3 editing machine!
b) Have fun!
I. INSTALLING THE EDITOR
1) UNINSTALL OLD THIEF 3 (i. installing the editor)
[Uninstall Thief 3 and delete all old files and folders]
a) Uninstall any extras or mods you have for Thief 3 (particularly John P.’s textures) using the “Add or Remove Programs” menu in your Windows “Control Panel”.
b) Then uninstall the whole game. Remember to delete the Thief 3 folder from your My Documents folder (although some have reported that you can leave this if you want to, that it doesn’t affect the installation, and it keeps your save-games intact, so it’s up to you).
c) Finally, delete the old Thief 3 installation directory (some files may have been left over after the uninstall). Now you should have a completely clean slate!
2) REINSTALL THIEF 3 (i. installing the editor)
[Reinstall Thief 3, but to avoid all spaces in the paths, install to a directory such as “C:\Games\Thief3”]
a) Install Thief 3 and when prompted for the install directory change the name to “Thief3” (rather than “Thief – Deadly Shadows”).
b) Also, don’t install it in your “Program Files” directory because there would be a space in the path causing problems later on, which is what we’re trying to avoid in the first place by renaming the installation to “Thief3”. Put in something like C:\Games\Thief3 or C:\Thief3, nice and clean that way.
- Avoiding spaces in the path is for the purpose of setting up your mission to later on to be played by the public. In the “baking” process at the end, certain files need to be accessed and spaces cause the process to break down. Just trust me on this.
c) Try playing the game for a few minutes just to briefly test it. If you can’t play, something has ALREADY gone wrong! Make sure you have all your video card drivers and everything properly installed, and that your motherboard drivers are all set up (such as the Via 4-in-1 drivers), etc. There is also a lot of help and information available online to help you get it working, especially on the www.ttlg.com Thief forums.
3) COPY AND RENAME DIRECTORY (i. installing the editor)
[Make a copy of the entire “Thief3” directory and call it “Thief3Edit”]
a) Find your main Thief 3 installation directory (called “Thief3”) on your computer, right-click on the directory title, and select “Copy”.
b) The next step will copy a TON of files and take a few minutes. You will need a lot of hard drive space to do this (around 2 gigs), so be sure it’s available beforehand.
c) Right-click elsewhere (on a blank area of the main directory that “Thief3” is in, or in a completely separate directory on any drive letter you want) and select “Paste”. Be sure you don’t paste it into the Thief3 directory, that’s not what we want!
d) It should say “Copy of Thief3” if you are in the same root directory, or just “Thief3” if you chose to copy it to a different place.
- You now have two full copies of your entire Thief 3 installation directory. They should be separate from each other, and they may be in the same root directory (such as “D:\Games\Thief3” and “D:\Games\Copy of Thief3”) or not (such as “D:\Games\Thief 3” and “F:\MoreGames\Thief 3”).
e) If you used the same directory and your new folder is called “Copy of Thief3”, rename it to something like “Thief3Edit” (it doesn’t have to be that exactly, but avoid using spaces or odd characters).
f) If you used a separate location and your new folder is just called “Thief 3”, do the same - rename it to something like “Thief3Edit”.
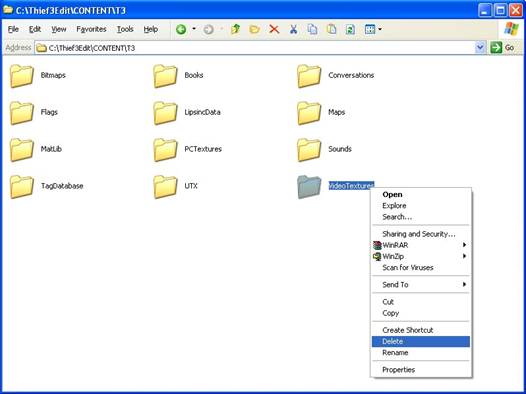
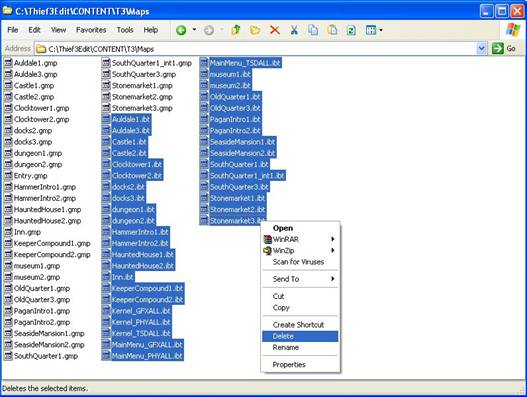
4) DELETE UNECESSARY FILES (i. installing the editor)
[In the Thief3Edit\Content\T3 folder, delete the “VideoTextures” folder and all the ibt files in the “Maps” folder]
a) To save hard drive space, you can now delete some stuff in “Thief3Edit”, stuff which is only used for playing the game and isn’t necessary for editing. You will still have the complete installation in the original “Thief3” folder for when you want to just play.
b) Thief3Edit\Content\T3\VideoTextures - delete the whole folder, this will save 650meg
c) Thief3Edit\Content\T3\Maps - delete the ibt files (750+meg), but KEEP the gmp files
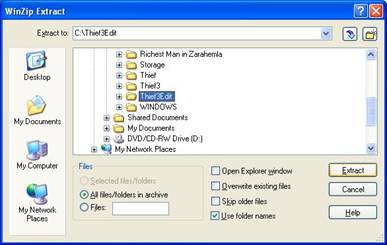
5) INSTALL T3ED (i. installing the editor)
[Unzip the editor into the “Thief3Edit” folder and let it overwrite the files it asks to]
a) Now, finally, unzip “thief3editorrelease_jan2005.zip” directly into your new “Thief3Edit” folder. One easy way to do it is to double-click the zip file so that it opens WinZip, then click the menu button “Extract” and select your “Thief3Edit” folder in the directory tree so that the path says something like “D:\Games\Thief3Edit”.
b) You may also be able to right-click and hold the zip file, and drag and drop it onto your “Thief3Edit” folder, and then select “Unzip here” or “Extract here”.
c) Make sure you don’t unzip it to a subfolder within the Thief3Edit folder.
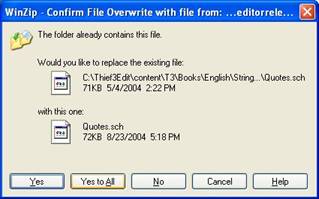
d) If you do it correctly, the files that were in the zip file in System and Content will go right into those same folders within the “Thief3Edit” folder. Only four files will be overwritten (let them):
- Default.ini
- T3.exe
- Ion Launcher.exe
- Content\T3\Books\English\String_Tags\Quotes.sch
e) What this step (unzipping the editor file) did is give you all the various types of content that you can now access and work with in the editor. All the textures, models, animations, objects, etc, were not available before because they were locked away in the mission files themselves. Now they are open and accessible. They constitute the bulk of the downloaded editor zip file.
6) CHANGE EXES (i. installing the editor)
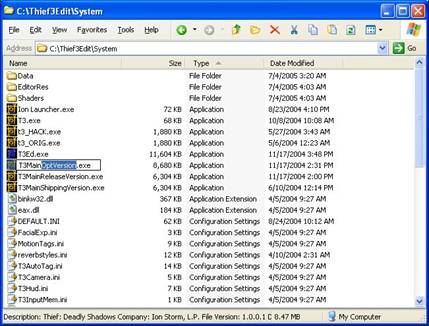
[In Thief3Edit\System, delete “T3Main.exe” and rename “T3MainOptVersion.exe” to “T3Main.exe”]
a) Go to your “Thief3Edit\System” folder and delete the file “T3Main.exe”.
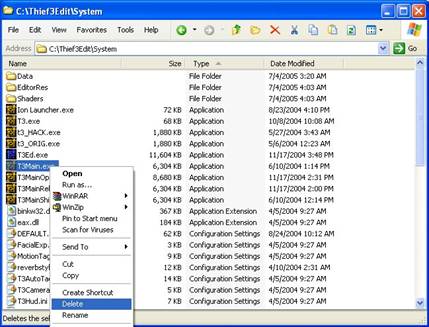
b) Find the file “T3MainOptVersion.exe” and rename it to “T3Main.exe”.
7) EDIT INI (i. installing the editor)
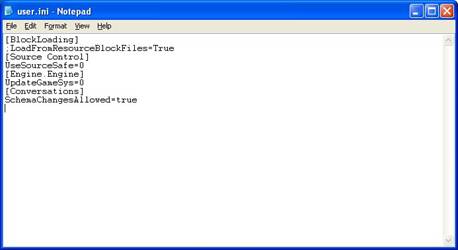
[In Thief3Edit, edit the user.ini file and add a semicolon in front of the line “LoadFromResourceBlockFiles=True.”. Add two new lines: “[Conversations]”, and “SchemaChangesAllowed=true”]
a) Go up to your main “Thief3Edit” folder and open the file “user.ini” (use Notepad, and it’s a good idea to have Notepad always open ini files as they are usually text-based settings files).
b) Find the line “LoadFromResourceBlockFiles=True.” and add a semicolon to the start of the line so that is now says “;LoadFromResourceBlockFiles=True.”
c) At the bottom, add two new lines:
[Conversations]
SchemaChangesAllowed=true
d) Save the user.ini file and close it.
8) REINSTALL EXTRAS (i. installing the editor)
[Reinstall your game play tweaks and extras]
a) Now you can go back and reinstall any little mods or extras to the normal Thief 3 installation (“Thief3” folder), such as textures or game-play tweaks.
9) CHECK OTHER THINGS (i. installing the editor)
[Set your desktop color to 32bit, set your firewalls to accept Thief3, and save any open work on your computer]
a) Before you go on to the last steps of getting set up, be sure that your monitor desktop color depth is set to 32 and not 16 or lower, as T3Ed requires 32bit color and won’t work without it (it will crash with an error message).
b) Some internet firewalls may interfere with going into game mode from the editor, so you might want to turn them off, or at least just be aware of it so that if you get hang-ups later on you’ll have one more option when trying to fix it.
c) Of course, you’ll also want to save any important stuff you have open at this point, as you never know if you might have to reboot your PC!
10) INSTALL THIEF 3 LAUNCHER (i. installing the editor)
[Unzip somewhere and run Thief 3 Launcher, set the paths correctly, close it]
a) In the “thief3launcher.zip” file you downloaded separately, unzip the “Thief3Launcher.exe” file anywhere you want (such as your desktop or your main games folder or whatever).
b) Run “Thief3Launcher.exe” – you will see a small window that has on the left side “Editor Path:” and on the right side “Thief 3 Path:”, under which are two tiny browser windows to find the correct folders.
c) It will try to find things correctly, but if it’s wrong, find your main “Thief3Edit” folder and your main “Thief3” folder (double click folders to open or close them).
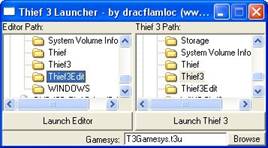
d) Ignore the bottom where it says “Gamesys:” for now (it should say “T3Gamesys.t3u”).
e) Close the “Thief3Launcher” window (don’t press either “Launch Editor” or “Launch Thief 3”). This will save its settings.
11) COWER IN FEAR (i. installing the editor)
[Take a break if you need to]
a) If you’re too scared to go on, close everything (including this tutorial) and go watch a movie or have a sandwich or something.
II. MAKING SURE IT WORKS
1) OPEN T3ED (ii. making sure it works)
[Run “Thief 3 Launcher” and click “Launch Editor”, wait for the editor to load]
a) So you’re braver than I thought! Well then, shall we proceed?
b) Run “Thief 3 Launcher” and click on “Launch Editor”. Have patience as it may load somewhat slowly or maybe even slower than your 98 year old great grandmother.
c) If all goes well, you should be staring at a new editor! You’ll see lots of funky bluish-green icons on the left side, four main editing windows, a separate “Textures” window covering part of the editing windows (just close it), a “Command” line at the bottom left, a few more icons across the top, and some other odds and ends.
d) If the editor didn’t start or you got some error message or if your computer imploded, then something went wrong! Retrace your steps, get help on the forums, or just give up now.
2) LOAD A MAP (ii. making sure it works)
[Open “Castle1.unr” from “Content\T3\Maps”]
a) Right now it’s best to see if your setup is working properly, so you’ll want to test a mission in game mode.
b) Find the little “Open” folder icon in the upper-left section (near the “Save” disk icon) and click it. Or you could just click on “File” in the very uppermost menu and select “Open...”, or press Ctrl+O.
c) Navigate to the “Content\T3\Maps” folder if it’s not there already and try opening “Castle1.unr”. You will see a tiny window pop up titled “Progress” with the message “Loading Map” displayed. It will take a little while, maybe a minute or so, to load.
d) WHOAH! That’s scary, all those green lines and weird icons and junk!
3) PLAY THE MAP (ii. making sure it works)
[Save the map as “sillytest.unr”, then play it by clicking the joystick icon on the top right]
a) First go in the “File” menu and select “Save As...” and save it as “sillytest.unr” or “mynewtest.unr” or whatever. If you click the little “Save” disk icon you will just save the mission as “Castle1.unr” again - no harm done, but not what we want.
b) Now, to test the level, find (don’t click yet) the little joystick in the top right side of the main toolbar on top (if you hover your mouse pointer over it, it says “Play Map!”).
c) Read the next bit first to know what to expect, and then, when I say so, you can actually try it out.
- It will minimize the editor and open a small window titled “Progress” and will auto-save the map as “Autoplay.unr” and then convert it to, and auto-save it as, “Autoplay.gmp” (it’s these gmp files that can be played).
- Then it will open a little window with some blah blah message about “Localization” and “General” this and that, but just ignore it.
- Finally, if all goes well (again), it will then run the Thief 3 game and load up the level and you’ll be at the start of the first main mission in the game (the “Castle1” map).
- Notice that it takes much longer to load gmp files than the normal game levels, and there is no progress bar during the actual mission loading.
- To exit and come back to the editor, you simply open the game menu (as you normally do while playing, by pressing Esc) and exit the game through the main menu, then restore the editor from your Windows taskbar.
d) Okay, try playing the map by clicking that joystick icon, NOW!
4) TROUBLE (ii. making sure it works)
[If you have a problem, check your firewall, graphics card drivers, or get help on the forums]
a) The odds are somewhat good (or bad) that it didn’t work right and you have a problem or two to fix before things start going your way.
b) Again, some would suggest quitting now while you’re still sane, but what kind of Thief fan would you be if you did that?! Here are a few pointers to get it working:
- Be sure you turn off your firewall or give Thief 3 permission to run in it or have access to the internet. I personally had McAfee firewall asking me to give it permission, which I gave and it worked fine after that.
- There may be trouble with some ATI Radeon cards and certain Catalyst drivers; the jury’s still out on this one.
- If, no matter what, you are still having trouble, read everything in the “Thief III Editors’ Guild” forum at www.ttlg.com (they also have a wiki set up for editor help). Register there and ask for help if you need to.
c) Good luck man, I feel your pain.
5) NO SOUND (ii. making sure it works)
[There is no sound, so you can press Alt+Enter to play in a window with sound, or there are other options]
a) Most likely you will have no sound in full screen game mode – this is normal for the debug version we’re playing with.
b) If you can’t stand to play without sound, you can press Alt+Enter to play in windowed mode and the sound will work.
c) If you can’t stand to play in windowed mode, then be a man, buck up, choose the lesser of two evils, and just live with it one way or the other.
d) But if you REALLY can’t stand it, then you have three additional options.
6) SOUND FIX ONE (ii. making sure it works)
[Make a shortcut to your “T3.exe” file (in “Thief3Edit\System”) and add “ autoplay” to the end of the “Target:” line (so long as autoplay.gmp has been created by trying the joystick icon method). Or better yet, under “File” select “Export Map For Game” and name it “sillytest”, then add “ sillytest” to the end of the “Target:” line in the shortcut]
a) The first option is not very popular, so you may want to skip to the next ones. You can set up a shortcut to play the map manually:
b) Exit the editor.
c) Go to your Thief3Edit\System folder and right-click-and-hold on “T3.exe” and drag it over to your desktop and then let go and select “Create Shortcuts Here” which will add a file to the desktop called “Shortcut to T3.exe” that you can rename to whatever you like.
d) Right-click on the shortcut and select “Properties” and in the “Target:” line add “ autoplay” after the “exe” so that it looks like this:
E:\Thief3Edit\System\T3.exe autoplay
e) There is just one space between the “exe” and “autoplay” (referring to “Autoplay.gmp”), and the path may be different according to your install directory (of course).
f) Remember, “Autoplay.gmp” must exist, so you will have had to try to play it through the editor game mode at least once so that it will have produced the gmp file.
g) You could also go in the “File” menu and select “Export Map For Game” to create a gmp with the name you saved the “Castle1” level as (“mytestmap” or whatever). In that case you would make your shortcut line end with “T3.exe mytestmap”.
h) When you click this new shortcut you just made, Thief 3 should load up with that map loaded and you’ll have full screen AND sound!
i) But don’t use this solution, it’s dumb.
7) SOUND FIX TWO (ii. making sure it works)
[Edit your “user.ini” and add four new lines: “[WinDrv.WindowsClient]”, “WindowedViewportX=1024”, “WindowedViewportY=768”, and “StartupFullscreen=False”. Then just play using the joystick icon]
a) The second option is a little more popular. You can have game mode (joystick) automatically start up in windowed mode (with sound) with the window 1024x768 (nice and large).
b) To make it work, edit your “user.ini” file in your “Thief3Edit” folder and add the following lines (you can just stick them at the bottom of what’s already there):
[WinDrv.WindowsClient]
WindowedViewportX=1024
WindowedViewportY=768
StartupFullscreen=False
c) Or you could be like me and set the window to 1280x1024 instead. My desktop resolution is 1280x1024, so the game window gets slightly cut off at the bottom (due to the window bar at the top), but it’s almost like full screen it works pretty well.
d) This may also depend on the in-game resolution you have set in the normal game menus, it acts funny and doesn’t always obey correctly.
8) SOUND FIX THREE (ii. making sure it works)
[Do this one. In “Thief3Edit\System” create “xbreboot.txt”, edit it and add the line “T3MainReleaseVersion.exe Autoplay”, and rename it to “xbreboot.bat”. To play, go to “Build” and choose “Send to Xbox”]
a) A third option which is quite popular is to make use of the “Send to Xbox” command (in the “Build” menu in the editor) since it’s useless otherwise.
b) To do this, go to your “Thief3Edit\System” directory and create a text file (right-click in the folder and choose “New – Text Document”).
c) Open the “New Text Document.txt” and type in just one line:
T3MainReleaseVersion.exe Autoplay
d) Close the text file, and rename it to “xbreboot.bat”. Yes, change the suffix to .bat (making it a batch file) instead of .txt, and if Windows complains, tell it to stuff it!
e) What this command does is give you the option of loading your level using the normal version of the game exe instead of the debug version the editor makes use of. Your frame rates should be a little higher and more indicative of how overall performance will be for other players. Plus, of course, you can play full screen with sound.
f) If you decide to use this option, you would just replace my instructions “click on the joystick icon” with “go to the ‘Build’ menu and choose ‘Send to Xbox’”.
III. BASIC CONTROLS
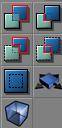
1) EDITING WINDOWS (iii. basic controls)
[Check out the different editor windows and notice what they all are, and notice the XYZ indicators]
a) Close and open T3Ed to get a fresh start (so some things from the “castle1” map get cleared out of the memory).
b) Notice that the left two editing windows are much wider thank the right two by default, and the lower left one is black with blue lines.
c) The three grey windows are the 2D windows, labeled “Top”, “Front”, and “Side”, which will give you “blueprint” representations of your level (once you get a level going!).
d) The black window with blue lines is the 3D window which will show your level more like it will appear in game.
e) All the windows have a little XYZ axis indicator to help you keep track of your geometry angles.
![]()
f) While the 2D XYZ indicators are pretty straightforward, the one in the 3D window is more complex as it rotates and twists in three dimensions. Just try to remember that it is, in fact, resting in three dimensions with a vanishing point and everything.
g) For example, if the X or Y lines aren’t flat it doesn’t necessarily mean you aren’t level with the horizon because you might simply be turned left or right somewhat.
2) BUTTONS (iii. basic controls)
[Notice the buttons on the left, and that they are in collapsible sections]
a) Along the left side of the editor are most of the control buttons, grouped in little collapsible sections.
![]()
b) Notice the top of each section with the faint bar and a small black and grey arrow – click on an arrow or two to collapse those sections.

c) Depending on your Windows Desktop monitor resolution you’ll have to collapse a section or two to get to the lowest buttons. For now, open up any that you collapsed and try to leave them all open.
- You can also “scroll” down the whole left button section. Slowly moving your cursor over the thin blue-green vertical line between that area the “Top” and 3D view windows. When the cursor turns into a little hand, click and drag the bar down to move the buttons up, and vice versa.
3) MOVING AROUND 3D (iii. basic controls)
[Click in the 3D window (bottom left) and move around. Try both mouse buttons. Try both together. Get used to the movement]
a) Okay, let’s actually start to learn the controls for this puppy - first off, moving around in the 3D window!
b) When you move your mouse pointer over any of the editing windows, the cursor becomes a crosshairs. Move the crosshairs over the 3D window (black space with blue 3D grid a la Tron).
c) Click and hold the left mouse button (LMB), and move the mouse around. Notice that you slide around forward and back, turning left and right.
d) Now try clicking and holding the right mouse button (RMB) and moving the mouse. Notice that the view tilts around, similar to “mouse look” in the game.
e) If you accidentally right-click without holding it, a small menu will pop up – you can just left-click somewhere else to make it go away.
f) Now try clicking and holding both buttons and moving the mouse. Notice that you slide up and down and left and right.
g) After editing for a while these movements will become VERY natural and easy to maneuver with. To review:
LMB+Move slide and turn on the horizontal plane
RMB+Move look around
LMB+RMB+Move slide around on a vertical plane
4) ODD BEHAVIOR (iii. basic controls)
[If your mouse disappears, just click to get it back]
a) As a side note, sometimes the editor will behave slightly odd, such as making your mouse pointer disappear. If that happens, just click once or twice and you’ll be back.
b) It’s slightly possible to accidentally click something doing this, but just be brave and do it anyway (I’ve never ruined anything doing this yet).
5) CAMERA MOVEMENT (iii. basic controls)
[We are in camera movement mode, and there are other modes]
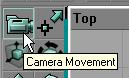
a) Two of the buttons on the left side of the editor relate directly to camera movement (that’s what you’ve been doing just now!).
b) The first one is on the very top left (not counting the File menu or the New/Open/Save icons), called “Camera Movement”, and it is highlighted because we are currently in camera movement mode.
c) You can hover the pointer over the other buttons nearby and see the titles of those modes. If you were in a different mode, the controls talked about below would do different things other than just moving things around, such as vertex movements or rotating textures.
6) CAMERA SPEED (iii. basic controls)
[You can change the camera movement speed to fast, medium, or slow by clicking the “Change Camera Speed” button on the lower left]
a) The second camera related button is near the bottom left, next to the little yellow guy and below the eyes, has three varying length bars, and is called “Change Camera Speed”. You might have to collapse a section or two above it to move the buttons up before you can see it.
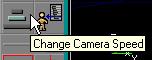
b) Currently the middle bar is highlighted, but if you click on it several times, it will cycle through the three speeds.
c) This affects the actual movement speed (sliding around on either the horizontal or vertical plane), but not the rotation speed (turning, looking around).
d) The middle setting is pretty good to leave it on for now.
7) MOVING AROUND 2D (iii. basic controls)
[Click and move around in the 2D windows. If you use the right button it’s faster. Zoom with the mouse wheel or with both buttons. If you can’t zoom, restore and close a browser then try again, or highlight another program than T3Ed then come back and try again]
a) Now for the 2D windows. In any of the three 2D windows, click and hold the left button and move around.
b) Basically, you’re moving your view in the direction you move the mouse, and the background naturally scrolls the opposite way since the view is in the middle.
c) Click and hold the right button and move around – same thing? Not quite, it’s a little faster than LMB.
d) These speeds are also affected by the overall “Change Camera Speed” setting as well, and in all three settings, the RMB is a little faster than the LMB.
e) Lastly, you can zoom in and out by scrolling your mouse wheel forward and back (make sure the particular 2D editing window is highlighted with the white border).
- You can also zoom by pressing LMB+RMB+move forward/back, but in this case when you move back you zoom IN, as though you’re pulling the grid back toward you, as opposed to moving the view back and zooming OUT. Too bad they weren’t consistent, because when just moving in 2D view you are NOT moving the grid around, but you are moving the view around, which is the opposite. But most of you use wheel-mice, so it’s a moot point.
f) Finally, notice that when you move around in the 2D windows your camera position in the 3D window doesn’t change – the camera only moves when you actually move around in the 3D window itself. To review:
LMB+Move moves the view around
RMB+Move moved the view around faster
Mouse wheel zooms in or out
LMB+RMB+Move zooms in or out bassackwardsly
g) As a final note, later on if you try to zoom in or out on a 2D window by scrolling your mouse wheel and it won’t work, it’s probably because you minimized a “browser” (you’ll use them a lot later).
- If that happens, restore the browser and close it and mouse wheel zooming should work again.
- If it’s still not working, then try going to another program (like this tutorial, or a web-browser), then coming back to T3Ed, and it should work fine again.
8) BUILDER BRUSH (iii. basic controls)
[Right-click on “Cube” on the left and set the “Height” to 192, the “Width” to 1024, and the “Breadth” to 512, then click “Build” and close the window. Check out the red box “Builder Brush”, click on it to select it, and click elsewhere to deselect it]
a) Let’s jump in and get ready to make something, shall we?
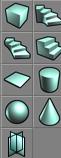
b) Find the “Cube” button on the left. It is light blue/green and is to the upper-left of the three different stairs.

c) This section, by the way, is the “Primitives” section, with different basic shapes you can make.
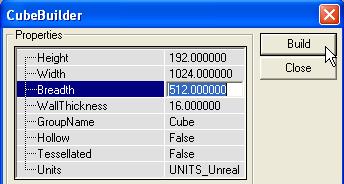
d) Right-click on the cube to bring up its settings (it opens a window called “CubeBuilder”), click on the “256.000000” next to “Height” and change it to 192 (you don’t ever need to type in the zeros).
e) Change the “Width” to 1024 and change “Breadth” to 512.
- By the way, since there are 16 Unreal units per one foot of world space, your box represents an area 12 feet tall, 64 feet wide and 32 feet across.
f) Now click “Build”.
g) Suddenly a tall (when viewed in the “Top” window – zoom out if you need to) red rectangle box has appeared! This is known as the “Builder Brush”.
h) You can now close the “CubeBuilder” window with “Close” or the red X.
i) Move around so that you can clearly see the whole red box in the 3D window.
j) Select it by clicking on one of its lines (you just have to be very close, not perfect) so that the box lights up bright red.

k) Click anywhere away from the box lines to deselect it.
l) Try selecting it and deselecting it in the 2D windows as well as the 3D window.
9) NO WORRIES (iii. basic controls)
[If you mess things up, undo some steps to go back. And save under a new name often]
a) Before you go on, keep in mind that if you start messing things up you can always quickly go up to the “Edit” menu and select “Undo”. Or just hit Ctrl+Z or click the left arrow next to the save disc icon. This will take you back as many steps back as you need.
b) Alternately, if you keep saving under a new name often, you could just load the last save.
c) And worst case scenario, you can close the application and restart it, then load a save. Or even restart your whole PC in drastic cases (repeated crashing, etc).
10) BRUSH MOVEMENT (iii. basic controls)
[Hold Ctrl and click and move the selected Builder Brush in the 2D windows. You may wish to move the window a bit first to “activate” it so your brush will move properly after that. Use the right button to rotate it, and reset an overly rotated brush by clicking “Cube”]
a) With the Builder Brush selected, hold Ctrl+LMB and then move the box around in the 2D windows (you can try it in the 3D window but it’s awkward depending on your view angle).
b) The view in the 2D windows might shift a bit before the box actually starts moving, so you might get in the habit of starting your movements slowly.
- Actually, you may have this problem A LOT while editing – the view window moving instead of moving the brush or object you want. The trick is to get in the habit of just moving the window a little bit every time you go into it (LMB+move inside that particular 2D window), and THEN move your brush/object (Ctrl+LMB).
- It seems each 2D window always wants a little movement to “activate” it or something. They’re just touchy that way, what can you do. They’re like women or classic cars, you have to handle them they way THEY say, not just however you feel like!
c) Now try holding Ctrl+RMB and moving – this is used to rotate the brush. You can make the rotation pretty wild with a combination the three 2D windows.
d) If you want to start over from your hopelessly twisted box, reset it by left-click the “Cube” primitive button (which is the equivalent of right-clicking it to open its properties and clicking “Build”).
11) BRUSH SLIDING (iii. basic controls)
[Hold Shift and move and rotate the brush to do it relative to the brush]
a) Now try using Shift the whole time instead of Ctrl, and notice how it does the same thing (moving and rotating the brush) but this time it keeps the brush centered.
b) This can be especially useful to move a brush a long distance across a map without having to move/scroll/move/scroll over and over.
12) BRUSH AXIS (iii. basic controls)
[Hold Alt to move around the brush’s axis point, then see the effect by rotating the brush]
a) Now try holding Alt. This time there is no RMB functionality, but with LMB you move around a little axis point. This is the rotation point.
b) Try moving it out away from the brush a little way, then rotate the brush (Ctrl/Shift+RMB+move) to see the effect.
IV. YOUR FIRST ROOM
1) SUBTRACTING (iv. your first room)
[Click “Subtract” (on the left) to carve out a room, then move the builder brush out of the way]
a) Let’s make something already!
b) Find the “Subtract” button on the left. It is one of the four buttons with a blue-green box overlapping a blue box (“Subtract“ is the upper right one).

c) These are in the “CSG Operations” section, which contains the basic construction commands for editing. We want “Subtract” because the whole universe is solid and we want to carve out an empty space of air, or “subtract” some of the solid away.
- Before you click “Subtract”, make sure the red box is not rotated but is flat and normal, a tall rectangle from the “Top” view – reset it if you need to by clicking on “Cube”.
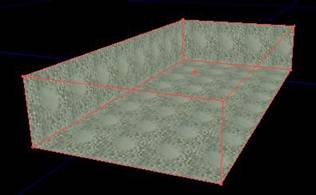
d) Now, click “Subtract”. You should immediately see a light green bubbly looking textured rectangle room in the 3D window. If you are outside the room you will be able to see into it, but if you are inside it then all the walls will appear solid and you can’t see out.
e) Move the “Builder Brush” (red box) out of the way now by selecting it and moving it as normal.
f) The little room you made stays behind because it was carved out there, whereas the Builder Brush is just a tool that does the carving. However, you can select this new room and move it if you want to, using all the same controls as when moving and rotating the Builder Brush.
2) SAVE SAVE SAVE (iv. your first room)
[Save your map often, using a new name at intervals. Consider backing up recent saves online or on a disc]
a) Now it’s time to start a good habit – SAVING OFTEN!
b) Save your map by going to “File” – “Save As” and choosing a new name, such as “Komag001” or something.
![]()
c) After this, for a few saves, you can just click the “Save” icon (a little disk), but after a few saves you will want to do another “Save As” and choose a new name, probably the next number up, such as “Komag002”, then “Komag003” etc.
- Once you get to “Komag999” go back and delete 001-500 or so and start over (just teasing, you won’t get that high with the tutorial, but some of you will get that high with your own missions later on!).
d) Bottom line: SAVE VERY OFTEN, and save with a new name somewhat often as well. This will “save” you headaches and pains and weeping and wailing and gnashing of teeth down the road, trust me.
e) Just do it!
f) And if you’re serious enough you can periodically zip up and upload your recent couple saves to your own web-space or email it to your mom or burn it to a CD or something. That way if your computer has a nuclear melt down you won’t lose a couple hundred hours of work!
3) LOOK IN ROOM (iv. your first room)
[Move into the room and click the round “ION” button to enter “render mode”]
a) Okay, back to work. Move your camera position into the middle of your room by moving in the 3D window.
b) Remember that just because you’re pointing downward doesn’t mean you move that way when you move “forward” - you will have to actually move “downward” if you are above the box.
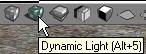
c) Find the little round “ION” button above any of the four editing windows and click it.
![]()
![]()
- Notice that some of the other buttons in each of those four rows change, and the title of the 3D window changes from “Dynamic Light” to “Flesh Renderer”.
d) When the “ION” button is on the 3D view window is in “render mode”, and it will render your level realistically like it would appear in game mode (which can make it go slower when your level is more complex, and it doesn’t show all the same things as non-render mode).
e) But, what’s that you say, it’s not working, it looks exactly the same? Aha, that’s because you didn’t “Build”! (I know, it’s my fault, but I want you to LEARN!)
4) LOOK AGAIN (iv. your first room)
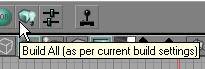
[Click “Build All (as per current build settings)” (along the top)]
a) Find the “Build All (as per current build settings)” button along the top near the right, near the joystick – it is a tiny blue-green cube next to a light bulb.
![]()
- This is the “Build” section as everything relates to the processing of the map. There are some other build types you’ll learn more about later.
b) Click the “Build All” button, which has extra processes, necessary to see the rendered level. You should have seen a small window pop up with some super-fast information about the build process flashing by, and then it disappeared.
c) Now try the “ION” button.
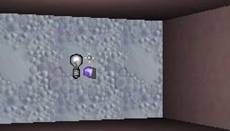
d) Oh no, you forgot to put a light in there! If it’s working correctly, you should see a completely dark room now. Garrett’s pretty good, but no one can see in TOTAL darkness!
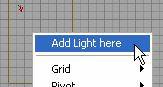
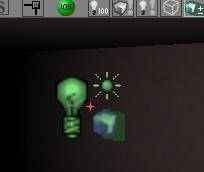
5) ADD LIGHT (iv. your first room)
[Right-click in the “Top” view and select “Add Light here”. Move it to one end of the room, and add another one to light the whole room]
a) Right-click somewhere in the room in the “Top” 2D view, and select “Add Light here”.
- You can also right-click in the 3D view or either of the other two 2D views to place a light
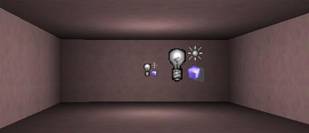
b) Voila, you can see some part of your room now, if you’re facing the right way (turn around if you need to).
- Notice the icon floating there that looks like a light bulb with a little sunburst and a box with a shadow (meaning it’s a shadow casting light).
c) You may have to adjust the height and placement of the light afterwards, by selecting it (clicking on or very near it in a 2D view or on the icon in the 3D view) and moving it like you move a brush (Ctrl/Shift+LMB+move).
d) One light at its current brightness isn’t enough to illuminate the whole room though, so move the light towards the top end of the room and then make another one and put it towards the opposite end.
e) But the room is all pinkish, instead of bubbly foam green (not that we really want that anyway), because we haven’t added any real textures yet.
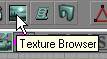
6) TEXTURE BROWSER (iv. your first room)
[Click the “Texture Browser” button (along the top)]
a) If you forgot to close the texture browser way back at the beginning like I said to, close it (click red X).
b) Find the “Texture Browser” button along the top, to the right of the “G” (which is “Group Browser”). It looks like a tiny moonlit landscape painting.
![]()
- This is the “Browsers” section, used to view game resources you might want to include in your map.
c) Click the “Texture Browser” button.
d) The “Textures” window that should have just popped up has two tabs (“Actor Classes” and “Textures” with “Textures” currently selected), a few buttons, a line that says “AICore”, a blank line, and a bunch of icon textures that are used in the editing (you’ve already seen the floating light bulb light icon).
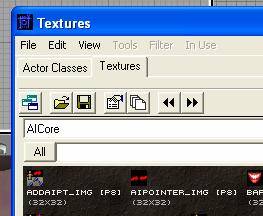
e) None of the real game textures are loaded in the texture browser right now so we need to import some.
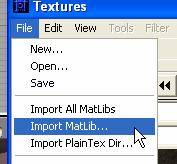
7) IMPORT TEXTURES (iv. your first room)
[In the texture window, select “File” – “Import MatLib…”. Browse up to “T3”, then into the “MatLib” folder, and select “T3_Gen.mlb”]
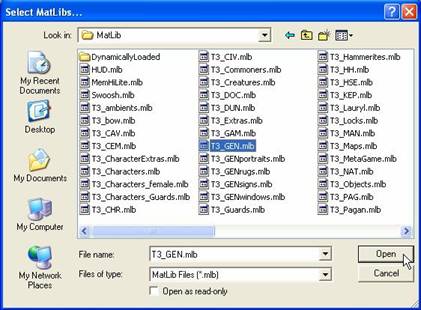
a) In the Texture Browser window, go to “File” and select “Import MatLib...” (don’t select “Import All MatLibs” as that’s just too much to browse through right now).
b) A new file browser window will pop up called “Select Matlibs...”, starting in the “Maps” folder of your Thief3Edit directory (because that’s the last folder we loaded anything from, when we loaded the “Castle1” map).
c) Go up a folder level to “T3” and then into the “MatLib” folder. This overall location is your “Thief3Edit/Content/T3/Matlib” folder. Here are some of the goodies!
d) Find and select “T3_GEN.mlb” for some good run-of-the-mill basic textures to mess around with. (You can explore all those other ones on your own time later on.)
- Don’t select the option to “Open as read-only”, that’s just for people who are paranoid that they might “accidentally” do some advanced texture property editing and save the changes to the permanent texture file.
e) Okay, with “T3_GEN.mlb” selected, click “Open”.
f) You should see a small window pop up talking about “Converting materials to UTextures...” and rapidly processing a bunch of files (the textures, of course).
g) The texture browser line that said “AICore” now says “T3_GEN” and you will see some of the loaded textures in the main window.
h) You can use the scroll bar on the right to view them all. Notice that they are in alphabetical order, because when I tell you find one this will help!
8) PAINT THE WALLS (iv. your first room)
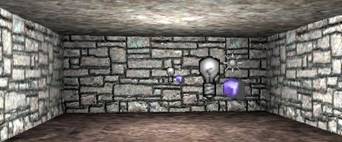
[Select a wall in the 3D view. Find and click “GENWALLC_D” in the texture window (stone, near blue windows. Select the other three walls holding Ctrl, then click the texture again. Do another build, just use “Build Flesh BSP” this time]
a) In the 3D view, click on one of your walls. If you still have the “ION” button on, in render mode, the pinkish wall now shows the bubbly texture placeholder again.
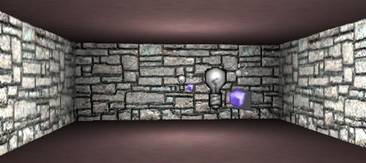
b) Scroll down in the texture browser and find the texture “GENWALLC_D” (it’s a stone wall, above some blue window textures), and click on it. The wall you had highlighted in the 3D window now should be a stone wall.

c) In the 3D view, hold Ctrl and click on the other three walls.
- If you need to, you can let go of Ctrl to turn around some, then hold Ctrl again and select the remaining wall(s). Also, if you are moving your mouse at all when you click a wall, it will not select it but will just do a slight camera movement, so be still and click quick.
d) With all the walls now selected/highlighted, click the stone texture again. Now all four walls should look like stone. But if you click elsewhere (in a 2D window) and deselect the walls they will go back to pinkish!
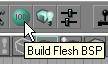
e) You need to build again to see the texture changes, but this time you can just do a “Build Flesh BSP” (the blue-green ION ball) as opposed to a “Build All” – it goes faster that will make a difference when your level starts to get big and complex!
9) PAINT MORE (iv. your first room)
[Texture the floor “GENROCKB_DTRED” (above footprints). Texture the ceiling “GENCEILINGA_D” (above city map). Build again]
a) Since you probably don’t want to continuously “build” a bunch of times in a row just to see what you’re doing with your textures, it’s best to turn off the render mode by clicking the “ION” button again so it’s just grey instead of green. That way you can do your texturing, and then just do one build at the end.
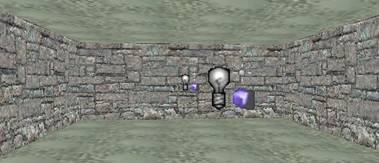
b) Select the floor, find the texture “GENROCKB_DTRED” (a reddish flat rock texture just below the middle of the list, about ten up from the blue footprints), and click it.
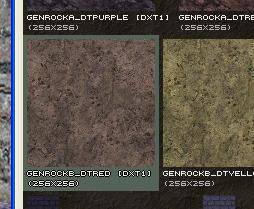
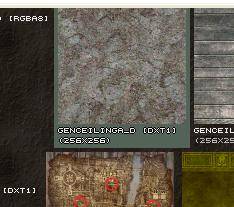
c) Select the ceiling, find “GENCEILINGA_D” (near the top, a couple before the city map) and click it.
- Notice that you first selected the surface, and then applied the texture, as opposed to choosing a texture and then “painting” it all over the place. There are some other options which will be discussed later.
d) Close the texture browser window.
e) Do another build and check it out in render mode.
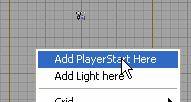
10) ADD A STARTING POINT (iv. your first room)
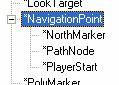
[Click “Actor Class Browser” (along the top) and expand the sections “Marker” – “Keypoint” – “Navigation Point” – “Player Start”, then close the window. Right-click in the room and choose “Add Player Start Here”]
a) Now that you have a room ready with a couple lights and some textures, it’s time to stick Garrett in there!
b) Right-click somewhere in the room and select “Add Player Start Here” – wait a minute, that’s not one of the options, is it?!
c) Okay, first you need to find the “Actor Class Browser” button and click it (it’s the little chess pawn icon to the left of the G near the “Texture Browser” button).

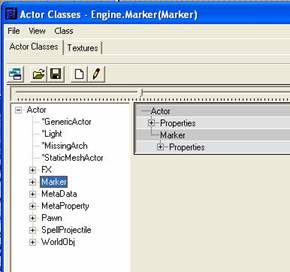
d) In the directory tree on the left side of the browser, click the +’s to expand the sections to the following: “Marker” – “Keypoint” – “Navigation Point” – “Player Start”, and leave that highlighted/selected. Close the browser.


![]()
e) NOW, right-click somewhere in the room (easiest from the “Top” view) and select “Add Player Start Here”.
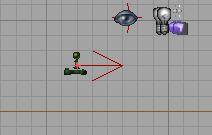
f) Move it if you need to so that it’s just two or three grey squares above the floor (if it’s too close to the floor you could get stuck or worse, but if it’s too high you will drop and make noise, alerting any nearby AI).
- Whatever you have recently selected in the “Actor Class Browser” will be available when you right-click in one of the views. As you already know, it will still work if you close the browser (which you will usually want to do so that you can see accurately where you are placing the item).
- This is the same method you will use later to place tables, chairs, AI’s, special lights, etc.
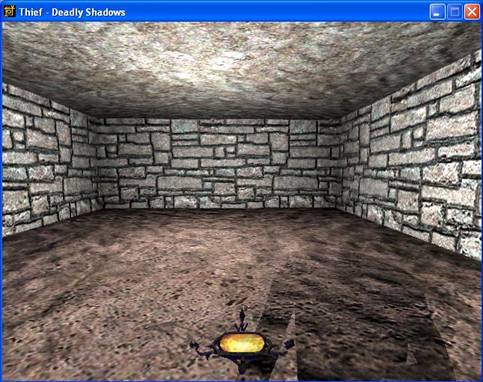
11) TEST THE ROOM (iv. your first room)
[Do a build and save, then try playing the room]
a) Okay! We’re ready to test this little map!
b) Do one last “Build All”. Save your level again (hopefully you are at about “Komag003” or so by now – you HAVE been saving regularly, haven’t you???).
c) Now you can just click the little joystick icon (like you did to test the “Castle1” map) (or do “Build” - “Send to Xbox” if you use that setup), and in a few moments you should find yourself in a small room with a stone wall and two obvious light sources.
d) If it didn’t work, start over! Just kidding, but if something’s wrong, you’ll just have to go back and double check things and figure out what you missed.
e) Otherwise, congratulations, you just made a room in T3Ed that works!
f) Go have a bowl of ice cream!
V. STARTING INVENTORY
1) OPEN LEVEL PROPERTIES (v. starting inventory)
[“View” – “Level Properties” – “Properties” – “Add Property” – “DefaultInventory” – “DefaultInventory” - “Add Property”]
a) Was the ice cream good? Good. Back to work!
b) Before we do anything else, let’s give Garrett some weapons and items, a good starting inventory. It’s pretty simple to do, really.
c) Go up the “View” menu (next to “File” and “Edit”) and select “Level Properties” (toward the bottom).
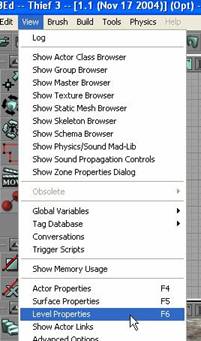
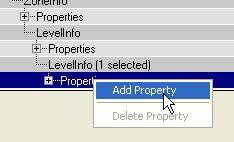
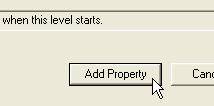
d) In the new window that popped up, right-click on the bottommost line that says “Properties” and select “Add Property”.
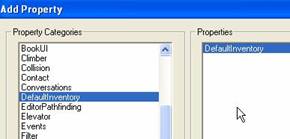
e) In the new “Add Property” window, find in the left column “DefaultInventory”, click on it, click on it again in the right column, and then click “Add Property” below.
2) ADD ARROWS (v. starting inventory)
[“LevelInfo” – “Properties” – “DefaultInventory” – “Add” – “0”. Click “ItemName” and enter “BroadheadArrow”. Click “Num” and enter “15”]
a) Now you will see the properties window for the “LevelInfo” again, this time with the bottommost “Properties” item expanded and in the middle of the list is the new “DefaultInventory” property, but it’s empty so far.
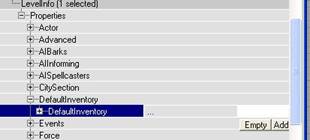
![]()
b) Click on the little “Add” on the right, and expand the + to see what you added. Wow, you now have a “0”!

c) Expand the properties on the “0” by clicking the little + next to it and you will see “ItemName” and “Num”.
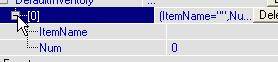
d) Click on “ItemName” and type in the box “BroadheadArrow” (without the quotes).
e) Click on “Num” and type in “15”. Now you can kill kill kill!
![]()
3) ADD MORE THINGS (v. starting inventory)
[Add more items to the DefaultInvetory, including GarrettBlackjack, GarrettDagger, NoisemakerArrow, ExplosiveMine, FlashBomb, GasBomb, FireArrow (or FireCrystal), GasArrow (or GasCrystal), MossArrow (or MossCrystal), WaterArrow (or WaterCrystal), HealthPotion, HolyWaterPotion, and OilFlask]
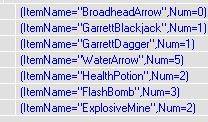
a) To add another item, select the deeper “DefaultInventory” again (the blue one, below and offset to the right of the other one, deeper into the selection tree), and just click Add and repeat the process, but with a new item.
b) Your blackjack and dagger can only have “1” for the “Num”. Other items have different maximums as well (which can be changed, but that is much more advanced), such as 5 or 25.
c) Here is a list of items to choose from:
GarrettBlackjack
GarrettDagger
BroadheadArrow
NoisemakerArrow
ExplosiveMine
FlashBomb
GasBomb
FireArrow (or FireCrystal)
GasArrow (or GasCrystal)
MossArrow (or MossCrystal)
WaterArrow (or WaterCrystal)
HealthPotion
HolyWaterPotion
OilFlask
d) Go ahead and add some of the basics, such as the blackjack, dagger, some water arrows, a few flash bombs, a health potion, a mine, and that’s probably good enough for a basic inventory (Garrett is not a walking armory!)
e) Click on “Done” below to close the “LevelInfo” window
4) INVENTORY CONSIDERATIONS (v. starting inventory)
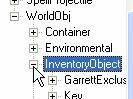
[See “Actor Class Browser” – “WorldObj” – “InventoryObject” for more things you could add, or place those things in your level to get later]
a) You can also add any number of other items such as various keys, special loot items, etc. You would probably only add those if it fit with the background story for your level.
b) All of these items can be found in your “Actor Class Browser” – “WorldObj” – “InventoryObject” branch (although not quite everything there can actually be used).
- Don’t forget that almost all inventory things can also be placed in the world for picking up, such as loot, quest items, elemental crystals, etc. So you might want to limit, say, the number of water arrows you give Garrett to start with, since you may decide to just place a few water crystals around the map to find later on.
5) LOCK PICKS UPGRADE (v. starting inventory)
[Well use a script to add the lock picks]
a) Lastly, we need lock picks. Unfortunately, Thief 3 considers lock picks an “upgrade” rather than an inventory item, so we’re going to have to do something advanced right off the bat!
b) We can use a script to give Garrett the ability to pick locks from that point on, and we’ll do it right when the map starts. Don’t worry, I’ll walk you through it.
6) MAKE A NEW SCRIPT (v. starting inventory)
[Open your PlayerStart Properties and add a property. Choose “Scripts” – “TriggerScripts”. Open the new property and click “Add”, then expand “TriggerScripts, select the “0”, click the “…” and wait for the scripts to load. In the “Trigger Script” window, click “New”]
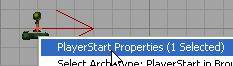
a) Find your starting point “PlayerStart”, right-click on it (remember, you can use either a 2D or the 3D window to select things), and select “PlayerStart Properties (1 Selected)”
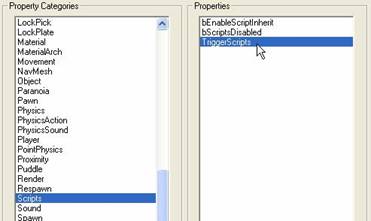
b) Right-click on the bottommost “Properties” and select “Add Property”.
c) In the left column select “Scripts”, then in the right column select “TriggerScripts”, and then click on “Add Property”.
d) You should see the new property at the bottom of the now expanded “PlayerStart” – “Properties” branch.
e) Click on the little “Add” to the right, then click the + next to “TriggerScripts” to see the new “0” script you added, and select it.

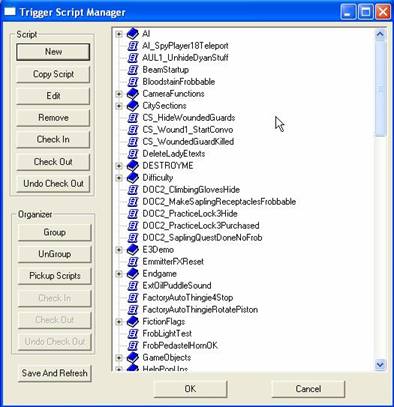
f) Some new buttons should have appeared to the right, click on the “...” and give it up to a full minute to load if it needs it.
![]()
g) Now you should see a crazy new window “Trigger Script Manager” with a bunch of scary looking script names next to blue books or papers. If the new window is under the “PlayerStart” properties window, just move that one to the side and select the new window.
- If you’ve clicked on and browsed some of the script names, shame one you, go sit in the corner! Just kidding, but before we go on, be sure that one of the blue paper script is selected, and not a blue book category of scripts, because we’re going to make a new script and we don’t want it going down into some category.
- If you haven’t TOUCHED the script names, pat yourself on the head for being a good little boy or girl, and don’t bother selecting a blue paper script, just proceed to the next step with nothing selected.
h) Now, look in the top left section and click on “New”.
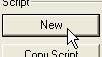
i) Another window has popped up called “Trigger Script” in which you can edit the new script.
7) CONFIGURE THE SCRIPT (v. starting inventory)
[Replace “DefaultName” with “StartingLockPicks. Click the “Condition” button to open “Trigger Conditions”. Expand “Player” and select “When player starts map” and click “OK”. Now click the “Action” button to open “Trigger Actions”, expand “Flags&Messages” , select “Set flag [Flag] to [Bool] expires on map etc …”, and click “OK”]
a) Okay, here’s the tricky part (don’t mess up, don’t mess up...).
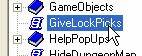
b) First of all, replace the “DefaultName” with something like “StartingLockPicks” or “GiveLockPicks” or whatever. Remember this name!
![]()
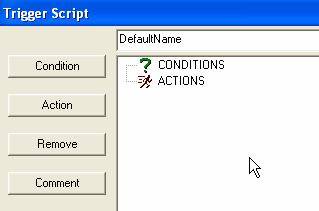
c) In the main window you can see “CONDITIONS” and “ACTIONS”, and on the left are the buttons. Click on the top left button “Condition”.
![]()
d) In the new window (“Trigger Conditions”), click the + next to “Player” to expand the branch, and select “When player starts map” (the top selection under “Player”).
![]()
e) Click “OK” at the bottom to close the window and go back to the “Trigger Script” window with the “When player starts map” listed as a new condition.

f) Now click on the almost top left button “Action”.
![]()
g) In the new window (“Trigger Actions”), expand “Flags&Messages” and select the bottom long one “Set flag [Flag] to [Bool] expires on map change [Bool] expires on mission [Int]”.
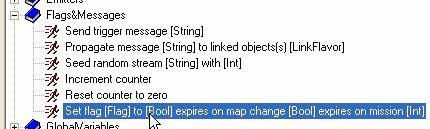
h) Click “OK” below.
8) FINISH THE SCRIPT (v. starting inventory)
[In the “ACTIONS” section click on “[Flag]”, and select “PlayerCanLockpick”. Set the first “[Bool]” to “TRUE” and the second to “FALSE”. Set the “[Int]” to “20”. Click “OK”, select your new script from the list and click “OK”, and wait for the scripts to recompile. Back in the “Player Start” properties, select the “[0]” again and click “Use”]
a) Now we’re at the very most tricksiest part of all! Be very careful! (All this just for some lousy lock picks!)
b) In the “Trigger Script” window’s main section you should now see that long thing under “ACTIONS”.

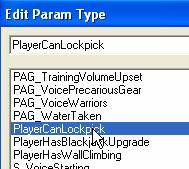
c) In it, click on “[Flag]” and in the new window scroll way down, choose “PlayerCanLockpick”, and click “OK” below.
![]()
d) Now click the first “[Bool]” and set it to “TRUE”, then set the second “[Bool]” to “FALSE”.
![]()


e) Finally, set the “[Int]” to “20”.

f) Go down and click “OK” to close the “Trigger Script” editing window and go back to the “Trigger Script Manager” list.
g) Your new script should now be in the list (I hope you remember what you called it!), so select it and click “OK” below. This time is has to save ALL the scripts, not just your new one, so it will probably take an extremely long time, but just wait and eventually the window will close.
- In the future you when you are just there to select a script and not making a new one or changing one, you will want to select it and then click “Cancel” to save tons of time.
h) You should be back looking at the “PlayerStart” properties window, but, oh no, it looks like it didn’t work!
i) Not to worry, just select the “[0]” again and this time click “Use” (instead of “...”). This will add in whatever script was the last one selected.
j) The name of your lock pick script should show up, and you’re all set.
k) Close the window by clicking “Done”. WHEW!
9) CONGRATULATIONS (v. starting inventory)
[Good job]
a) You did it, you’re the man (or woman)! Now you have a good starting inventory including lock picks. Pat yourself on the back.
VI. LIGHTING
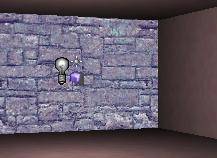
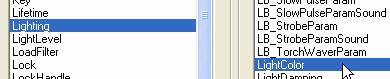
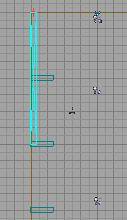
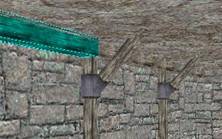
[“WorldObj” – “Light_” – “FlameLight” – “TorchLight” – “GenWallTorch”. Add one to your map, move and rotate it to fit along the top wall. Press Ctrl+W to duplicate it and place one or two more around the room. If they are stubborn, try right-clicking them and “Snap To Grid”]
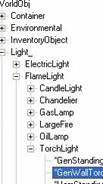
a) We need some better lighting in here. In your “Actor Class Browser”, find and select “WorldObj” – “Light_” – “FlameLight” – “TorchLight” – “GenWallTorch”. Close the browser.
b) In the “Top” 2D window, right-click and select “Add GenWallTorch Here”.

c) Rotate it and fit it along the top wall (the uppermost wall as seen in the “Top” view window) at a reasonable height. Remember, hold Ctrl+LMB to move things, and hold Ctrl+RMB to rotate things.
d) With the torch selected, press Ctrl+W to duplicate it.
e) Place one or two more around the room.
f) You’ll have to rotate them to fit properly against the walls, and if they’re refusing to line up good, try right-clicking on them and selecting “Snap To Grid”.
![]()
g) Their light is somewhat reddish yellow (naturally, since it’s torch light), and is more fitting for our room than bright white light.
2) MAKE AMBIENT LIGHTS (vi. lighting)
[Select both original white lights (hold Ctrl), right click one, open the properties, and “Add Property”. Select “Lighting” and “LightColor”, then “Add Property”. Click on “Color”, choose an ambient color (dark green, blue, or brown is good) and click “OK”. Expand “LightColor”, click “LightBrightness”, and adjust it down to about 10]
a) Instead of just deleting the two bright lights we already had, let’s change them into some soft colored ambient lights, which will gently fill in any areas the torches don’t reach.
b) Select both original lights (select one, hold Ctrl and select the other), right-click one of them, and click “Light Properties (2 selected)”.
c) In the new window (“Multiple”), right-click on the bottommost “Properties” and choose “Add Property”.
- By the way, by clicking the bottom “Properties”, you are just adding a property to these two instances of light right here in your level, and you are not messing with the properties of that type of light in general or of that type of object in general.
- If you wanted to do that (but you don’t), you would mess around in the “Properties” settings higher up in the tree.
d) Scroll down and click “Lighting”, choose “LightColor” on the right, and click “Add Property” below.
e) Now you will see the properties window for the light again, this time with the bottommost “Properties” expanded and in the middle of the list is “Lighting” with a “CoronaSize” (which was already there before) and the new “LightColor” you just added.

f) Click on the “Color” button on the right and choose and adjust your color (make it some dark shade of green or blue or brown for a good ambient for this room) and click “OK”.
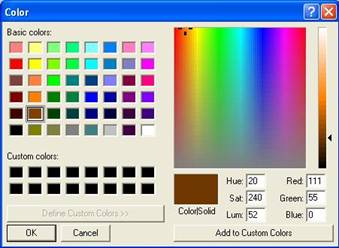
g) Expand the “LightColor” property by clicking the +, then click on “LightBrightness”, and adjust the slider down to about 10 for a very soft dimmed effect.
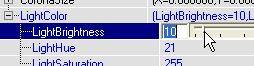
h) The “LightHue” and “LightSaturation” levels were set when you picked your color, but you can adjust them here if you want to.
3) TURN OFF SHADOWS (vi. lighting)
[To turn off shadow casting by these ambient lights, right-click on “Lighting”, select “Add Property” – “FleshLightType”, and change the property to “FL_OmniNoShadow”, all set]
a) Now we need to turn off the shadow casting on these two lights since they’re just ambient lights and not supposed to be from any specific source.
b) Right-click on “Lighting”, select “Add Property” – “FleshLightType”, and then change the property (using the drop down menu) to “FL_OmniNoShadow”.
![]()
![]()

c) Finally, click “Done” on the bottom of the properties window.
4) REAL AMBIENT LIGHT (vi. lighting)
[To set an overall mission ambient light level (to avoid pitch black), go to “View” – “Level Properties” – “Properties” – “ZoneLight”. Set “AmbientBrightness” to “7” or “5”]
a) Most likely, in the missions you create you will want to avoid having any completely 100% pitch black areas. A good way to avoid this is to set an overall ambient light setting for the whole entire level.
- Keep in mind that this isn’t for style, it’s for practicality in game play (almost everyone hates complete black, the game is supposed to be fun not frustrating), so we don’t want to go nuts on the color and brightness.
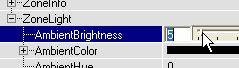
b) Open up to the “View” menu select “Level Properties” expand the bottommost “Properties”, and go down the bottom and expand “ZoneLight”.
c) Scroll the window down so you can see, click on “AmbientBrightness”, and set it to “7” or “5” (barely any light).
5) TWEAK AMBIENT SETTINGS (vi. lighting)
[Set “AmbientHue” to “21” (brown) and set “AmbientSaturation” to “128” (half color, half white). If you want blue, a good hue is 171. To test it, delete one of the “OmniNoShadow” lights, do a Build, and see in game mode. Replace the deleted light and save]
a) We actually want the ambient light even dimmer by choosing a darker color than white light, but in this case the “AmbientColor” property doesn’t seem to have any effect, so we need to set the hue and saturation manually.
b) Click on “AmbientHue” and type in 21 (dark brown), and then click on “AmbientSaturation” and set it to 128 (half brown with half normal white for good luck). That should do it. Click “Done” to close the “LevelInfo”
- For good blue ambient light, set the hue to 171
c) To test the brightness, go ahead and delete one of the two “OmniNoShadow” lights (select it and press your “Delete” key), do a build, and check things out in game (you’ll definitely need to actually go in game, as opposed to just looking at the 3D render mode).
- And remember to always do light level testing in a darkened room, the preferred playing environment of all true Thief fans!
d) After you find a good light level for both the overall ambient light and the omni light, (adjust if you need to), replace the light you deleted (copy the other one with Ctrl+W), do build, and save.
6) STANDARD STARTER MAP (vi. lighting)
[Save the map under the name “MyStarterMap” or “BasicMap” to be used later whenever you start a new mission. Save again back under the current name for the tutorial mission]
a) Now that you have a basic room made, a good starting inventory in place, your lock picks in hand, and basic lighting in place (especially the overall ambient light setting), now is a good time to take a deep breath!
b) It’s also a good time to do a little trick - save your map under a very different name, something like “MyStarterMap” or “BasicMap” or whatever.
c) Now, the next time you want to start editing a new level, you can just load this one and save it under a new name, and you already have a few of the basics set in place which you would probably want in any map you make.
d) Don’t forget to save the level again under the next tutorial name so we can continue.
VII. STATIC MESHES
1) MESH BROWSER (vii. static meshes)
[Open the “Static Mesh Browser” (along the top) and expand the folders (they have to load each time) to “COLUMN_ARCH_VAULT_DOME” – “Columns_Beams” and select “INNcolumn1A1”. You can see it in the mesh window if you move around. Close the window]
a) Your room is quite boring so let’s add a few things to liven it up, some Static Meshes!
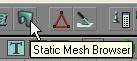
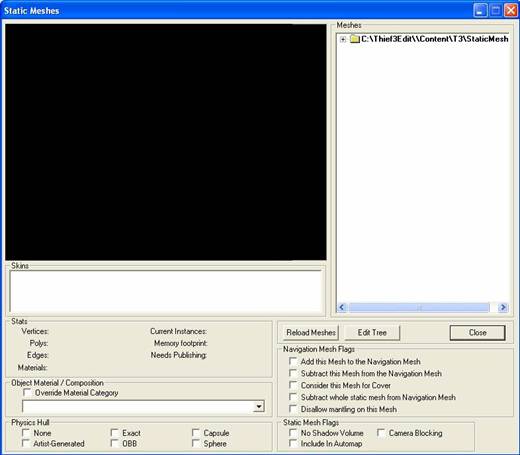
b) Open the “Static Mesh Browser” (a square arch icon a couple to right of the “Texture Browser”). You should see a whole new window that has a black window in the upper left, a file browser list window on the right, and various other checkboxes and stuff.
c) Click on the + next to the folder that says something like “D:\Games\Thief3Edit\\Content\T3\StaticMeshes”. Each time you expand a branch by clicking a + it will take a moment to “build” it and load the meshes.
d) Find “COLUMN_ARCH_VAULT_DOME” and expand it, and then expand the “Columns_Beams” tree.
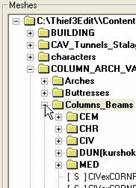
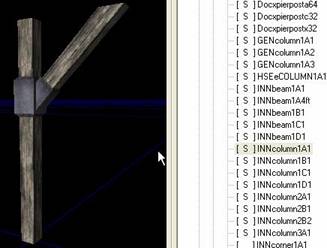
e) Go down and find and select “INNcolumn1A1” (there will be a “[ S ]” in front of it like most of them). You should now see a wooden support beam in the view window – if not, look and move around in the view window.
- The controls are the same as in the main 3D editing window, although it’s a little off center and might feel funky.
f) Leave the “INNcolumn1A1” selected and close the static meshes browser. (If you only minimize it, you will sometimes not be able to use your mouse wheel to zoom in and out of 2D windows.)
2) ADD SUPPORT BEAMS (vii. static meshes)
[Add two or three beams on each side of the room. Lower the grid setting (under the 3D view) below 16 for more precise placement, but don’t worry if it’s not exact. Select the button “Textured” (above the 3D view) to see the meshes better]
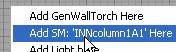
a) In the “Top” 2D window right-click and select “Add SM: ‘INNcolumn1A1’ Here”.
b) Move and position it to line up with the floor and ceiling, and put it along the left wall with the diagonal support piece extending into the room.
c) If it’s not lining up exactly, again you can try right-clicking it and selecting “Snap To Grid”.
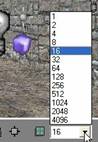
d) You also may opt to temporarily lower your grid setting from 16 down to 8, 4, 2, or even 1 for more precise placement.
e) You can find the grid setting centered on the bottom of the whole editor, below the 3D window, next to a little grid icon – just click the number or the arrow next to it and select the new number. Change it back when you’re done, as it’s best to edit at a higher grid if you can, for cleaner more efficient construction and also for better texture alignment on your BSP.
![]()
- However, even with the mesh snapped and on a lower grid, one thing you need to get used to with Static Meshes is their general imprecision. Many of them aren’t going to fit completely perfectly with all your architecture, but don’t worry about that and just go ahead and slap those suckers in place close enough, not caring if they overlap things a little bit or aren’t lined up to the millimeter. Just think of yourself as an impressionist painter, rather than a realist painter.
- And when you do overlap meshes (which you will be doing a lot with this editor), you never want two flat surfaces in exactly the same plane, or else they will “compete” and flicker between them and look really nasty, so make them offset a bit and you’ll be fine.
f) Press Ctrl+W to duplicate the support. Place two or three more along each side of the room in pairs.

g) Before we go on, you may have noticed that the supports look pitch black it the 3D window (in non-render mode). To change this so that you can see them better, find the currently highlighted spotted box icon above the 3D window called “Dynamic Light”. We want to change the selection to the less-spotted box next to it called “Textured”, so click on that one.

3) ADD MORE BEAMS (vii. static meshes)
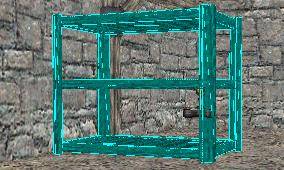
[Select the mesh “TENxBEAMwood1x32” (below the INN meshes). Make four of these and put them along the wall/ceiling joints of the long walls, slightly embedded, on top of the support beams. Make two or three more and have them cross the ceiling to connect your support beam pairs. If meshes intersect, offset them a bit to avoid surface “fighting”]
a) Go back to your mesh browser in the same section, scroll down a bit from the INN meshes, and find “TENxBEAMwood1x32” toward the bottom. Select it, and close the browser.
![]()
b) Create one in your room, rotate it horizontal, and position it to go along the top of the left wall from the upper left corner (looking at the “Top” 2D view) to the middle of the left wall.
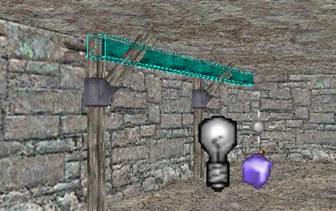
c) Copy it (Ctrl+W) and place another from the middle to the bottom left corner.

- It’s too bad there isn’t a “TENxBEAMwood1x64” because it would go the whole length. But your two 32 beams should snap to the grid exactly enough to meet right in the middle and not overlap or leave a gap. The side and top of the beams, however, should be embedded a little into the wall and ceiling to look good.
d) Select them both and press Ctrl+W to duplicate both at once.
e) Move the new pair over to the other side and line them up.
f) Now select just one beam and copy it – rotate the new one so it spans across the room and position it a little higher or lower but still embedded in the ceiling (you can embed it quite a bit and it still looks good).
g) Line it up to go right across a pair of supports with the diagonal support pieces lined up (you DID make them in even pairs, right?).

h) Copy the new ceiling beam and make one for each support pair you made earlier.
i) Now you should have a ceiling with crossing support beams and beams along the top of each long wall. Not bad, eh?
j) Do another “Build All“ and save your level with a new name, and check things out in game mode (“Play Map”) if you want to.
4) ADD BARRELS (vii. static meshes)
[“Mesh Browser” – “SETDRESSING” – “GENbarrelrack”. Make it. In the folder “Barrels_Crates” find “GenxGOODSbarrelA” and make a few to stick sideways in the rack, rotated and turned for variety]
a) I’m going to start getting more general with my instructions on mesh placement, since you now are an expert at it!
b) Go to your mesh browser, expand the main folder “SETDRESSING”, go down past the folders, find the item “GENbarrelrack”, make one in your room, and place it somewhere along a wall.
c) Now, under “SETDRESSING”, expand the folder “Barrels_Crates”, find the item “GENxGOODSbarrelA”, make one, rotate it sideways to fit on your barrel rack, and place it in there.
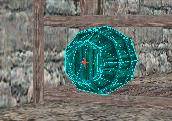
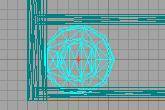
d) Then make two or three more, rotate them around a bit to have some variance in the grain direction, and stack them in the rack as well. You will most likely need to set the grid to 8 or 4 to line them up good in the rack (let them embed down into the rack just a bit, it will look fine).
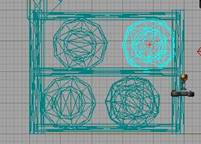
[Multi-select the rack and all the barrels, make a copy of it all, rotate the new set, and place it elsewhere]
a) Now select the rack and all the barrels at the same time and duplicate the whole bunch.
b) Rotate it around 180 degrees and place it further down along the wall or on another wall. Voila! Since you rotated it, it doesn’t look like just another exact copy of the first rack and barrels, even though it is!
c) This type of “cheating” allows you to fill out a room more quickly and still look good with lots of seemingly unique detail.
6) ADD SHADOWS (vii. static meshes)
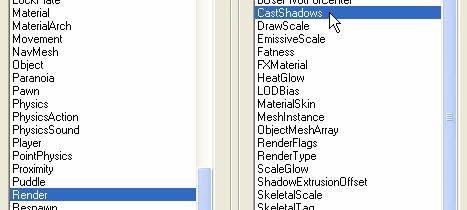
[When needed, add shadows to meshes by adding the property “Render” – “CastShadows”]
a) Your room should be looking pretty good now.
b) One interesting thing about Static Meshes is that, by default, they don’t cast shadows. This saves on processing and helps the frame rate, but can often look lame.
c) Depending on where you placed your torches earlier, you may want to turn on shadow casting on your barrel racks, barrels, and support beams.
d) Do another “Build All”, go into game mode (you could just look it over in Render mode in the 3D window if you feel that’s good enough to judge by), check things out, and make a mental note of which items need shadows.
e) Select all the meshes that need shadows and right-click one of them and open the properties.
f) Right-click on the bottommost “Properties” and add the property “Render” – “CastShadows”. That should do it!

VIII. EXPANDING THE AREA
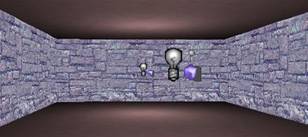
1) ADD A SECOND ROOM (viii. expanding the area)
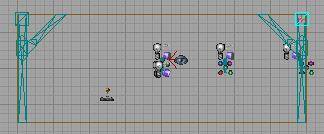
[Copy the room, move it down right, connected to the first for 8 feet, and 4 feet lower]
a) You need to expand your level a little to make more room for AI and other things!
b) Select your main room, copy it (just the room, not all the contents), and move it down to the right (again, looking at the “Top” 2D view).
c) With your grid set on 16 you should notice the smallest grey grid squares as 16 units, or 1 foot, large. You should also notice darker grey lines (major grid lines) that are 128 units apart, or 8 feet.
d) Line up your new room so that the top left edge of it touches the bottom right edge of the original room, touching for 8 feet. Check your accuracy by temporarily setting the grid to 128 and see if it lines up to one square!
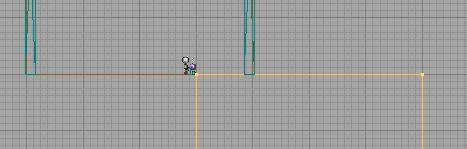
e) Finally, in either the “Front” or “Side” view, lower the entire new room so that it is 4 feet lower (you can’t do that with the grid at 128, so just set it back to 16 and set the room 4 squares lower).
2) RESIZE THE ROOM (viii. expanding the area)
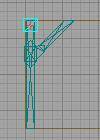
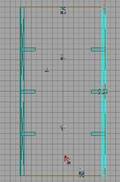
[Click on “Vertex Editing” to the right of “Camera Movement”. With the new room selected, use Ctrl+Alt to encircle and select vertex (the corners) pairs, then hold Ctrl to move them. Set the new room to 192x512x768. Go back to “Camera Movement” mode]
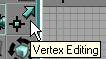
a) Let’s do some “Vertex Editing”, shall we?
b) Click the icon to the right of the camcorder (“Camera Movement”) at the top of the left side of T3Ed which looks like a little square with lines poking out and an arrow pointing up to the right.
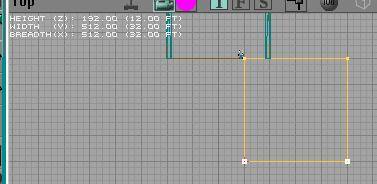
c) The first thing you should notice is that when you have a brush selected, its dimensions are listed in each view window. Your new brush should be 192x1024x512 (or 12x64x32 FT), just like the first of course. But we want to change it 192x512x768.
![]()
d) Hold Ctrl+Alt and click and drag a box around the bottom two corners of the room (as seen from “Top” view). The two corner, or vertices, should have just turned into little white squares.
![]()
- If it didn’t work, you probably didn’t have the brush selected first. Also, you may have to move around just a bit in a 2D window after going into “Vertex Editing” mode before it will let you draw a box.
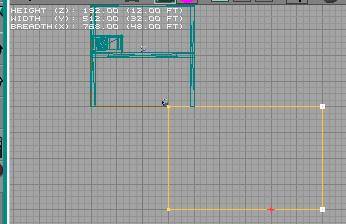
e) Hold Ctrl and click on and drag one of the white square vertices upwards so that the room is just 512 tall (it will now be 192x512x512).
f) Deselect the vertices by clicking elsewhere.
g) Ctrl+Alt and draw a box around the right two vertices and move them out to the right some until the room is 768 wide.
h) Deselect everything, go back to “Camera Movement” mode, “Build All”, and save under a new name.
3) ADD STAIRS (viii. expanding the area)
[“Mesh Browser” – “STAIR_RAILING_FLOOR” – “Stairs” – “STMstairsA8x8”, notice that “Add this Mesh to the Navigation Mesh” is checked so that AI can walk on the stairs. Put them leading down into the new room, using grid 4 for better placement]
a) You should see a “doorway” that leads into your new room with four foot drop-off down into it. If AI’s get hurt falling off that big step, it could cost the building owner some serious lawsuits, so let’s put in a set of stairs for everyone’s benefit.
b) Select “Static Mesh Browser” – “STAIR_RAILING_FLOOR” (near the bottom) – “Stairs” – “STMstairsA8x8” (with “[AS ]” in front).
c) Notice the section below called “Navigation Mesh Flags”, and that the top two are checked.
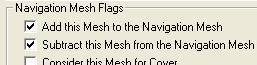
- Most meshes will just have the second one checked, but some stairs and a couple other things have the “Add this Mesh to the Navigation Mesh” also checked, because we want AI to be smart enough to walk on the stairs!
- If you wanted AI to walk on the wooden beam you place somewhere, you would want to check this property before you place the beam, or add the property later. More on NavMesh later.
d) Create the stairs mesh and stick it in the right place.
e) The top step will stick up a little bit if you snapped it to grid on grid 16, but poor servants might stumble on that step and go tumbling! Lower the grid to 4 and drop the stairs one little square and it will be about perfect.
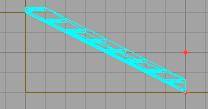
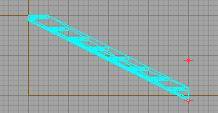
4) TEXTURE THE ROOM (viii. expanding the area)
[“Texture Browser” – “T3_Gen” – “GENWALLD_D”, and Alt+LMB on the left, bottom, and right walls and the ceiling in the new room, and the bottom wall of the original room. Paint the new floor with “GENFLOORSB_D”]
a) This room is boring. Select “Texture Browser” – “T3_GEN” – “GENWALLD_D” (it’s right after the “GENWALLC_D” you used before for your walls, near the bottom, a little above the blue windows). This is a cool reflective marble type texture that will go well for our little crypt!
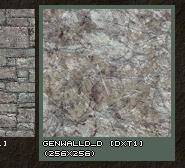
- Now we’re going to paint textures backwards! Last time, we multi-selected the surfaces we wanted, then chose a texture.
b) But now you have a texture chosen first, so Alt+LMB the left, bottom, and right walls (those are “Top” view directions, but you’ll need to do this in the 3D view), and the ceiling, to paint them all to marble.
c) The top wall we want to leave the GENWALLC_D stone pattern like the other room, because then it will properly look like it’s a part of that building.
d) In fact, in the same line of reasoning, paint the bottom wall of your original room the marble texture as well.
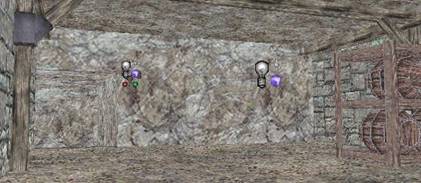
e) Now it looks like the new room was carved out of the rock. But they would probably lay a new floor, so find the texture “GENFLOORSB_D” near the top, a few below the city map, and paint it on the floor.
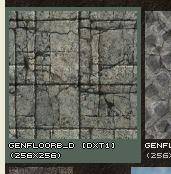
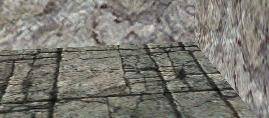
f) Do a “Build All”, save under a new name, and check it out in game mode if you want.
5) ADD NEW LIGHTS (viii. expanding the area)
[Add some torches and/or a colored ambient light for good effect]
a) It’s dark in the new room, so stick in a couple torches (you can just copy one of the torches you already have).
b) Don’t forget about the vertical offset of the room, so lower the torches in the Front or Side view to a reasonable height.
c) You might leave part of the room dark and put in an “OmniNoShadow” ambient light, set to an eerie green or purple light for good effect off the marble surface.
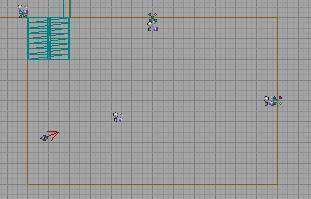
6) ADD NEW MESHES (viii. expanding the area)
[“Mesh Browser” – “SETDRESSING” – “HAMxCRYPT_a” and stick a few in there. You can also multi-select objects by them using Ctrl+Alt. Select “COLUMN_ARCH_VAULT_DOME” – “Columns_Beams” – “CIVexCORNR12”, and in the “Skins” window select “KEPgoodnessA”. Add a couple to the room. Select “Tenxbeamwood1x8” in the same section, and stick three around the doorway for trim]
a) It’s empty in the new room, so select “Static Mesh Browser” – “SETDRESSING” – “HAMxCRYPT_a” (down past the “SETDRESSING “ subfolders, toward the bottom).
b) Create about four of these crypts and position them in the new room.
- An easy way would be to make two along the top, then select them both and duplicate them.
- By the way, you can hold Ctrl+Alt and draw a box around things to multi-select them, which is sometimes easier than doing Ctrl+LMB on each thing. Try it out.
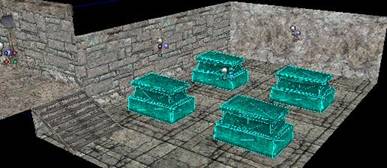
c) For a nice touch, select “Static Mesh Browser” – “COLUMN_ARCH_VAULT_DOME” – “Columns_Beams” – “CIVexCORNR12”.
d) This time we need to change the texture of the mesh before creating it, because the default it NO texture!
e) Under the mesh 3D view window notice the “Skins” window and select “KEPgoodnessA” as the new skin. Some meshes will give you the option of choosing amongst a handful of skins.

- Also, after they’re in your map, you can re-skin your meshes to any texture you want! We’ll be doing that later on. Patience, young grasshopper.
f) Create two or three of these columns, and place them in the new room, perhaps along the middle area, left to right.
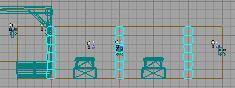
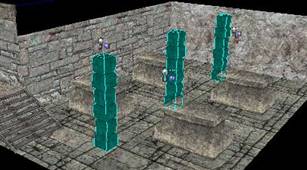
g) Lastly, find the mesh “Tenxbeamwood1x8” (still under Columns_Beams, the last mesh). Make three of them and stick them around the doorway between the rooms, at the top of the stairs, in a way that looks good for a door trim (you may want to lower the grid to 8 or 4 for this).
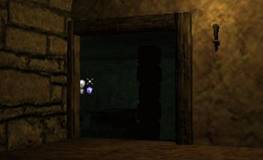
7) FINISHING TOUCHES (viii. expanding the area)
[Check the mesh shadows, rearrange lighting as desired]
a) As a finishing touch, check again if you need to turn on shadow casting for any of these new meshes.
b) You may also wish to rearrange or add more low level non-shadow-casting lights for ambient light, if you get the feel that your whole-level ambient light setting isn’t enough. This room is all set!
IX. AI, PATROLS, AND NAVMESH
1) ADD A SERVANT (ix. ai, patrols, and navmesh)
[“Actor Class Browser” – “Pawn” – “AIPawn” – “T3AIPawn” – “T3AIPawnHuman” – “T3AIPawnHumanNonCombat” – “ServantMale” – “ServantMale_Mpants1_01”, put him anywhere. You can add things by right clicking in 3D as well]
a) This is where it starts to get more fun!
b) “Actor Class Browser” – “Pawn” – “AIPawn” – “T3AIPawn” – “T3AIPawnHuman” – “T3AIPawnHumanNonCombat” – “ServantMale” – “ServantMale_Mpants1_01”.
- Notice that we didn’t expand the last branch and choose the “CastleServantMale1”. Most of the time, only items in the deepest branches are actually items you can use in your level, and items further up the tree are just categories.
- But sometimes those category names are items themselves, as in the current situation.
c) Create the guy and stick him wherever you want. Be sure he’s not embedded in a wall or floor or anything.
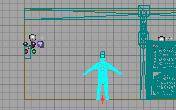
d) By the way, if he doesn’t want to get created, try right-clicking in the 3D windows instead of a 2D window, and adding him that way (the same holds true for any actor or mesh).
2) STATIONARY AI (ix. ai, patrols, and navmesh)
[The AI is boring and retarded]
a) If you’ve been impatient and already tried it out in game mode, you will have noticed that the poor sap just stands there, and if you bother him he simply fears you and cowers in place, but doesn’t run anywhere.
b) We need to make him busier and smarter, by creating a patrol route and linking him to it, and by placing some flee points for those scary moments.
3) ADD PATROL POINTS (ix. ai, patrols, and navmesh)
[“Actor Class Browser” – “Marker” – “AIPathPoint” – “PatrolPoint”, and add three of them, near the floor, around the rooms. Select “AddAIPoint” and add one near the AI]
a) Select “Actor Class Browser” – “Marker” – “AIPathPoint” – “PatrolPoint” (this is another non-deepest-in-the-tree item).
b) Place three of them in different locations, near the floor, where you want your man to walk (again, if you put one or two in the new room, don’t forget that it is lower).

c) A little above “PatrolPoint” in the browser, select “AddAIPoint” and make one near the servant. Notice the yellow line from the AI’s feet to the marker, meaning that AI is assigned to that “AddAIPoint”. (You may have to Build to see the line.)
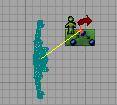
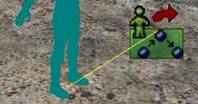
4) MAKE A PATROL ROUTE (ix. ai, patrols, and navmesh)
[Enter “Connect AI Path Points” mode. Select one patrol point, hold Shift and select the next one. Select the second point, Shift-click the third; select the third, shift-click the first; select the “AddAIPoint”, shift-click the nearest patrol point]
a) Now we need to actually set the patrol route, and link the servant to it.
b) To do this we need to enter “Connect AI Path Points” mode. The icon is below the camcorder, near the “MOV” cut; it’s the two green balls with an arrow from one to the other. Click on it.
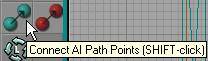
c) You should now see a small legend in the view windows about what colored lines mean what (although currently it only shows a yellow line and says “ATTACHED TO ACTOR”).
![]()
d) Making links is really easy, just select the first item, hold Shift, and click the next item.
e) In this case, select one of your patrol points, hold Shift, and click on the next patrol point you want the AI to go to.
- You may have to zoom in some to click them easier, as selecting items seems to be touchier in “Connect AI Path Point” mode.
f) You should now see a big red line/arrow connecting the first patrol point to the second one, with a light blue line also connecting them representing the actual path the AI will try to take.
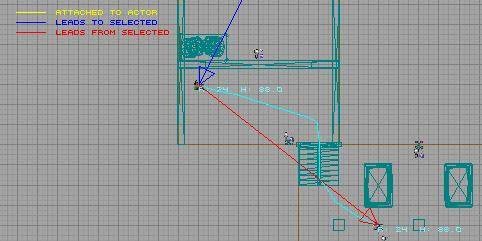
- If the path is direct enough, the blue line will be straight, but if the AI has to go around corners or avoid objects, the blue line will snake around.
g) Deselect everything, then select the second patrol point (the one you just linked to). The red line/arrow will turn blue. Now Shift-click on the third patrol point (the blue connection is still there, and a new red connection appeared).
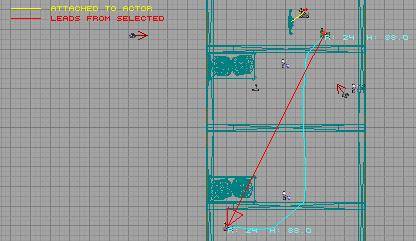
h) Connect the third one back to the first one the same way (the connections all turned green indicating a complete circular patrol route)
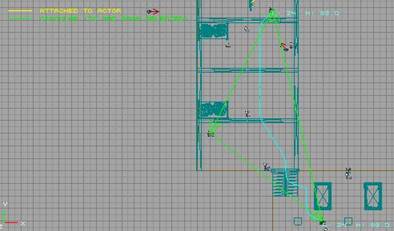
i) Finally, select the “AddAIPoint” and Shift-click whichever patrol point you want the servant to start at (probably whichever one he’s closest to).
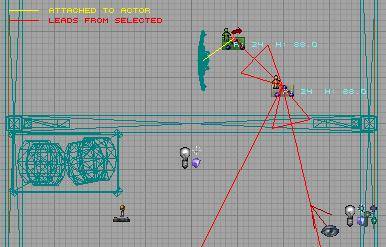
j) Now, since the man is connected to the “AddAIPoint” which is in turn connected to the patrol route we made, as soon as you start the map the he will start patrolling! Great!
k) You can return to camcorder mode now.
5) ADD FLEE POINTS (ix. ai, patrols, and navmesh)
[Add a couple vanilla “FleePoint”s to the area]
a) Flee Points are next. Find them a little above patrol points in the actor browser. Just use the vanilla “FleePoint” ones, not any of the flavors under it.
b) Make at least two, so that when he runs to one and you follow him there and fill him with mortal terror, he will have at least one other flee point to run to.

c) You don’t need to do any linking, they just need to exist and he’ll make use of them.
d) That was easy!
6) ADD A GUARD (ix. ai, patrols, and navmesh)
[Add a “PrivateGuard_GNormal_01” and set up a patrol for him in your crypt section]
a) Let’s add something more serious, an armed guard!
b) “Actor Class Browser” – “Pawn” – “AIPawn” – “T3AIPawn” – “T3AIPawnHuman” – “T3AIPawnHumanCombat” – “PrivateGuard” – “PrivateGuard_GNormal_01”.
c) Stick him in the crypt area and set up a small patrol for him (you can do it!).
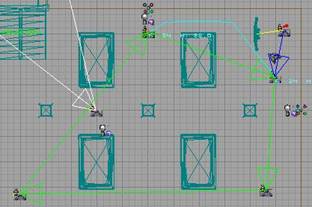
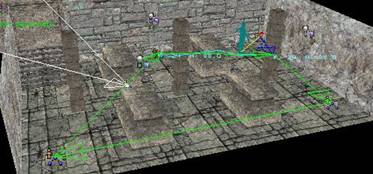
7) NAVMESH (ix. ai, patrols, and navmesh)
[The Navigation Mesh tells AI where they can go. You can tweak the NavMesh to help it run more efficiently]
a) Okay, you have two AI either running from you or chasing you around and getting tired. Our simple level may be fine for them right now, but as the geometry gets more complex they will have a more and more difficult time intelligently knowing where to go.
b) That’s where the “Navigation Mesh” (NavMesh) comes into play.
c) The editor will compute it automatically through inefficient brute force, but you can be a good helper and make things simpler here and there. This not only helps the AI to navigate, but it also helps your map to compile faster when doing a “Build All” or a “Build Navigation Mesh” (near “Build All”, next to “Build Geometry...”, the squiggly lines one).
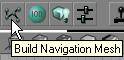
8) EXAMINE THE NAVMESH (ix. ai, patrols, and navmesh)
[Along the top of the 3D window, find and select “NavMesh Nodes”, and notice all the red triangles on the floor. Notice where the mesh is missing where objects block it, and where it should be missing because objects failed to block it]
a) Look at the icons above the 3D window and hover your mouse pointer over them to see the titles.
b) Don’t click any of them or your level will implode. Just kidding.
c) But some of them are only for advanced use, so for now move to the right and find the two flat planes called “NavMesh Nodes” and “NavMesh Links”. Make sure the “ION” is not green, because in render mode you see a different set of icons which doesn’t include the NavMesh ones.
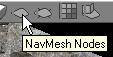
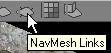
d) Click on “NavMesh Nodes” and you should see the floors all covered in various sized red triangles with little bird feet tracks in the exact center of them (they look like Y’s).
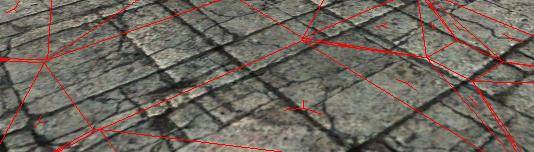
- If you don’t see any triangles, you are probably too far away from them. They only show up when you are somewhat nearby, so just move around and they’ll fill in as you go.
e) Skim around a while and look at where these triangles are NOT (look for empty areas that are missing the bird foot track).
f) You should notice they are missing where your columns, crypts, posts, etc, are. That’s because when you placed those meshes they had the setting “Subtract this Mesh from the Navigation Mesh”.
g) But your barrel racks didn’t have this setting, because they don’t touch the floor except where the legs poke down and that would just make the NavMesh very messy and overly complex if they subtracted four tiny spots.
- Incidentally, even though the barrel racks didn’t subtract from the NavMesh, your lower barrels in them may have. Well fix that oddity momentarily.

9) FIX THE NAVMESH (ix. ai, patrols, and navmesh)
[Find the builder brush. Right click on “Cube” and set it to 48x88x160, build, close. Click on “Volume” below and select “NavMeshSubtractionVolume”. Move the builder brush far away. Copy the new volume and stick them under the barrel racks, halfway into the floor. Build, then see the new NavMesh. Check out “NavMesh Links” if you want. Add more volumes as needed to clean up messy areas, such as under the stairs]
a) Since your AI can’t very well walk through the barrel racks (they currently think they can), we need to block the NavMesh under the racks manually.
b) Bring back your builder brush (which you moved away from your rooms a long time ago) and put it somewhere near your rooms.
c) Right-click on the “Cube” in the “Primitives” section again, and set the size to just 48x88x160 and click “Build” (then close the window). Now the builder brush should be quite small, very similar in size to your barrel racks in fact!
d) We want to make a “NavMeshSubtractionVolume”, so find the “Volume” CSG Operation, click it, and choose the one we want.
![]()

e) You’ve just made the volume where the builder brush was, so move the builder brush far away again.
f) Move the volume and place it right under the first barrel rack so that the volume intersects (is half buried in) the floor (to cut up the NavMesh, of course).
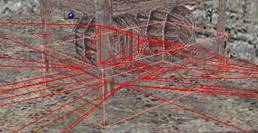
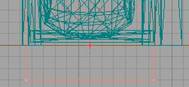
g) Do a build all or just rebuild the NavMesh to see the result.
- You should see the outline of the volume in the floor and the red triangles completely avoiding that area on the floor, perfect!
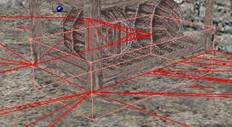
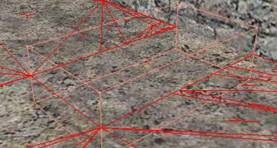
h) Now’s a good time to check out the “NavMesh Links” view, so click it and notice the green diamond-blade things which act as sort of “bumpers” around meshes and other boundaries.
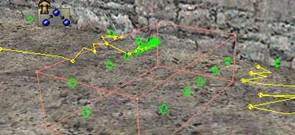
- You will also see the yellow connection lines amongst the nav zones, and, depending on exactly where you placed your support posts, you may fret when you see some of them going behind the posts along the walls!
- It probably won’t be a problem, but if you want to you could place more “NavMeshSubtractionVolumes” in those places, or, on a low grid setting, just move the supports a tad bit toward the walls to be flush.
i) Copy the volume and stick one under the other barrel rack.
j) Make another copy of the volume, resize it as needed in “Vertex Editing” mode, and stick it under the stairs to make the AI stop thinking they can go under there!
k) Be careful not to intersect the stairs themselves (such as the bottom step) or else the AI will become deathly afraid of them! If you can only get rid of most of the NavMesh under the stairs, don’t sweat it, it’s good enough.
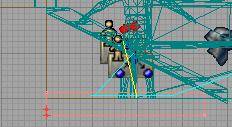
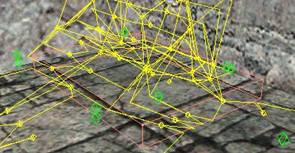
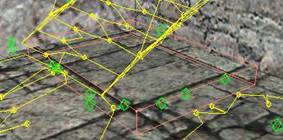
X. LOOT!
1) STATIC MESHES VS ACTOR MESHES (x. loot!)
[Static meshes don’t move or have physics or shadows (although you can turn them on), whereas Actors are more interactive for the player, can move, etc]
a) What’s Thief without stuff to steal? We want the moolah, the clams, the goods, the stuff, the redistributed wealth, the LOOT!
b) But we need some good places for the loot to be, so let’s add a few more objects and static meshes to our map.
- Some items are accessible in both the Actor browser and the Static Meshes browser. The main difference is that Static Meshes are static – they don’t move, don’t have any physics, and are set by default not to cast shadows. On the other hand, Actor meshes can often be moved around while in game and may have various other physics and properties, and they are set by default to cast shadows.
- You basically should think of Static Meshes as part of the architecture of your level, and think of Actor meshes as things within the level that may be interacted with.
- You should also try to use static meshes where it would make sense to not be able to move the item, or for items that will be out of reach and just for looks. This saves a lot of processing power and will ultimately help your map to run more efficiently.
2) ADD A BUNCH OF MESHES (x. loot!)
[“Mesh Browser” – “FURNITURE”, add some various shelves and tables to your room. In “SETDRESSING” – “Barrels_Crates” add a couple large crates. Notice that “GENiFURNkitchentable” has “Subtract whole mesh from Navigation Mesh” selected, which more cleanly intersects the whole NavMesh area under the table. You can add this to other meshes via “Properties” – “NavMesh” – “SubtractAsOne”. Check/fix your lighting]
a) We’ll start with some static meshes, since they are more permanent in their placement, and you may even add some actors within these meshes afterwards!
- Remember, if the item doesn’t seem to be lining up exactly, try right-clicking on it and selecting “Snap to Grid”. This is often a symptom of placing and moving the object whilst on a low grid setting, then later changing the grid setting higher.
b) Okay, add the following meshes somewhere (most of them will go best in your original room):
“SETDRESSING” – “Barrels_Crates” – “GENxGOODScrateA” (make two or three)
“FURNITURE” – “Shelves” – “CEMiTABLEtools” (two or three, in the crypt area)
“FURNITURE” – “Shelves” – “GENiFURNkitchenshelf1” (one or two)
“FURNITURE” – “Shelves” – “GENiFURNkitchenshelf2” (one or two)
“FURNITURE” – “Shelves” – “GENiWALLshelfA” (three or four)
“FURNITURE” – “Shelves” – “GENiWALLshelfB” (three or four)
“FURNITURE” – “Tables” – “GENiFURNkitchentable2” (one or two)
“FURNITURE” – “Tables” – “GENiFURNkitchentable” (one)
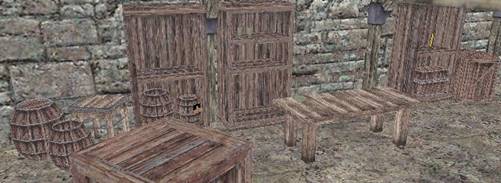
- Notice on the last kitchen table, that one of the mesh settings was “Subtract whole mesh from Navigation Mesh”. What it did was treat the table like a big cube almost, so that in the NavMesh we don’t just get four little subtracted spots where the legs touch, but the whole area of the table on the floor is subtracted
![]()
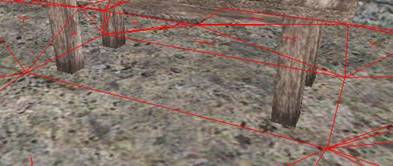
- If you have added other meshes that you later decide could use this property (such as the barrel racks) or you just want to try it out, you can add it through the object’s “Properties” – “NavMesh” – “SubtractAsOne”.
c) Before you go on to add any actors, make sure things look good in game mode, especially the position of your torches and meshes, and turn on shadow casting for any meshes that need it (“Properties” – “Render” – “CastShadows”).
3) ADD A BUNCH OF ACTORS (x. loot!)
[“Actor Class Browser” – “WorldObj” – “SetDressing”, add some Barrels and crates. In “Container” add a “Basket” and a “Chest” – “GenChest”]
a) Now, add these items from your “Actor Class Browser” – “WorldObj” section:
“SetDressing” – “Barrel” – “Barrel1” (one or two)
“SetDressing” – “Barrel” – “Barrel2” (two or three)
“SetDressing” – “Barrel” – “Barrel3” (one or two, you might put one on a “Barrel1”)
“SetDressing” – “Crate” – “Crate2” (one or two)
“SetDressing” – “Crate” – “Crate3” (two or three)
“Container” – “Basket” (one)
“Container” – “Chest” – “GenChest” (one)
b) You now should have TONS of places to hide/place loot for Garrett to steal!
4) ADD LOTS OF LOOT (x. loot!)
[“Actor Class Browser” – “WorldObj” – “InventoryObject” – “Loot”, add a bunch of various loot to your map, but leave the basket and chest empty. Use zoom and side views as needed for small loot]
a) Okay, the fun part! Add a few loot items to your shelves, top of barrels, tables, etc. You find them all in the “Actor Class Browser” – “WorldObj” – “InventoryObject” – “Loot” section.
- Since all the loot comes with the sparkly loot glint effect and shows the multi-colored spots icon, the smaller items may be hard to see and select once you place them in your map. You’ll just have to zoom in and out a LOT and make more use of the “Front” and “Side” 2D view windows.
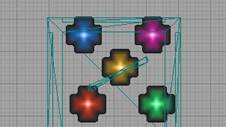
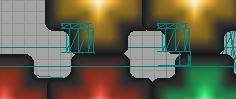
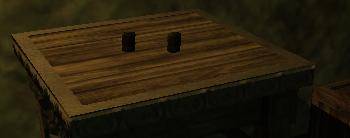
- It also helps to try not to deselect the new item after you’ve created it, so you can move it around some and know where it’s at right off the bat.
b) Don’t put any loot in the basket and chest just yet.
5) CHANGE THE VALUE (x. loot!)
[Select a piece of loot and add “Properties” – “Inventory” – “SellPrice” set to a high price]
a) Pick one of your loot items and pretend it’s a rare collector’s item that is worth a lot more than normal! In order for the game to now match your imagination, you’ll need to change the loot value setting.
b) Open up the loot’s properties and add the property “Inventory” – “SellPrice” and change it to what you want (but not ridiculously high as that just breaks immersion).

![]()
[Decorate with other items, from “WorldObj” – “SetDressing”]
a) Take the opportunity now to decorate your rooms with non-loot items as well.
b) A good example might be placing some non-loot cups near a loot cup, all on the same shelf. But also go ahead and add other completely non-loot things, like a broom or an apple.
c) You’ll find good stuff in the “WorldObj” – “SetDressing” section, in such branches as “Cleaning”, “DiningWare”, “Food”, “Kitchen”, “Knickknack”, and “Sack”.
7) FILL THE CONTAINERS (x. loot!)
[Position some loot exactly inside the basket and chest, zoom in tight to see]
a) Decide on a couple slightly larger loot items to put inside the basket and the chest, and then position them right inside so that they look like they’re resting on the inside floors of the containers.
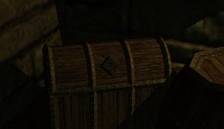
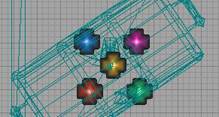
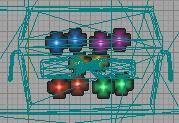
b) You’ll have to move the camera right inside those small spaces to see if you’ve got it right! Keep in mind, however, that if your loot is partially embedded, it’s probably okay as no one would ever notice during the normal course of game play.

c) How precise you demand yourself to be is entirely up to you!
[Select the chest lid and add “Properties” – “Lock” – “blsLocked”, set to “True”]
a) The chest comes with a lock, so let’s use it! It’s much easier than you might think.
b) Select the chest top/lid (not the bottom box) which the lock is attached to, open its properties, and add the property “Lock” – “blsLocked”.
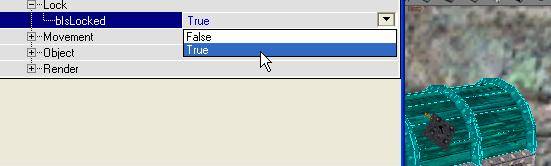
c) You’ll also have to change the new property setting from “False” to “True”.
d) Voila, the chest is locked! The loot you placed inside won’t be accessible until the player picks and opens the lid. Go ahead and test it out in game mode!
[“Actor Class Browser” – “WorldObj” – “InventoryObject” – “Loot” – “Purse” – “SmallPurseCity, stick it near the servant. Add “Properties” – “Scripts” – “bScriptsDisabled”, set to “True”. Right-click on “Create links” mode and select “RigidAttachment” (without ~)]
a) That servant walking around ought to be more careful how loosely he wears his money pouch! Wait a minute, he doesn’t have one yet – let’s give him one.
b) “Actor Class Browser” – “WorldObj” – “InventoryObject” – “Loot” – “Purse” – “SmallPurseCity”.
c) Stick it somewhere near the servant.
d) Because this is “city loot” it has a bunch of scripts that make it only randomly appear (amongst other things), but we want it to always be there, so we need to turn off those scripts.
e) Select the purse, open its properties, and add “Scripts” – “bScriptsDisabled” and set it to “True”.
f) Now we need to link the servant to the purse, and to do this we need to enter “Create links” mode.
g) The icon is right next to the “Connect AI Path Points” icon, but this time the connected balls are red. Right-click on it.
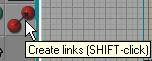
h) You’ll get a menu asking what type of link you want to create. Scroll down past all the ~ items (those are the backward links), and find “RigidAttachment” (be careful you don’t select “~RigidAttachment”, but if you scrolled past the ~ section that won’t be a problem, will it!). Click OK.

10) ATTACH THE PURSE (x. loot!)
[Select the servant (his body) and Shift-click on the purse; it will jump to his feet. Right-click on “Create links” and select “Alarm” or “~Alarm”. Go back to “Camera Movement” mode]
a) Your view windows should have lots of blue junk on them now, including some triangles and lots of “RIGIDATTACHMENTLINK”s all over the place. They’ll be on your more interesting things, such as AI, loot, torches, etc


b) Now, just like setting up the patrol routes, to create your new link you select an item, hold Shift, and select the next item. In this case, select the servant (not his hair or eyes or teeth, but his whole main body), then Shift-click on the money purse. If the purse just disappeared, you did it right!
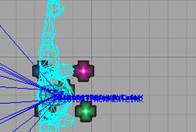
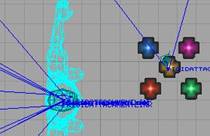
c) Look closely and you’ll now see it on the floor between his feet (the same place the other blue attachment lines are coming from for that AI for his hair, eyes, and teeth).

d) You can go back to “Camera Movement” mode now.
- The only remaining little “problem” is that even though you are back in “Camera Movement” mode, every time you select anything that has attachments, all the links keep showing up and getting in the way of what you want to see!
- If this annoys the heck out of you like it does me, right-click on the “Create links” icon again and just choose “~Alarm” or “Alarm” (because you don’t have any of those), and then go back to camcorder mode. Problem solved.
11) CONFIGURE THE ATTACHMENT (x. loot!)
[Right-click on the purse and select “Actor Links”. Notice the backwards link (~), you could have made it in that direction. Select the link to the servant and click “Edit Selected Link”. Expand “Properties” – “Attachment” – “m_attachmentBone” and click the “…”. In the “Bone List” select “hp_itemattach”, click OK. Select “m_parentBone”, click “…”, select “HP_LeftHip”, click OK. Move the AI a bit, Build, and test in game]
a) Right-click on the servant and select “Actor Links (1 Selected)” (it should be the third line down).
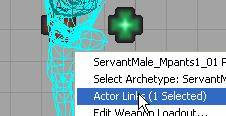
b) This opens up the “Object Links” window showing all the links for that AI. You will notice that there are five “RigidAttachment” (Flavor) links from the AI to his body parts, and one to the “SmallPurseCity” (which will have a number such as “__0”).
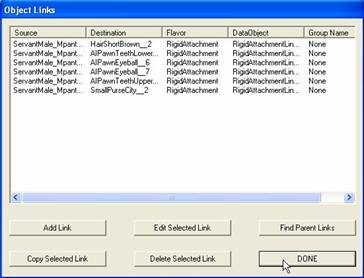
c) Go ahead and close the window by clicking “Done”. Select and right-click on the purse, and open the “Actor Links” window again.
d) This time you’ll see a “RigidAttachment” link to its “LootGlimmer”, and then a “~RigidAttachment” link to the servant.

- This is the backward link I mentioned, and it was automatically created as the natural flip side of the forwards link you created.
- You COULD have chosen this backward link in the “Create links” mode and selected the purse first and Shift-clicked on the servant, placing the backward link in that direction and the normal forward link automatically being reciprocated from the AI to the purse, but that’s just confusing!
e) Select the link to the servant and click “Edit Selected Link” at the bottom.
![]()
f) In the new “Edit Link Data” window, expand “Properties” – “Attachment” and select “m_attachmentBone”.
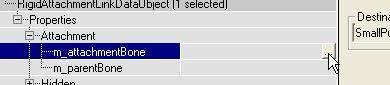
g) Click the “...” that showed up on the right and in the “Bone List” window select “hp_itemattach”, then click “OK”.
![]()
h) Now select “m_parentBone” and click the “...”.
i) In this different “Bone List” window you have a lot to choose from, including such famous bones as the “eyelid” and the “lip”!
j) Select “HP_LeftHip” and click “OK”.
![]()

k) You may see the purse still on the ground, so select your AI and move him a tad and the purse should pop up to his hip. You will probably want to do a Build as well
l) It’s all set to go, ready to steal!
XI. DOORS
1) CARVE A DOORWAY (xi. doors)
[Copy the main room, resize it down to 128x16x64, and place it along the top of the room. Copy the new room, resize to 192x112x128, and place it on the other side of the doorway. Add a torch, and Build]
a) We have a nice couple rooms going here, but we need to expand the area some more to make our little mission. We’ll start by making a doorway at the top end of our main room, which will eventually lead up some stairs.
- By the way, I’m going to start being more and move vague on exactly where to build new doorways, rooms, stairwells, bigger rooms, etc. Things don’t have to be so exact from here on out, and you’re free to make your little map somewhat how you like. Don’t fret when you don’t know exactly where to place a new brush, because it doesn’t matter very much. If the position of things and fitting it all together isn’t working out, you can always make movements and adjustments later on.
b) Copy the main room, go into “Vertex Editing” mode, and resize the new room so that it’s only 128 high, 16 wide, and 64 broad.
- As a reminder, to select vertices use the multi-select key combo Ctrl+Alt and drag a box around the vertices.
c) Position it somewhere along the top of the room, between major (dark grey) gridlines on grid 16 if you’re interested in precision construction, and make sure the floor levels line up.
d) Copy it and change the newest room size to 192x112x128, and place this one on the other side of the small doorway, exactly lined up along major gridlines.
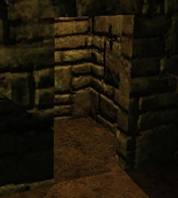
e) Stick a torch in the new little room on one of the side walls.
f) Do a build and voila, you have a doorway! But there’s, um, no door...
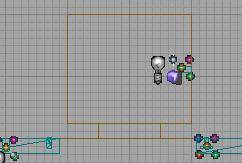
[“Actor Class Browser” – “WorldObj” – “Moving” – “Hinged” – “DoorHinged” – “DoorWoodenHinged” – “GenDoor”, stick it in the doorway. Add some “Tenxbeamwood1x8”s for door trim]
a) “Actor Class Browser” – “WorldObj” – “Moving” – “Hinged” – “DoorHinged” – “DoorWoodenHinged” – “GenDoor”.
b) Line it up right in the doorway.
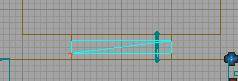
c) Do a build and try it in game!
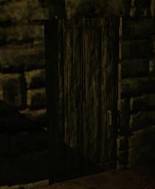
d) If you want to, go back and add some trim around the door such as some wood beams “Tenxbeamwood1x8” (under “Columns_Beams” in the mesh browser). You’ll have to turn the grid way down to 2 or 1 to place them perfectly. They can also help block any light slivers getting around the door if you turn on their shadow casting.
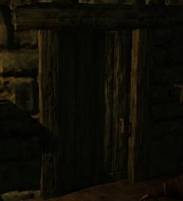
e) Keep in mind that if you embed the bottom of the door a little into the floor, it’s impossible to notice because the floor is all level! This might help when you’re trying to get everything lined up well.
3) FIX THE LIGHTING (xi. doors)
[If you see light going through walls or the door, try moving lights, or try adding to the light properties “Lighting” – “ShadowExtrusionDistance” set to 256 or 512 or more]
a) Test out this area in game again to look for the following: Depending on where you placed your torches in relation to the doorway, and whether the door is open or not, you may notice light where it should not be! You may need to put out one light or the other (with a water arrow) to notice the problem.
b) This is a common “bug” in the engine (light seeming to go through walls, or shadows not going far enough), and there a couple things you can do about it.
c) First of all, you can simply move your light sources around, probably further from the doorway area.
d) But if you like them where they are, you can extend the shadow casting distance from the lights.
e) Select a problematic light and open its properties. Add “Lighting” – “ShadowExtrusionDistance” and set it to 256.
![]()
f) Test that, and if the problem remains try changing it to 512. This is usually enough, but you are free to make it more.
- If you make it 10,000 you are just wasting compute cycles because the engine has to figure out the shadow forever even though the light only goes a little ways.
- What you want to do is make the shadow extend about as far as the light goes.
4) EDIT THE HINGE SETTINGS (xi. doors)
[Turn the door around so it opens the other way. Right-click on the door, select “Actor Links”. Edit the “HingedAttachment” link from the door to the door, and under “Properties” – “Physics” – “m_hingeAxis” change “Z” from 1 to -1 or vice versa. But the door still embeds when opened, so change “m_hingeLocation” – “Y” to -8]
a) Currently the door swings open into the room, which is the way it should be (or else you couldn’t bar the door with a chair when the murderer is after you, see).
b) Select the door and turn/rotate it around, switching which sides the handle and hinges are on. Since the door now swings open the wrong way (out of the room), let’s change the hinge settings.
c) Right-click on the door and select “Actor Links (1 Selected)”.
d) Find the “HingedAttachment” link that shows the “GenDoor” (__#) as both the “Source” and “Destination”, select it, and click on “Edit Selected Link”.
![]()
e) Expand “Properties” – “Physics” – “m_hingeAxis” and change the Z from “-1” to “1” (or vice versa)
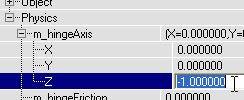
f) Now the door opens into the room again (try it out in game mode to make sure it works). But the hinge is still in exactly the same location, which is not good because now the door is embedding itself into the wall or doorjamb!
g) Edit the door’s hinge link again and expand “Properties” – “Physics” – “m_hingeLocation”. The XYZ is currently all 0’s, which basically means the hinge location is a certain bottom corner of the door. It is a point, not a line as you might think a hinge as being.
- Theoretically, you could have the door do a big funky far out movement by changing the hinge axis to 1,1,1 or -1,1,-1, and then changing the hinge location to 32,64,128 or –256, 64, 16, or something. If you REALLY want to try that out, do it now to get it out of your system!
h) Okay, now that the possibilities are swimming in your head, return to the task at hand and set the hinge location Y to “-8”.
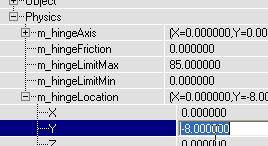
i) That moved the hinge 8 units back (when facing the door from the other side now), which is about the thickness of the door, effectively placing the hinge on the other corner, so the door opens naturally.
- Rotating a door and properly changing the hinge settings will become essential when you want to make double doors or window shutters or other special moving objects
[Add “Lock” – “blsLocked” – “True” to the door’s properties. “Actor Class Browser” – “WorldObj” – “Environmental” – “Lock”, pick a lock for the door, and make two of them]
a) Now that we have a working doorway and door, let’s lock it! This isn’t quite as simple as locking the chest, though it starts out the same way.
b) Right-click on the door, open its properties, add “Lock” – “blsLocked”, and set it to “True”.
c) Now pick a lock style to add to the door (the same for both sides) in the “Actor Class Browser” – “WorldObj” – “Environmental” – “Lock” section. The Diamond or Square shaped Iron or Metal lock style would be fitting for this door.
d) Make two of them and put them somewhere near the door.
e) Look closely and notice that the locks have a small part (the lock meter). You’ll want to avoid selecting that part in the next section when you go to select the whole lock, so just be aware and careful.
6) ALIGN THE LOCKS (xi. doors)
[Switch to “Create links” mode set to “Rigid Attachment”, select the door, then Shift-click one of the locks. Do the same for the other lock. Open the door’s links, edit one of the lock links, and set “Properties” – “Attachment” – “m_parentBone” to “hp_lockA”. Set the other one to “hp_lockB. Build, save, test]
a) Switch to “Create links” mode with the link type set to “Rigid Attachment” (without the ~).
b) Select the door then Shift-click on one of the locks. Hopefully it just disappeared!
c) Clear your selection, select the door again, and Shift-click on the other lock so it disappears as well.
- If you snoop around you should find the locks at the good old 0,0,0 point on the door (where the hinge point was before we moved it). They will be partially buried in the ground and maybe the wall or beam you placed, because the center of the locks got moved to that point.
- Remember, you may want to right click on the “Create Links” mode button and select a link you never use such as “Alarm” before you go back to camcorder mode.
d) Open the door’s links (right-click and select “Actor Links”) and you should see two new ones, both “RigidAttachment” flavor, going to the two locks.
e) Select one of them, edit it, expand “Properties” – “Attachment”, and set “m_parentBone” to “hp_lockA”.
f) Set the other link’s attachment parent bone to “hp_lockB”.
g) Move the door back and forth a bit to make the locks jump to their new homes.
h) Build (can’t hurt).
i) SAVE (of course you do this all the time)!
j) Test in game!
[Make another doorway and room to the left of the main room. Make a thin (8 units) room to use for a sliding door receptacle, to the side of the doorway. “WorldObj” – “Moving” – “Sliding” – “DoorSliding” – “DoorMetalSliding” – “WindowMetalDoorSliding”, add it]
a) Make another small doorway and room to the left of your main room, just like you did in step 1 above.
b) Now make another copy of the small doorway brush and edit it down to just 8 units thick (0.50 FT), and move it to the side of the doorway lined up in the center, so you make a thin door size hole for a sliding door to slide into. You’ll probably need to go down to grid 4 or 2 to line it up correctly.
c) “WorldObj” – “Moving” – “Sliding” – “DoorSliding” – “DoorMetalSliding” – “WindowMetalDoorSliding”. Put it in the doorway lined up correctly so that it will slide right into the door hole you made.
8) MISSING PROPERTIES (xi. doors)
[Add “Highlight” – “HighlightDist” set to 128 to the door. If it slid the wrong way, edit it’s “SlidingAttachment” link and change “Physics” – “m_slideAxis” – “X” from 1 to -1 or vice versa. To allow AIs to open the door, add the properties “AIDoors” – “AIDoorOpenDistanceInFeet” set to 7, “AITags” – “AINearObjectDistanceInFeet” set to 10, and “AITags” – “AINearObjectTag” with “door” typed in. For tweaking the door, set “Physics” – “DoorController” – “DoorSpeed” to 2, and “Frob” – “FrobBias” to 16]
a) This door is missing some properties for a normal door. First of all, add “Highlight” – “HighlightDist” and set it to 128 (standard). This allows you to frob the door and open it! Try it in game.
b) If your door slid open the wrong way and went into the other wall, you need to fix the sliding link properties, similar to changing the hinge settings on hinged doors. Just open the door’s “Actor Links”, edit the link (“SlidingAttachment”), and change the “Physics” – “m_slideAxis” – “X” setting from 1 to -1 (or vice versa).
c) AIs cannot open this door. You can test it by making the guard chase you and shutting the door between you and he’ll never open it to get you. There are some other AI interactions with the door that are missing as well. Add the following properties:
- “AIDoors” – “AIDoorOpenDistanceInFeet”, set it to 7
- “AITags” – “AINearObjectDistanceInFeet”, set to 10
- “AITags” – “AINearObjectTag”, type in “door” (without quotes).
d) That should do it. Now this door has the same properties that standard hinged doors have. But the sliding door opens quite fast, and is also a bit hard to frob to close it, so add the following properties:
- “Physics” – “DoorController”, expand it and set the “DoorSpeed” to 2 (twice as slow).
- “Frob” – “FrobBias”, set it to 16 (gives more leeway).
XII. RAMPS, STAIRS, AND LADDERS
1) MAKE A STAIRWELL (xii. ramps, stairs, and ladders)
[summary]
a) Copy the first little door “room” and move it to the side opposite the door.
b) In “Vertex Editing” mode, make it 128 tall, 96 wide, and 512 long (the units might be in a different order depending on which direction you are making it in). It should be a skinny hallway now.
c) Select the vertices that are furthest away from the main room and, in the “Side” or “Front” view, move them up, creating a ramp shaped parallelogram. You’ll use this for the stairwell.
- You want the rise/run ratio to be 1 over 2. In other words, since the room is 512 long you want it to rise only 256. You can easily see this in the side or front view as the brush floor/ceiling angle will go over four major grey grid lines but only go up only two lines on grid 16.
- It’s wise to try to keep most of your brushwork lined up with major gridlines; just makes things easier to eyeball and keep track of.
- The new height should actually say 384 now (256 worth of rise, plus the original 128 height).
- Make sure the bottom of the lower side of the stairwell lines up with the floor of the small door room.
- Do a build and see if it’s working right.
2) MAKE IT TURN (xii. ramps, stairs, and ladders)
[summary]
a) Make another little room that is 128 square (and 192 tall) and stick it at the top of the stairwell (line up the floor of the new small room with the floor of the higher side of the stairwell). We’ll use this for a “landing”, a turning point in the stairs.
b) Make another stairwell (just copy the first one) and have it go up to the left (or if you already went left, have it go straight, just make it turn direction from the first stairwell).
- Make sure you check the side or front view to see that your vertical placement is correct.
c) Make another little door room at the top (128x112x192).
d) Add torches or other lights to the stair rooms or in the stairwells, whatever you want.
3) ADD THE STAIRS (xii. ramps, stairs, and ladders)
[summary]
a) “Static Mesh Browser” – “STAIR_RAILING_FLOOR” – “Stairs” – “INNstairs1C6ft” and select the “Default” skin.
- Notice that these stairs don’t add to the NavMesh. This is a good thing because it would just overcomplicate things! The AI can walk over small obstacles placed flat over BSP, including little stair steps, even though, by following the NavMesh, they think they’re just walking up a smooth ramp. We couldn’t do this with the first steps we placed because there was no BSP ramp right under them.
b) Create the stairs and notice that they (and most stairs in the game) have a rise over run of ½, just like the stairwell we made, what a happy coincidence! Position it exactly in the lower half of the lower stairwell.
c) Copy and place three more of them to fill both halves of both stairwells.
d) Now you have stairs! That was easy!
e) Go ahead and make another stairwell leading from the sliding door room going down. Add stairs.
4) BUILD A SEWER ROOM (xii. ramps, stairs, and ladders)
[summary]
a) Connect the bottom stairwell to a couple of seller storage rooms (make them) that go around a corner or two to block the view
- Going around a corner like this is something you should do all the time. It helps minimize long view distances, and it facilitates the usefulness of adding zone portals which will help the engine performance a lot. We’ll be adding zone portals soon.
b) Then connect these rooms to a larger underground sewer room via a big doorway. Make the sewer whatever dimensions you want.
c) Create another long room within the floor of the sewer room, positioned lower to carve out the deeper area where the shallow water would run in the sewer. Don’t overlap the brushes – make the ceiling of the lower water area brush lined up with the floor of the main sewer room brush.
- In the side or front view, you should be able to clearly see where one brush ends and the next begins.
d) Make a narrow brush next to the lower brush (the same height, again with the ceiling of it lined up with the floor of the main room) and select just one bottom corner vertex in Front or Side view and move it back to create a ramp on that side of the brush.
- You should end up with a brush that has a long ceiling but a short floor, and three vertical walls with the fourth wall slanted so much it makes a sloping ramp. It should look like half of a trapezoid or keystone, stretched out if you will.
- Just try to make it, you’ll get it sooner or later!
e) After doing a Build you should now have a larger sewer room with a ramp that leads down into a lower section.
f) Add some lights.
5) BUILD A CITY SECTION (xii. ramps, stairs, and ladders)
[summary]
a) That’s it, just go to it and build a city.
b) Great, now that your city is done…what’s that you say, you haven’t built the city yet? Well, making a city area is one of the harder things to do, both stylistically and just practically. It’s hard to know where to make your BSP (brushes) and where to add meshes.
- One thing that will help is to browse through your meshes a lot and just experiment with them so you know what’s available and what sizes things are.
- It can also be very helpful and inspiring just to play the game some and closely examine the city areas to see what they did, and take a look at those areas in the editor as well (now that you know how to get around in the editor, looking at the OMs can be a great learning tool!).
- One thing to keep in mind when building any outside area is to try not to just subtract a massive huge brush, planning to go back and add in large chunks for buildings to make streets and such. You can do it that way and it will work, but…
- It’s generally better to subtract/carve out the open street areas as you go along bit by bit, making it twisty and blocking the long views. This way you will keep the frame rate performance up, and it will also be much easier to do your zoning and sounds and lighting later on. It just makes for a cleaner construction with fewer problems.
- Other than that, it’s hard to give much advice in this area, you just have to practice.
c) But seriously, for now just add a few basic street brushes, and connect to the door room at the top of your upper stairs. You can add all the little details (building fronts, décor, sky texture, pipes, wagons, debris, windows, etc) later on.
d) Make the street section go somewhere above where you have your sewer room (so we can connect the street with the sewer via a vertical tunnel).
e) Add a couple ambient lights or other lights (such as “ElecStreetLight”s) so it’s not pitch black!
6) ADD A LADDER (xii. ramps, stairs, and ladders)
[summary]
a) Make a small (64x64) but tall tunnel that goes from some corner in your streets down to the sewer room.
- Have it come down on the side somewhere, or have a small hall from the sewer room lead to it (just don’t make a hole in the middle of the ceiling of the sewer room). This is where we’re going to put a ladder leading from the sewers up the streets.
b) “Actor Class Browser” – “WorldObj” – “Environmental” – “Ladder” – “Ladder4FT” and “LadderTop”. Make the top piece and line it up at the top of the hole and right up close to the hole wall.
c) Add 4 ft pieces going all the way down.
- They don’t have to go right to the floor if you don’t want to, the bottom can be a couple feet up and it will work fine.
d) That’s it, your ladder should work fine!
e) If the top is acting funky, like not letting you off correctly, you might need to adjust the placement higher or lower, or closer to or further from the side.
1) GENERAL INFO AND ADVICE (xiii. zoning)
[summary]
a) Now that you have the basic layout of your little mission basically carved out, it’s a good time to add some portals to create zones. BSP Zones help your map run more efficiently because they define areas that the engine can ignore when not visible to the player.
b) If you were making a large level you would definitely want to start adding portals sooner than the end, because even with this small map you’ve probably noticed that the frame rates you’re getting in game mode are much lower than they ought to be.
c) Test your non-zoned level to really see how bad it is right now.
- To test the lowest frame rate area, go in game and go to a far corner of your map and look in the general direction of the rest of the level. Your frame rate should be quite low because the engine is rendering the whole map in your view area, even though you can’t see it through the walls and stuff.
- In a mission I’m testing I found six spots with 7 or 8 fps (measured by FRAPS) on my laptop. I’ll tell you how much that improved after adding zone portals below.
- If you turn around and face away from the rest of the level and just toward an outer wall, your frame rate will be smooth because your field of view doesn’t include any far way sections of the level
2) MAKE A ZONE PORTAL (xiii. zoning)
[summary]
a) We’ll be using the builder brush again, so find wherever you put in and bring it back to the area of your map.
b) Click on the “Sheet” primitive (two below “Cube”) to make the builder brush go flat.
c) Rotate the brush in the side or front view to turn it vertical, as this is almost always how you will place it in the level.
d) Click on the “Add Special Brush” CSG operation (blue square with a dotted line square inside, two below “Add”)
e) In the “Add Special” window that popped up, select the prefab “Zone Portal” (this will automatically put checks next to “Zone Portal” and “Invisible” and select “Non-Solid”). Click OK.
- The window won’t go away, although you just made a zone portal. If you clicked OK two or three times thinking you hadn’t really clicked it yet, you just made two or three portals on top of each other!
f) Click “Close”, move the builder brush far away again, delete any extra portals you made, and then select the last (or only) one.
3) MAKE MANY PORTALS (xiii. zoning)
[summary]
a) Put them everywhere! You’ll have to do a Build now and again for the actual portals to show up, and remember that they will appear invisible from one side, and from both sides in render mode!
b) Good places are in ends of hallways, between rooms, each side of doorways and stairways, etc. Just section off the map in every logical location.
c) Using the grid, you can line them up right evenly at the end of a hall or doorway, and they will seal the opening good.
d) It’s a good idea to let the edges extend into the wall or out along the surface a little, partly to make sure you’re fully covered, and partly to have an easier time selecting them later on if you want to.
e) You can place horizontal ones too, such as at the top and bottom of your sewer access tunnel with the ladder.
f) Don’t make huge ones, but rather try to keep them reasonable, like door or hall size or a little larger. Don’t stick one right in the middle of a large open space, for instance.
g) Be careful not to overlap them or place two in the same exact spot!
h) And don’t make more than perhaps 15 to 25 for this small level; any more would just be overkill and not helpful. (The maximum possible is 1024 zones!)
4) ADD ZONEPROPERTIES (xiii. zoning)
[summary]
a) In the main menu at the top, select “View” – “Show Zone Properties Dialog”.
b) A window pops up about “Missing ZoneProperties” asking if you want to add them automatically, choose yes.
c) The “Zone Properties” window opens with a list of the zones (Zone 0 through Zone 12 or whatever). For the time being just close it.
d) You should now see little “?Z” markers here and there in between your portals.
e) Test in game. You should definitely notice higher frame rates now!
- Try the test above, a corner area of the map looking in the direction of the rest of the level. Your frame rate should be relatively good and normal, because the engine is only drawing the zones you can physically see some part of in that moment.
- The six spots I previously mentioned all improved. Three of them went up to 25 to 30 fps! One went up to about 15 fps, and the last two only went up to about 10 fps (there were complex views no matter what on those two). Zoning makes a big difference!
5) EXAMINE THE ZONES (xiii. zoning)
[summary]
a) Open the “Zone Properties Dialog” again (it won’t ask to add the ZoneProperties again unless you alter or make more portals later on).
b) Notice all the columns about schemas – these have to do with ambient sounds and we’ll be adding some of those later on. The last column, “ReverbStyle” is also for sounds, the EAX echo properties that most good sound cards can make use of. We’ll do that later on as well.
c) Select one of the zones halfway down the list or so (just click on “Zone 7” or so). If your 3D view is set to Render mode, you should now see an area lit up bright orange (you may need to move far outside and perhaps above your level to get a good view).
d) Select other zones to see where they are.
- You might have some very small zones that are only the space right in the doorway if you put portals on either side of the door (a good idea, by the way).
e) Before you close the “Zone Properties” window, be sure to deselect any zone you had selected.
- You can most directly do this by simply clicking just to the right of the “Zone 7”, or down below the bottommost zone listing in the blank area. You could also just click somewhere in a 2D or even in the 3D view.
- If you don’t deselect the zone then that area will remain crazy bright orange in the 3D window in render mode (although in game mode it will be normal). So if you are editing along and click the “ION” ball to go to render mode and suddenly see orange everywhere, you know what happened. Just open back up the “Zone Properties Dialog” and deselect the zone.
f) You can also check out where your zones are in the 3D window with render mode off, by selecting the bisected cube (next to the really spotted cube) to the right of the ION button. This will show each zone in a flat color scheme different from the adjacent zones, and gives a good overview of them all.
- It’s easier to see where you zones are overall by using this method, but you’ll want to select them individually in the above method when you are adding some sounds and other properties and want to see where a particular zone is.
[summary]
a) The art of texturing is one of the most essential skills to master if you want to make good missions. The Flesh engine is powerful, but our current generation PCs and video cards just can’t handle tons of polygons and overly complex architecture if we’re going to have complex real-time lighting and shadows, so you’re going to have to make up the difference with good use of textures.
b) For instance, you can paint a craggy looking cave wall using just a couple indentations, a couple smart textures, and good lighting to maximize the texture effect. This performs much better than trying to carve out lots of individual rocks and bumps, or adding 37 overlapping meshes because you think they look cool.
c) First of all, it’s a good idea to just experiment a lot with all the game textures to get familiar with what’s available and where they fit well.
d) You might also go back and play the game missions and pay close attention to how they used textures, in what combinations, with what lighting, etc.
2) TEXTURING REVIEW (xiv. texturing)
[summary]
a) There are quite a few ways to manipulate and work with textures, so let me walk you through some of them.
b) Go to one of your relatively empty areas, where it’s pretty much just a few walls and a floor and ceiling.
c) If you haven’t already, browse through the available textures and pick some to use for this area and paint them on the walls. Remember the basic texturing controls mentioned in the “YOUR FIRST ROOM” section:
d) Open your Texture Browser and this time select “File” – “Import All Matlibs”. You’ll see the “Converting Materials to UTextures…(####)” window longer this time as it may take a while importing all those textures, about 2094 of them (at least 2094 is the last number I see before it disappears).
e) Now you can open the drop down menu that currently says “AICore” and choose from all the texture folders. Some of the textures are odd behaving, so just use some caution when experimenting.
f) Every time you start T3Ed you’ll need to import the textures to get all the new ones available, but any that you are using in your map, including ones that are on meshes, will be available without having to import them each time.
3) NEW METHOD (xiv. texturing)
[summary]
a) The normal way to paint walls is to use the 3D window to select the wall or walls you want to paint and then select the texture you want in the texture browser. To tell the truth, however, I hate this method! I never use it! I apologize if you thought it was the only way.
b) I do it backwards (which is actually more intuitive to me), by selecting the texture in the browser first, and then painting it onto the surfaces I want in the 3D window using Alt+LMB. Try it!
[summary]
a) A command complimentary to that is using Alt+RMB to “grab” or select a texture already in your map.
b) When you select a texture this way it will now be selected in the texture browser, but the browser won’t jump to that texture to show you or even change to the proper texture group if it’s different from the group you were currently browsing (such as T3_GEN).
- The (slight) problem with this is that you can’t see for sure that you have the texture selected, and T3Ed is sometimes a little finicky and may not always select things you want, sometimes because you were accidentally moving the mouse a little when you clicked, and sometimes for no good reason.
- With that in mind, I always do my Alt+RMB selecting by clicking two or three times to make darn sure I have the texture selected! After selecting your texture, you can now conveniently use Alt+LMB to paint it elsewhere. Try it!
c) Remember, if you are texturing in render mode, you’ll have to do a lot of builds to see the changes, so it’s best to just be in normal mode and then do one build at the end, and go back to render mode if you want after that.
d) So, to review:
Alt+RMB click on a textured surface to “grab” or select it in the browser
Alt+LMB click on a surface to paint the currently selected texture on it
[summary]
a) Okay, you’ve got some basic textures in your rooms. But perhaps you’ve noticed some badly aligned corners where the texture on one wall doesn’t match up correctly with the next wall, even though they’re the same texture, such as stones or bricks suddenly being cut off.
b) Multi-select the surfaces (Ctrl+LMB on them), right-click on one, and open the “Surface Properties”.
c) Click the “Alignment” tab, and in the “Alignment” box select “Planar” and click the “Align” button below.
- You should most likely see an immediate difference in the texture positions, hopefully for the better.
d) You can experiment with the other alignment types and settings on your own time, but for general good alignment just use “Planar” all over the place.
- If you mess up the alignment all funky and bad, just choose “Unalign” and start over.
- You can also double click the selections to test them quicker.
e) Additionally, you don’t even have to open the surface properties at all, but can right-click the surface, select “Align Selected” and choose an alignment.
6) PAN, ROTATION, AND SCALE (xiv. texturing)
[summary]
a) Another more powerful texture manipulation tool is the “Pan/Rot/Scale” tab in the surface properties. You will definitely be making use of these controls to alter, fix, adjust, fine tune, tweak, and anything else, your textures.
b) In the “Pan” box you can see the U and V and the numbered buttons 1, 4, 16, and 64. With your selected texture in view, try out these buttons to see how they move your texture along in various increments (of Unreal Units, and remember that 16 UUs equal one virtual foot).
- You might use this to manually align stubborn textures, to line up a window texture exactly right, etc.
c) In the “Rotation” box you can see buttons to rotate the texture in 45 or 90 degree increments, or even to flip it over with either the “Flip U” or “Flip V” button (depending on which direction you want to flip).
d) You also can use the flip buttons to fix inverted normal maps, which you will recognize by noticing bumps where there should be dips and vice versa (such as floorboards with ridges sticking up between the boards instead of empty dips).
- You should pay special attention to this problem, as it is extremely common and easily overlooked, because it looks bad in the game.
- For example, if you have a torch on an exterior rock wall, and the area just above the torch depicts the top edges of the rocks lit up and the bottom edges in shadow, you know the normal is inverted.
- So fix it for the benefit of the rest of us!
e) If you mess up and want to reset the panning and rotation, you can simply align the texture again.
f) In the “Scaling” box you have some precise controls over how much the texture is “zoomed in” or scaled. I only ever use the “Simple” line, usually setting it to .5 or 2 (to halve or double the scale), although you can use precise custom settings applied individually to the U and V directions if you want.
g) You can check “Relative” if you already scaled the texture before and want to apply the new scale to that; leave it unchecked if you want to apply the new scale to the default scale the texture started with.
- For example, if you choose “Simple” – “2.0” and click “Apply”, it will double the texture zoom the first time whether you have “Relative” checked or not. But if you click “Apply” again and it’s relative, the texture will double the zoom again, but if it’s not relative it will stay on the current zoom.
h) Relative is useful when you’ve forgotten what scale a texture is currently set at and all you know is that you want to double it or cut it in half from how it currently looks. It’s also handy when you are selecting multiple textures of varying scales and want to blanket adjust all of them at once.
7) RE-TEXTURE MESHES (xiv. texturing)
[summary]
a) The ability to re-texture or re-skin your actors and static meshes gives you a powerful tool to customize the look of your mission.
- It helps tremendously when trying to make meshes fit in with the surroundings, such complimenting or matching the wall textures.
- It also allows you to “camouflage” meshes for unique or non-standard uses.
- And some meshes require you to texture them as they don’t come with any default texture!
b) Most objects are uniformly textured, but some of the more complex ones have various parts with distinct textures.
- For example, you can change the texture of just the trim or windows on some of the whole mesh buildings.
c) You can’t re-skin meshes by selecting them and then selecting a texture in the texture browser. Rather, you will need to have your desired texture already selected and then use Alt+LMB on the mesh.
- Note, however, that you cannot “grab” a texture from a mesh because both Alt+LMB and Alt+RMB only paint onto meshes (it’s dumb, I know).
- In other words, you could use Alt+RMB to grab a texture from a nearby BSP surface and then paint it onto the mesh, or you could select a texture in the texture browser and then paint it, but you can’t grab a texture from a nearby mesh and then paint it elsewhere.
d) So let’s test it out. Head down into your sewer area and use Alt+RMB to grab the wall texture down there. Then use Alt+LMB on the bottom section of the ladder you built to paint the texture onto it.
- You should see the ladder change to the new texture immediately.
- If it didn’t work then you may not have selected the wall texture properly, so try again.
e) Now save your map. Woops, you got an error “Unpublished skins!” You forgot to save your new skin you just made! What were you thinking?
- The error message should include the name of the item that has an unpublished skin, and in the future you will want to carefully make note of it so you can track it down and fix it, but in this case you already know which one it is.
f) Click “No” to close the error message window.
g) Right-click on your ladder piece and at the bottom select “Static Mesh” and then at the top of the submenu select “Add Skin”.
h) A new small window pops up called “Specify skin name” in which you can type anything you want. Describe it briefly or just call it the name of the mission you’re planning or whatever you want (I call all mine “Komag”). Click “OK”.
i) Voila, it’s done, and you can safely save your mission. Now if you go to change that mesh’s skin or are making a new piece of ladder, you can see the new option in the list of available skins.
j) This whole procedure is known as “publishing” the skin.
[summary]
a) To help your map render even more efficiently it’s a good idea to paint unseen textures blank!
- This is a good idea for underneath stairs, behind doorjambs and window trim meshes, etc.
- This helps the engine to not have to render any normal maps or textures for that surface.
b) The texture for this looks like a man’s face skin spread out (but it sometimes just looks purplish grey, I don’t know why). It’s called “BF” and is found in the texture browser under “Engine”.
- It may look very tiny if you have all the MatLibs imported or larger if you don’t.
- It’s a lot easier to find if you haven’t imported all the MatLibs because the “Engine” section is HUGE if you’ve imported the whole thing, and besides being a freaking long list it also may run slow and choppy.
c) Now, in order to paint the texture on surfaces that are covered by meshes, first you may want to temporarily toggle off the meshes by pressing W or H. Then just have the texture selected and use Alt+LMB on the surfaces you want.
d) You may have noticed this blank texture before, on the backs of some static meshes, on some of the small barrels, and other places.
- You can paint real textures in those places if you want to, depending on how you’re planning to use the meshes.
- You might find a symbol texture to put on the barrels for instance, representing what’s inside.
9) TURN OFF SHADOWS (xiv. texturing)
[summary]
a) While static meshes have shadow casting off by default, BSP surfaces have it on, which can be an unnecessarily large hit on your frame rate. You’ll want to turn it off on all surfaces, and then only turn it back on where it looks wrong to have it off.
b) Go up to “Edit” – “Select All Surfaces” (or hit Shift+S) to highlight all the BSP surfaces in your map.
c) Right-click on one of them and open the “Surface Properties” and put a check next to “Do Not Cast Shadows”. This turns off all the shadow casting.
d) Do a build and go back through your level and turn back on shadow casting on surfaces that need it (a light obviously shines through, etc).
[summary]
a) Now, to do it right, create a new square room (512x512x512) somewhere far away where it will never be in the way of future construction (but don’t worry too much, you can always just move it later if you need to).
b) “Actor Browser” – “MetaData” – “Info” – “ZoneInfo” - “SkyZoneInfo”. Put the SkyZoneInfo actor in there, in the middle.
c) You can just paint the walls any texture you want for now, such as brick or stone or wood.
d) Put a few big lights in there to light it all up.
e) Then go back to the playable areas of your map, and in the 3D view right-click on any surfaces you want to look like sky (the ceilings of outdoor rooms such as your city streets) and select “Fake Backdrop” in the texture properties.
f) Check it out in game and notice that you see the sky from the view of the sky zone object.
g) Go back and paint your fake backdrop surfaces with the “BF” blank texture. Since we won’t ever see those textures anyway, might as well save the engine some work.
h) Paint your skybox all stars with the texture “STARSA01” in the “T3_SKYSTUFF” texture group.
i) If you do the whole thing wrong somehow, bad settings, multiple SkyZoneInfo’s, etc, you may see “Hall of Mirrors” effects in your sky areas, or you may have all your lights winking out when you peer heavenward. Just know that those are symptoms of messed up skyboxes.
2) SKYBOX POTENTIAL (xv. skybox)
[summary]
a) You can put anything in the skybox room you made, including AI, and be able to see it in your fake backdrop surfaces.
b) If you want some clouds, there are cloud object meshes you can add right around the camera point and put in some very small radius dim blue lights to light up sections of cloud for a good effect. Try “CloudDomeB01” right in the main mesh folder. Other good meshes are just below, including various “SKY…” meshes and a few others.
c) The skybox will show every angle you can see, so if you set a floor surface to “Fake Backdrop”, when you peer down into it you’ll see whatever is in the floor of your skybox room (whatever is below your SkyZoneInfo camera).
d) There are a lot of possibilities, including such views as the whole flowing misty ocean view you see in Docks and from the Seaside Mansion with water, islands, etc. You can see those by loading those maps in the editor and experimenting with the settings. Have fun!
e) Keep in mind that whatever is in the skybox is constantly and always rendered by the engine even if you’re not looking at the sky, so don’t go crazy with lots of big meshes and lighting and stuff or you will feel the wrath of unstoppable and constant low frame rates!
1) WATER IS GOOD (xvi. water and fog)
[summary]
a) Water is fun. Water sounds cool. Water adds to the atmosphere of a mission. Let’s add water!
b) At least, let’s add some shallow fake water (the lack of real water in Flesh is certainly its biggest flaw).
c) We won’t be doing any deep “death water” (I hate that stuff) like you find in some OMs, but you can learn that on your own later if you want.
2) WATER MESH (xvi. water and fog)
[summary]
a) Go down to the lower section of your sewer room. “Static Mesh Browser” – “Nature” – “WATtile512x512”.
- You can choose among the other WAT meshes if you want.
b) Change the texture to “WaterSheetA02”.
c) Create the mesh and stick it down near the floor, about 16 or 24 units up (two or three squares up on grid 8) so that it’s ankle deep or a bit more.
- It doesn’t matter if most of the water mesh sticks into nothingness on the sides, so long as the area you need gets covered. If one mesh is not enough, add another one.
3) WATER VOLUME (xvi. water and fog)
[summary]
a) Now you need to tell the game to pretend there’s water down where your mesh is (the mesh is just for looks).
b) Bring back your builder brush nearby, “Cube” it, and click on “Volume” (the blue cube) and select “ShallowWaterVolume”.
c) Move the builder brush away again and select the volume brush you just made.
d) Shape and position it so that the bottom is right on top of the water mesh, the top is near the top of the lower sewer brush (to be over Garrett’s head when he’s down there), and the sides line up evenly with the lower sewer walls.
- Because it’s a volume brush it can overlap or intersect other BSP brushes and it’s okay.
[summary]
a) Add to the water mesh the property “Render” – “Texture Pan”, and adjust the TexturePanX and TexturePanY settings (.1 or .2 for slow lazy water) to create a “flow” (just for looks, nothing with the physics or interaction).
5) WATER THOUGHTS (xvi. water and fog)
[summary]
a) There doesn’t seem to be any way to turn off your footsteps on the surface under the water, so depending on what texture you’re using you might hear the crunch of dry gravel combined with the splish splash of water. This is exactly what happened in the Pagan Tunnels OM.
- The only way to fix it is to use a different, less noisy texture, so that you mostly just notice the water sounds, or whose sound compliments the water sound nicely.
b) The water volumes don’t always work right for some reason, so you may have to rearrange your tunnel layout or exact placement of the volumes. They’re very picky
- In the Pagan OMs they had the volumes extending down 8 units below the water surface, but set the “Water” – “SurfaceHeight” to “16” which placed the water splashes about 8 units above the water, but it looked okay and maybe that arrangement helps.
c) The lack of real water in Flesh doesn’t mean you have to weep and wail and avoid all water. Adding some shallow water and [gasp] “death water” can still add to the atmosphere and mood of your mission, giving it a nice drippy wet or maritime feel. It’s not a total loss, so just buck up and make the best of it!
6) FOG CAN BE GOOD (xvi. water and fog)
[summary]
a) Sometimes a mission can really benefit from a little fog or, on rare occasions, a lot.
b) Because you can only set “distance fog” for the whole level, you will have to be sure it is appropriate for every location you have, and if not, it may be best not to use it at all.
c) Fog will also seem to “light up” the distant areas, and then when you walk up to them they are darker and harder to see than when you were 40 feet away! Beware of this side effect and tweak your settings to minimize it if you can.
d) Fog also will slow down performance a little, so it might not be worth it if it’s not necessary.
e) Keep in mind that adding fog just to make your map “awesome” is probably a bad idea. Make a great map and you don’t need to rely on fog to add to the atmosphere.
f) But sometimes fog really is very appropriate and would not be a copout at all. Use it as a tool in good judgment, not as a crutch to make up for lack of creativity.
7) ADD FOG (xvi. water and fog)
[summary]
a) This map certainly doesn’t need fog, but let’s add a little anyway for practice, and it will probably look good as well.
b) Go up to “View” – “Level Properties” and expand the properties
c) Expand “ZoneInfo” and set both “bDistanceFog” and “bFogZone” to True.
d) Expand “ZoneLight”.
e) Select “DistanceFogColor” and click the “…” to change it to a darker grey for a more subtle fog effect. You can temporarily try it on pure white to see the garish look it gives! You could also choose any other color you want, the choice is yours.
f) Our map is pretty small and has small sections, so change “DistanceFogEnd” to “3000”
g) Change “DistanceFogStart” to “300”
h) That’s it, try it in game, and adjust the distances or color as desired.
- To make the fog transition look smoother, set the End number higher or the Start lower (you could have a stupid wall of fog by setting the Start and End to the same number).
- If you are adjusting the color, make sure you are adjusting the fog color and not the ambient color above! If you are trying to make drastic changes and nothing is happening, that might be what you were doing.
i) If you notice problems with surfaces looking bad in fog, you might have to redo some of your brushwork and try it again. If you can never make it look good, you might have to give up on fog and turn it off!
XVII. DETAILING AND OPTIMIZATION
1) GOOD SO FAR (xvii. detailing and optimization)
[summary]
a) Okay, your level is coming along really well at this point!
b) In this section I just want to give you some suggestions and hints about how to add some more details and improvements, plus a few instructions on tweaking your map for efficiency and performance.
2) LIVEN UP THE SEWER (xvii. detailing and optimization)
[summary]
a) First of all, go back through your map and add some more architectural detail to the sewer section.
b) You might carve some long upward sloping small tunnels for additional water inlets, and position them on a couple sides of the main sewer room.
c) Put grate covers (“WorldObj” – “Moving” – “Hinged” – “SpecialHinged” – “GenVent”) over the holes for good effect.
- To make the grates unfrobbable set the “Highlight” – “HighlightDist” property to “0”.
d) Add lights up in the tunnel shining down (“FleshLightType” – “FL_Spot”) and adjust their brightness, color (bluish), and radius until they look good but don’t go too far (lights that go too far are taxing on the engine). You’ll have to point them accurately as well.
e) You could carve out little water grooves from the water inlet tunnels in the floor and leading to the lower sewer section.
- Cover the grooves with more grates laid horizontally (you can embed them down into the main floor level a little, using a small grid size like 2 or even 1).
- If the grooves are shallow enough, AI will be able to walk over them on the grates without a hitch.
- You might want to set the “Render” – “CastShadows” property to “ShadowCasting_False” on all the grates to cut down on engine work.
- Add another spot light on each grate entrance with a blue barred-window light-texture to give the effect of the grates causing lined shadows.
f) You could add “Meshes” – “PIPE_ELECTRICAL-MECHANICAL” – “DOCxDrain01”, carve out a BSP spot for it, and stick it in.
g) Other things to look for and add might include utility lights set with dim red light, various pipes, water drip effects, smoke/steam, or a hundred other things.
h) Just add stuff even if you don’t know what you’re doing. The area will start to come to life and you’ll start being pleased at the results. After a while, you may decide some things don’t go well, so just delete them, no problem.
i) Remember that you can re-skin any meshes or actors to match the surrounding BSP (see “XIV. Texturing”), so don’t let a specific mesh’s lack of textures put you off.
3) LIVEN UP THE CITY (xvii. detailing and optimization)
[summary]
a) Back in the section “XII. Ramps, Stairs, and Ladders” I had you carve out the basics of a city section. Head back up there and flesh it out
b) Build in a store! (We’ll use it as part of the storyline when we do readables and objectives later)
- You can just carve out a doorway in one of the city area walls, then carve out interior rooms for the store rooms
- Add a small office where the owner would keep his books/records
- Have an area with counters/shelves of things to buy
- Lock the front door and set it to be pick-able
- And whatever else you want
c) Add any other things you want to your city area, such as a few building fronts carved out, fake doors, street lamps/lanterns, benches, gutters, corner meshes, overhangs, gates, sign posts, plants and hedges, whatever. Even more stuff to consider might include various décor, skybox “fake backdrop” textures, rooftop profiles, pipes, wagons, debris/junk, windows, etc.
- Keep in mind that static mesh browser objects can’t be moved or interacted with, whereas actor class browser objects can be, but are more taxing on the processor and could lower frame-rate (but usually not much)
d) Open up a city section or two in the editor (“Stonemarket1.gmp” is a good example) and look around for some ideas on what meshes to try out or how to set up the brushwork
e) Perhaps add a grate or two at the top of the ladder hole area (that leads down to the sewer), or make the ladder come out to a small grate room just below the street or into a pump station or whatever you can think of.
f) Spend a few hours making a nice looking city.
g) Be brave and just toss a bunch of junk in there, you’d be surprised how little bits of “nothing” can just seem to add life to a scene.
- Tip: Don’t be afraid to use a mesh only for a small part of the mesh, burying the rest of it in the wall or ground or something.
- Don’t be shy when doing this whole process, go ahead and get messy! You can always clean up later, and being a bit reckless can get the creative juices flowing.
4) QUICK ACTOR SELECTION (xvii. detailing and optimization)
[summary]
a) Here’s a handy trick you can do when you want to add something similar to an actor object you already have in your map (such as a different AI), but don’t want to have to expand the branches of the browser all the way down to it again.
b) Have the “Actor Class Browser” open (it doesn’t have to be open, but you can see the results best when it is), then right-click on the object you already have in your map, and click “Select Archetype: ______ in Browser”. Now your actor selection in the browser is in the neighborhood already and you can quickly find the new object you wanted.
5) NAVMESH OPTIMIZATION (xvii. detailing and optimization)
[summary]
a) Select the surface properties and check “Do Not Add to NavMesh” on all BSP surfaces where the AI will never walk, such up on high ledges on buildings and in your skybox room. Think of small areas too, such as under pipes, in sliding door cracks, etc.
b) Tweak/block NavMesh around edges of ramps so AI doesn’t try to go up the shortcut and get stuck. You can place small narrow blocking volumes on the edges at the top and bottom.
6) FRAME-RATE HELP (xvii. detailing and optimization)
[summary]
a) If you don’t pay attention, pretty soon you’ll probably find that your frame-rate in some areas gets pretty low. There are a few things you can do to help raise it up some.
b) Remember to turn off shadowcasting on all BSP surfaces, as mentioned earlier in “XIV. Texturing”.
- In the menus select “Edit” – “Select All Surfaces” (or hit Shift+S) to highlight them.
- Right-click on one, open the “Surface Properties”, and check “Do Not Cast Shadows”.
- Even when there is NOTHING behind a wall, the engine will calculate the shadow in that direction, so you can see how turning them all off would help.
- But this looks very bad in some places such as where a wall corner certainly should cast a shadow or torch light is obviously streaming through solid granite, so just go back and turn on the shadowcasting one surface at a time where needed.
c) Make sure you have added wisely placed zone portals, and don’t forget to select “View” – “Show Zone Properties Dialog” so the editor can add the “Zone Properties” for any new ones you’ve made.
d) Try not to have many shadowcasting lights visible in the same area. Here are some options:
- Remove some and rearrange the others
- Turn some into “OmniNoShadow” lights
- Lower the light radius setting
e) Turn on shadows for meshes only if you have to, or move the mesh into or up to the edge of a darker area and turn its shadow back off since now it won’t be missed.
f) Turn off the fog.
g) Rebuild the area to be more twisty with smaller view areas
1) SOUND ADVICE (xviii. sound)
[summary]
a) Things sounding dull in your map? Boring and quiet? You need to add some sounds! Trust me, good sounds affect the player enjoyment and immersion more than you might realize. Graphics hog the spotlight, but sound is almost just as important.
b) Be subtle and appropriate with your sounds, don’t go hog wild or all funky, or you’ll ruin the mood.
2) AMBIENT MUSIC (xviii. sound)
[summary]
a) Ambient music is rarely what you would normally refer to as music. Usually it consists of distant tones, repeating minor harmonies, and the sort, and can be mixed with real world sounds that fit the area such blowing wind or echoing dripping water.
b) In Thief, ambient music is best used to set a dark or mysterious mood, build tension, and keep you holding your breath as you sneak around. It should not be overpowering or too distracting. You want the average player to be affected the by the ambient, but not even realize it’s there without stopping to think about it.
- Jarring circus band music, for instance, would lead a player to say “What the freaking crap?”, severely breaking the game play immersion (unless you’re thieving from a haunted carnival and the music has nice evil overtones, in which case it might actually work).
====== ROUGH BELOW, UNFINISHED, MAY BE INACCURATE!!! ======
3) ADD SOME AMBIENT MUSIC (xviii. sound)
[summary]
a) Select the ZoneProperties actor in your first basement room. Open its properties and add the property “SoundStreaming” – “StreamSchema1”.
b) Click the “…” to open the SchemaBrowser. Go make a sandwich because it will take FOR-E-VER the first time. Seriously, your computer may even start to think it’s “not responding” but just wait a really really long time and it will finally be okay.
c) Find and select the schema you want (_______), then exit the browser (EXIT) and select “Use” in the properties window.
d) When you try it in game it should play the schema forever, even when you go into another zone. Also notice that the music seems to come from everywhere, rather than any one particular spot.
e) Try moving your starting point outside the basement room. Now when you try it in game it starts out quiet until you first enter the basement, then it plays the schema forever after that.
4) OTHER AMBIENTS (xviii. sound)
[summary]
a) If you add a different ambient to another zone (even a far away zone) in the same slot (“StreamSchema1”), it will change to that ambient until you go back into the basement room when it will change back.
- Try it by putting an ambient on one of your city street zones. Notice that the in-between zones don’t have any effect, because they don’t have any settings to force a change
b) If you set a sound slot to “Silence” then it will turn off any ambients from other zones for that slot (such as the slot “StreamSchema2”)
c) If you add a Non-Stream Schema ambient, it will play until it gets turned off, but will never come back on again. So streaming ambients will restart if you re-enter the zone, non-streaming ones won’t.
d) Each ZoneProperties actor can hold up to two streaming and three non-streaming ambients.
5) AMBIENT LIST (xviii. sound)
[summary]
a) Some ambients are more “musical” while others are more environmental. Experiment and mix!
b) Here are some good ambient schemas that are more environmental:
- amb_start the level starting sound, one-shot
- m02wind deep booming wind, ideal for large, empty buildings
- m05ocean ocean, lapping waves
- m08heartbeat grinding sound with beat
- m08hollow midrange tone, quite insistent
- m09wind wind sound, with bird/animal calls
- m12murmur ghostly chattering
- m13creaks the creaking ship
- m13hollow similar to m08hollow but slightly louder
- m13shimmer high-pitched squealing
- m13tone standard low-pitched background tone
- m14pipes low-pitched bubbling pipes
- m16cave deep wind sounds with occasional rocky creaking
c) Here are some good ambient schemas that are more musical:
- m02breaths tension building music
- m02thumps deep chords with low thumps, quite melancholy
- m04hammers hammering sounds and distant chants
- m04sub music
- m05piano1/2/3 piano music
- m06groove music
- m07song gentle bell sounds
- m07song2 bell/hammer sounds with low melody
- m08heartbeat low tone with heartbeats
- m08mel dissonant string melody
- m08swell dissonant, echoing reverse string hit
- m08vox low hums and drumbeats
- m09haunted echoing noises, children's voices, haunted voices, screams
- m09haunted2 low humming, echoing noises, children's voices
- m09haunted3 low, dissonant tuba sounds and strings
- m09stitch string theme with an uneasy feeling; voices
- m09stitch2 similar to m09stitch
- m12in tavern
- m14hum theme music
- m16auldale city music
6) OTHER SOUNDS (xviii. sound)
[summary]
a) Besides ambient music, you also want to have other various sounds.
b) The game automatically takes care of a lot of sounds (voices, torch fire crackling, objects tumbling, etc), but you will want to add more to specific areas or items to spruce things up.
c) Be careful not to overload an area with too many sounds, or some soundcards won’t be able to handle it correctly and you could cause crashes as well.
[summary]
a) “Actor Class Browser” – “Marker” – “KeyPoint” – “AmbientSound”, and stick it somewhere in your sewer room.
b) Open its properties and add “Sound” – “SoundAmbient”.
c) Click the “…” to open the schema browser and find and select (_______)(waterdrip_lp). Close the browser and select “Use”.
d) In game you should hear the sound when you are near the marker location, sounding like it’s coming from that spot.
- The distance you have to be to hear it is determined by the schema itself, not the AmbientSound object, so if you want to adjust it you’ll have to mess around with that.
e) You can add sounds to other objects you already have places in the level, such as a pipe or crate. Just add the property “Sound” – “SoundAmbient” and select the schema.
[summary]
a) In your ZoneProperties actors, you will want to add in the appropriate EAX settings, to add echo or make the room feel small, large, outdoors, etc.
b) “View” – “View ZoneProperties Dialog”. Select zones and look in the 3D view to see them become bright orange.
c) Right-click on them and choose “Edit Reverb Style” (the only choice). Select a good style! Repeat for various zones and choose appropriate styles.
d) Be sure you deselect any selected zones before closing the ZoneProperties Dialog, or else those zones will stay bright orange in the 3D view! Close the window.
e) Test in game!
f) Anything you hear will sound like the reverb setting of the zone you are in, not necessarily the zone where the sound is coming from. So if you set a hall to be echoey and a room non-echoey, and you are in the hall and you hear people talking from in the room, they will sound echoey.
g) Hopefully you have an EAX enabled sound card, otherwise it will all sound the same as before.
h) If you don’t have an EAX card, try to pick settings that look like they’ll make sense, as the rest of us would really appreciate it, thanks.
1) ADD A BOOK (xix. readables)
[summary]
a) Having readable things (books, plaques, scrolls, etc) in your mission really help add a sense of reality to the game world, helping to create immersion and depth to the Thief experience. So don’t make a mission without at least SOMETHING that can be read, even if it’s only a street sign!
- Loading quotes and the briefing/debriefing (which we’ll go over in a later section) are not enough; you still need to have some in-game readables.
b) “Actor Class Browser” – “WorldObj” – “Readable” – “(book)”. Put it wherever you want, such as on a table or shelf or anywhere.
c) Outside T3Ed, open up Notepad and type in the following:
blah blah blah
blah blah
blah blah
blah blah blah
d) Save the file into your Thief3Edit/CONTENT/T3/Books/English folder, and save it as komag.sch (force it to have .sch as the extension if you have to)
e) Back in T3Ed, select your book and add the property “Book” – “BookFileName” and set it to the “komag.txt” (not komag.sch).
f) Test it in game! If it crashes, you did it wrong, shame on you!
[summary]
a) The four language versions of your text need each be in quotes. As most of you are English only speakers, and since most others speak English, you can simply make four English copies of the text.
b) (FROM WIKI)
- Each "command" must be separated with \n
- Each of the lines (inside the quotes) must start with a font, such as \n<font=Papyrus14>
- <p> is a new paragraph
- <pb> is a page break
- <jl> justifies left
- <jc> justifies centre
- <jr> justifies right
- Font color can be set by using <dc=0,0,0> in the format R,G,B where each number is an integer between 0 and 255.
- Known valid font tags/sizes:
<font=Papyrus14>
<font=Papyrus20>
<font=SmallFont10>
<font=MediumFont14>
- Images and maps can be inserted, but I have not tried that yet.
- For more info it is easier to check the existing books in \CONTENT\T3\Books\English\. I expect you can substitute English with French, German or Italian
[summary]
a) When it comes to T3Ed, scripts are the power of God given to man. Accordingly, make good use of them so you don’t offend Deity; don’t abuse them, yet don’t fear them (remember, God is love), and most of all, use them creatively and wisely.
b) Here are simply a bunch of tips and tactics to follow when working with scripts. You’ll be making a lot of scripts in the last sections of the tutorial, so it should come in handy then.
[summary]
a) When you’re in the “Trigger Script Manager” and want to choose a script to add to the object, select the script and hit “Cancel” instead of “OK” because it’s a LOT faster.
b) You can still then select “Use” under the “Properties” – “TriggerScripts” list and it will use the script you had selected before canceling.
c) But if you make a new script you have to click “OK” to compile and save the scripts.
[summary]
a) The Trigger Script Manager window is messy and full of a huge mish mash of scripts; let’s organize it a little, shall we.
- Keep in mind that this is fully optional, and if you like the mess you can just leave it, everything will still work.
b) Select the “GiveLockPicks” script we made long ago, click on “Group”, and type in “MYSCRIPTS” or “BENSCRIPTS” or something that denotes you personally (all caps like that will help it stand out in the list).
- A new folder should have been added to the list (the list is alphabetical, so you may have to scroll down or up to find the folder) and the lock picks script should now be in the new folder.
c) Select “GiveLockPicks” within the “MYSCRIPTS” folder and click “Group” again to make another new folder, this time calling it “KomagTut”.
- We’ll add any new scripts we make for the tutorial mission to this folder.
d) But the lock picks script is actually one you’ll want to use for other missions you make, not just the tutorial, so drag and drop it out of the “KomagTut” folder and back into the “MYSCRIPTS” folder, leaving “KomagTut” empty for now.
e) From now on forever, any new script you make should go in “MYSCRIPTS”, or in a subfolder within it.
- That will help you a lot just to be able to always quickly find the new script you made without having to remember where it is or what exactly you called it.
f) Here are some other tips to help you organize your scripts:
- You can drag and drop scripts to and from any folder, but you can't drag folders into it or out of another folder.
- Anytime you want to add a folder you have to select a script and click “Group”.
- If you want to move a folder, you’ll have to delete the folder with “Ungroup” (which allows any scripts in the folder to “spill out”), move one of the scripts to the new desired location, and use it to make the new folder there.
- You can rename folders by “Edit”ing them.
- Here’s a little trick I did to clean up the big mess. I selected one of the many random scripts hanging around, clicked “Group”, called the new folder “OriginalMisc”, and then dragged and dropped every single script that was not already in another folder into it. Now my scripts are much neater! Cleanliness is next to Godliness!
4) TURN OFF HELP POP-UPS (xx. scripts)
[summary]
a) To get rid of the help pop-up texts on tools (like you got them the first time)…
b) Create script to set flag "HelpTxtToolNameBlahBlahBlah" to TRUE, map change BLAH expire 20 (?)
c) Make a single script to turn on all the flags for items in the mission
d) Then add the script to a volume at the beginning to set it off when Player enters/exits volume
e) Put this script in MYSCRIPTS, use for multiple missions
1) NEW SAVE SYSTEM (xxi. preparing the mission)
[summary]
a) Before we start this section, let me just mention that what follows in these final sections is intended for use with a one-map mission. If you were making a mission with more than one map, with loading zones in-between, the process would more complex with more steps than I’m going to show you.
- There are other tutorials out there for that, but for our purposes I’ll just guide you through the process of preparing a single-map mission.
b) Also, we’ve been constantly saving under a new name, such as “KomagTut24.gmp”, but for the final version of our map we’re going to be calling it just “KomagTut” without any number.
c) When you work on your mission from now on, continue to save using your numbering, but then also save it as just “KomagTut” for testing purposes each time you complete some more steps and want to try it out in normal game mode as outlined further below.
2) KOMAGTUT (xxi. preparing the mission)
[summary]
a) Go to “View” – “Level Properties”, select “LevelInfo” – “ConversationPackage” and put in “KomagTut” (without quotes, as usual).
b) Select “LevelEnterText” and type in “T_LevelEnterTextKomagTut”
c) Select “Title” and type in “KomagTut” (what your gmp file is named).
- This title is used for a number of things, including teleporting from the entry map when playing.
d) Now, you just typed something like “KomagTut” three times, and you’ll pretty much be using that for everything that follows, but if you were making a multi-map mission then those names would vary. Sometimes you would use the general “KomagTut”, and other times you would use “KomagTutFront” or “KomagTutRear” or whatever you named your different sections.
- But, as I mentioned a minute ago, I won’t be going into that in this tutorial.
3) BRIEFINGS (xxi. preparing the mission)
[summary]
a) With T3Ed closed (close the editor program), go to your Thief3Edit\CONTENT\T3\Books\Enlish\Briefings folder. Create a new text file called “KomagTut.txt” and type in:
VERSION 2.0
TextEntry
Bank
lang_english 2004-02-20 21:36:00 "<font=Papyrus14><dc=97,80,109>\nThis is the briefing that you will read when you start the mission."
lang_french 2004-04-22 14:52:42 "<font=Papyrus14><dc=97,80,109>\nThis is the briefing that you will read when you start the mission."
lang_german 2004-04-29 11:40:37 "<font=Papyrus14><dc=97,80,109>\nThis is the briefing that you will read when you start the mission."
lang_italian 2004-04-23 16:18:39 "<font=Papyrus14><dc=97,80,109>\nThis is the briefing that you will read when you start the mission."
b) Of course, you can put translated texts into the French, German, and Italian sections if you wish. Save the file and then rename it to “KomagTut.sch”.
- In order to make sure Windows doesn’t name it “KomagTut.txt.sch” or “KomagTut.sch.txt”, you may have to have your Windows “Tools” – “Folder Options…” – “View” set without a check next to “Hide extensions for known file types” so that you will see the extensions such as exe and txt to better manipulate and control them.
c) Now go to the DeBriefings folder, create a new file “KomagTut.txt”, type in:
VERSION 2.0
TextEntry
Bank
lang_english 2004-02-20 21:36:00 "<font=Papyrus14><dc=97,80,109>\nThis is the debriefing that you will read after you finish the mission."
lang_french 2004-04-22 14:52:42 "<font=Papyrus14><dc=97,80,109>\nThis is the debriefing that you will read after you finish the mission."
lang_german 2004-04-29 11:40:37 "<font=Papyrus14><dc=97,80,109>\nThis is the debriefing that you will read after you finish the mission."
lang_italian 2004-04-23 16:18:39 "<font=Papyrus14><dc=97,80,109>\nThis is the debriefing that you will read after you finish the mission."
d) Rename it “KomagTut.sch”
4) OTHER TEXTS (xxi. preparing the mission)
[summary]
a) Now go to the String_Tags folder. You’ll want to edit some of the sch files here, so in order to do it as easily as possible, right-click on one of them and select “Open With” – “Choose Program…”, select Notepad from the list, check the box next to “Always use the selected program to open this kind of file”, and click OK.
- Now you’ve associated all sch files with Notepad, which is nice and convenient because now you can just double click the file and it will open in Notepad for your editing pleasure.
b) So open up MapRooms.sch and, at the top just under “VERSION 2.0”, add the lines:
TextEntry
T_EnterMissionNamekomagtut
lang_english 2004-02-29 21:48:00 "Komag Tutorial Mission"
lang_french 2004-03-25 13:58:31 "Komag Tutorial Mission"
lang_german 2004-03-20 17:14:06 "Komag Tutorial Mission"
lang_italian 2004-03-25 07:24:35 "Komag Tutorial Mission"
- (I’m not sure if this “T_EnterMissionName” setting has to have a lower case “komagtut” but all the OMs are. It may not matter.)
c) Open Misc.sch and add the same:
TextEntry
T_LevelEnterTextKomagTut
lang_english 2004-02-29 21:48:00 "Komag Tutorial Mission"
lang_french 2004-04-29 12:12:22 "Komag Tutorial Mission"
lang_german 2004-03-20 17:14:06 "Komag Tutorial Mission"
lang_italian 2004-03-25 07:31:09 "Komag Tutorial Mission"
- (In this case, the OMs used upper case for “T_LevelEnterText” titles, and I don’t know why the difference. Perhaps the “T_EnterMissionName” needs to be lower, but the “T_LevelEnterText” just needs to match whatever you put in the “LevelInfo” – “LevelEnterText” property.)
- This file would allow for a large mission with loading zones and therefore different sections, all with different titles, such as “Upper Clocktower” and “Lower Clocktower” in the OMs
d) Finally, open Quotes.sch and add:
TextEntry
T_komagtutLoadingQuote0
lang_english 2004-08-23 18:16:39 "A quote to be shown when the level is loading."
lang_french 2004-08-23 18:16:39 "A quote to be shown when the level is loading."
lang_german 2004-08-23 18:16:39 "A quote to be shown when the level is loading."
lang_italian 2004-08-23 18:16:39 "A quote to be shown when the level is loading."
TextEntry
T_komagtutLoadingQuote1
lang_english 2004-08-23 18:16:39 "Another quote to see during other loads."
lang_french 2004-08-23 18:16:39 "Another quote to see during other loads."
lang_german 2004-08-23 18:16:39 "Another quote to see during other loads."
lang_italian 2004-08-23 18:16:39 "Another quote to see during other loads."
- (Again, all the OMs are lower case here, don’t know if it’s necessary)
- You could add more loading quotes if you want to, the OMs usually have at least three and as many as seven! Additional quotes just get a higher number, such as T_komagtutLoadingQuote2, 3, 4, etc.
- I’m not sure if the quotes are randomly polled, or if the first always comes first then the rest are random, or what.
5) BACKUP ENTRY (xxi. preparing the mission)
[summary]
a) OK, now we’re getting closer to running your map outside the editor through the main game. We’re now going to slightly edit the “Entry” map so it will send the player to your mission instead of to the “Inn” training mission. But don’t start the editor yet!
b) First of all, make a backup of both “Entry.gmp” and “Entry.unr”, found in your Thief3Edit\Content\T3\Maps folder. To do this, I suggest simply copying both files and naming them “Entry_ORIGINAL.gmp” and “Entry_ORIGINAL.unr” and leaving them in your maps folder. Then you can edit the “Entry.unr” (and generate the new Entry.gmp) without fear of messing anything up.
6) EDIT ENTRY (xxi. preparing the mission)
[summary]
a) Now start the editor and load “Entry.unr”.
b) Select the “EnterMissionInfoInn” actor (a little “E” with a red arrow pointing into an open blue doorway), and expand “Properties” – “EnterMissionInfo”.
c) Next to “EnterMissionBriefingFileName” type in “KomagTut.txt” (oddly, NOT “KomagTut.sch”). Later on if you make a custom sound file or want to use an existing one, you can enter the name of it next to “EnterMissionBriefingVoiceOverSchemaName”, otherwise let it be blank.
d) Also, because the game was set up to send you to the “Inn” training mission, it also didn’t allow you select any difficulty level at that point, but of course we want to able to. Under “EnterMissionInfo”, add the property “EnterMissionDisableDifficultySelect” and set to “False”.
- Now’s a good time (and perhaps I should have had you do it earlier) to select “Show Non-local Props” in the lower right section of an object’s properties window.
- This shows the properties that aren’t specific to this exact object; the properties it inherits from the object tree above it. That way, you wouldn’t have had to actually add the “EnterMissionDisableDifficultySelect” because really it’s already there, and you could just see it and change the setting to “False”.
- This can crowd up the properties window, so it’s a good idea to only use it sometimes or until you’re more familiar with the properties and don’t need to see them all. But it will be useful for the rest of the tutorial, so you may want to turn it on for a while.
e) Close the properties for the “EnterMissionInfoInn” actor. Select the “ExitMissionInfoEntry” actor (a golden square-bottom tied-top bag that says “Thief END”), and expand “Properties” – “ExitMissionInfo”.
f) Next to “ExitMissionDestMapName” type in “KomagTut”.
g) Next to “ExitMissionDestTeleportName” type in “StartKomag”
h) Okay, that’s it for the entry map for now, so save it, and then “Export Map For Game” to generate the gmp version.
7) NEW PLAYERSTART (xxi. preparing the mission)
[summary]
a) We’ve been using a “PlayerStart” starting point in our map to test it in game mode. This will not actually be used the same way in the final version to play outside the editor, although we can leave it in there without any problem. But we’ll have to add another starting point with some different properties to get set up for the final version.
b) Open back up your KomagTut37 or whatever, and go to “Actor Class Browser” and to go “Marker” – “Keypoint” – “NavigationPoint” – “PlayerStart”. Add a new “PlayerStart” object right near your current “PlayerStart” (don’t get rid of the old one, keep them both).
- If you’ve ever opened the OMs in the editor you will see they use two starting points just as you are now going to use, one for editor testing, the other for final version game playing
c) In its properties, add “Teleport” – “TeleportDestName” and enter “StartKomag” to match the name we gave in the entry map.
d) Rebuild. Save your map with a number as usual, but then save it again just as “KomagTut.unr”. This will now match all the times we’ve entered “KomagTut” as the map name in the various sections above.
e) Then go to “File” – “Export Map For Game” to generate the KomagTut.gmp needed file for out-of-editor play. Close T3Ed.
8) TEST MISSION (xxi. preparing the mission)
[summary]
a) You can now actually test your mission by starting the normal game!
- We’re not yet using your regular “Thief3” installation directory though, so don’t mess with that.
b) Open your Thief3Edit\System folder, and double-click on T3.exe or T3Main.exe to start Thief 3 (I don’t think it matters which, but if one gives you trouble then try the other and let me know about it). Select “New Game” and play your mission!
c) You should be able to see the text you wrote for the briefing, the mission name on top, some other things, and a standard starting gear of 10 water arrows, your dagger, and your blackjack.
- If the briefing text is present but dark looking, be sure you have the “<font=Papyrus14}{dc=97,80,109>” bit in the briefing files (if you followed the above instructions you’re all set; it’s just that other tutorials have sometimes left this bit out).
9) STARTING INVENTORY (xxi. preparing the mission)
[summary]
a) Now that we’re starting to finalize the mission and create a final game play version, we need to set up a new working inventory, since the method we used a long time ago doesn’t work any more.
b) Open the “Entry” map, open the properties of “EnterMissionInfoInn”, and expand down to “EnterMissionInfo” – “EnterMissionDefaultInventory”.
c) Here you will repeat the old process of adding inventory items by typing their names in, and setting the number you want (up to the “MaxInventoryStack” setting for that item, set by the gamesys).
d) Here’s the list if items again for reference:
GarrettBlackjack
GarrettDagger
BroadheadArrow
NoisemakerArrow
ExplosiveMine
FlashBomb
GasBomb
FireArrow (or FireCrystal)
GasArrow (or GasCrystal)
MossArrow (or MossCrystal)
WaterArrow (or WaterCrystal)
HealthPotion
HolyWaterPotion
OilFlask
e) It already starts with the blackjack, dagger, and 10 water arrows, which you can keep or change as you see fit. When you’re done, save and export the “Entry” map.
f) It should work fine now, except for a small bug which causes some of the items not to show up on the pre-mission “Gear” screen, but it’s a minor problem that most people won’t even notice. The items WILL show up properly while playing or after a restart of the mission.
1) PRE-OBJECTIVES (xxii. objectives part 1)
[summary]
a) Before you get started, double check your user.ini file (in your main Thief3Edit folder) and if they aren’t there then add the lines:
[Conversations]
SchemaChangesAllowed=true
- This will allow you to make the changes below, which make objectives possible.
b) We will be working with “Conversations”, or a variant of scripts. Some conversations are actual dialogs with AIs talking, but not the ones we’re going to be dealing with now. These will just be series of instructions the game will use to process your objectives.
c) We’ll also set up some more “TriggerScripts" to work with the conversations.
2) TWO KINDS (xxii. objectives part 1)
[summary]
a) The objectives we primarily think of when playing a mission are the mission specific objectives, such as stealing a certain object, or performing some other specific action for that mission.
b) But another type of objectives is determined by the difficulty setting. Examples are the loot percentage requirement, number of special items to steal, etc.
c) The methods of setting up these two types of objectives are very different from each other.
d) We’ll be setting up two mission specific objectives, but only the first one will be visible at first. The second objective (escape) will show up after the first is completed.
- Steal the Hawk Statuette
- Escape back to the sewers (hidden)
e) We’ll also have a couple notes, with the second note only showing up at a certain point if the information in it is still relevant.
3) PLANNING (xxii. objectives part 1)
[summary]
a) It’s always a good idea for you work out in advance what exactly you want to do when you’re getting ready to add objectives to any mission. Remember the five P’s: Proper Preparation Prevents Poor Performance!
b) With that in mind, let me explain what the plan is in a bit more detail.
c) We’re going to have the mission be very simple; the only objective the player will see is to steal the hawk statuette. They will also have one note, saying it should be an easy job with few guards.
d) If the player makes his way straight to the chest that the statuette is in, they will frob the chest only to discover that it’s locked and can’t be picked!
e) Nearby at a desk, the player can read a diary of the nobleman which will tell them that he had the special lock made and carries the key on his person at all times, and also how he has spent a lot of time in recent weeks walking around in his family crypt, pining over the loss of his three sons. At that point a new note will pop up, saying that the nobleman has the key with him and he may be in the crypt.
f) After the player finds the crypt, steals the key from the nobleman, comes back, opens the chest, and takes the statuette, the hidden objective will pop up, saying that the statue is too conspicuous for the streets, and that you should head back to the sewer.
g) But let’s back up. What if the player first goes to the crypt and gets the key before reading the diary? In that case it would be dumb to later add a new note about where to find the key. To avoid that, we’ll set it up so that the new note will not show up if the player already has the key.
h) Finally, when the player goes back to the starting point in the sewer the second objective will be completed and the mission will finish. But we have to make sure that the objective can’t get checked off before the theft, such as the player going a little ways and just turning around and going back to the start! So we’ll set it up to avoid any problems like that.
i) Does it sound like a good plan? Of course it does!
j) Okay, time to start back up T3Ed again!
4) LOADING SAVES (xxii. objectives part 1)
[summary]
a) If you’ve been following along the tutorial closely, you most recently saved your mission as “KomagTut.unr” without any number on it (such as “KomagTut42.unr”).
b) But just barely before that you DID save using a number. So now when you are loading the map, you can just load the one with the last number, since it’s exactly the same as the one without the number.
c) This way you always keep your latest number current, and never have to get mixed up whether the one with or without the number is the latest one.
d) Again, this is just a good habit to get into with your save system when doing the last steps for a mission as we are now, to always save with a number, and then and only then to save without a number, for testing purposes.
e) If you save without a number, then suddenly remember something you want to add or edit, be sure to save with a number immediately afterwards, and then without a number again. It’s a slight chore, but it saves headaches of accidentally loading the wrong one and losing small important edits.
5) ADD A GOAL (xxii. objectives part 1)
[summary]
a) Let’s start off with the basic “Steal this item” objective, which we have as “Steal the Hawk Statuette”.
b) Select “View” – “Level Properties” – “Properties” – “LevelInfo” – “Conversation Package”, and type in “KomagTut”.
c) Select “View” – “Conversations” to open the Conversation browser. (It might take a very long forever as it loads them, so wait patiently.)
d) Find and select “PlayerGarrett” in the tree, then right-click on it and select “Add Conversation”.
e) In “Conversation Name” type “KomagTutObjectives”.
f) Check the box next to “Remain in First Person”.
g) Down to the left, click the “Add Map” button and type “KomagTut” (the same as your “Conversation Package” name). Click on “Add Map” to the right. Then select “KomagTut” and click “OK”.
- You should now see the map name “KomagTut” in the “Usage” window. Click the final “OK”.
h) Select your new conversation (under the PlayerGarrett category).
i) In the big blank window on the right, right-click and “Add” – “Goal”
j) Type your goal name, descriptive of the item you want to steal, in this case “obj_StealHawkStatuette” will work well.
- Always remember your goal names exactly (or write them down), for later use.
k) Leave the “Initial State” selections as “Pending” and “Objective”. Set the “Do this objective last” option to off by unchecking the box (this is not going to the final objective).
l) Now you can type out the text you want for the goal. Don’t make it too long, but more than three words would help to make it more interesting.
- “Steal the Statuette” is boring, but…
- “Your friend Basso’s sister has always had her eye on Lord Bartholemew’s silver hawk statuette. If you grab it to give to her later, she may just let you back into her graces.” …is much better!
m) When you’re done, click “OK”. (It might take forever at this point as well, so be patient.)
6) MORE GOALS (xxii. objectives part 1)
[summary]
a) Add another goal:
- Call it “obj_EscapeToSewer”
- Leave “Do this objective last” checked (this will be the final objective)
- Set the “Initial State” to “Hidden” and “Objective”.
- In the “Goal Text” type “The hawk statuette is larger and more conspicuous than you thought it would be. It would be too risky to traverse city streets with it, so head back to the sewers to make your escape.”
b) Add another goal:
- Call it “obj_NotePlan”
- Uncheck “Do this objective last”
- Set the “Initial State” to “Pending” and “Note”
- In the “Goal Text” type “It should be a simple heist, few if any guards around, and the streets in the neighborhood are usually dark.”
c) Add another goal:
- Call it “obj_NoteKey”
- Uncheck “Do this objective last”
- Set the “Initial State” to “Hidden” and “Note”
- In the “Goal Text” type “Bartholemew keeps his chest key on his person at all times, and he often wanders around in his private estate crypt.”
d) Finally, in the window, right-click again and select “Add” – “End”.
- Make sure the “End” is indeed at the bottom. If you add more goals later, you’ll need to move “End” down so it’s again at the bottom.
e) In the menus, select the following:
- “File” – “Save”
- “File” – “Compile” (click “Yes”).
- “File” – “Export Mission Objectives”
f) Close the “Conversation Editor”
7) OBJECTIVES SCRIPT (xxii. objectives part 1)
[summary]
a) In order for the objectives to work, we need to set up the map to run the objectives conversation when the map starts.
b) Select your “PlayerStart” (which one? either?), add “Properties” – “Scripts” – “TriggerScripts”, click “Add” and then “…” in the new listing.
c) Make a new script (be organized now and make it within your new “KomagTut” folder!), and call it something like “ObjectivesStart”.
d) In “Conditions” select “Scripts” – “When map starts, arriving from a different map”.
- Be sure you don’t select “Scripts” – “When map sim starts, either from travel, load, or launcher” or “Player” – “When player starts map”, because those will try to run the script every time the map starts, even if it’s just from loading a save or something, which could reset things and mess it all up. We just want the objectives script to run once and that’s it.
e) In “Actions” select “Conversations” – “Queue conversation [string] to play”
f) Click “[String]” and type in (or select if it’s there) the name of the conversation you set up for your objectives, which is “KomagTutObjectives”.
g) Click “OK” to exit the script editor. With the script manager still open, select the new script you made. Then click “OK” below to close the Trigger Script Manager and to save and compile the scripts again (it takes a long time; wait for it to finish).
h) Back in the “PlayerStart” properties under Scripts, find the new blank script line (that currently says “None” and then click on “Use” to the right, and your new script name (“ObjectivesStart”) should show up!
8) TEST AND FIX (xxii. objectives part 1)
[summary]
a) In order to test these objectives you’ll have to enter your map from another map, as you set in the conditions of the script. To do that you’ll need to use the entry.gmp and teleport to your map, thus starting your map, “arriving from a different map”. That’s part of why we edited the entry map as we did above in the PREPARING MISSION section.
b) Okay, let’s try it out! Rebuild, save your map with a number, then as “KomagTut.unr”, export it to make the gmp, close T3Ed, go to Thief3Edit\System, and start T3.exe or T3Main.exe.
c) At this point when you select “New Game” you should now be able to see the visible objective and note that you wrote above! You shouldn’t see the hidden objective and note. How exciting, it’s starting to work!
d) If you’re only getting empty check boxes and no text for the goals, there are a couple steps to try.
- Open the conversation editor (“View” – “Conversations”), and select your conversation. Do “File” – “Generate Schemas” (wait forever for it to finish)
- Then “File” – “Repair Schemas”, then “OK”, then “Yes”.
- Finally, Save, Compile, and Export Mission Objectives again.
- This is a common problem with more than one cause and which affects people differently and seemingly inconsistently. If it’s still not working right, there are some other possibilities that I won’t go into here. As with any problems you can’t fix, there is always help on the ttlg.com Thief forums. Good luck!
9) FROB OBJECT SCRIPT (xxii. objectives part 1)
[summary]
a) Okay, if you played your map for any length of time you may have quickly realized that there’s nothing you can do to complete the objective! Let’s fix that little problem.
b) Add a statuette to your map if you don’t have one already, under “Actor Class Browser” – “WorldObj” – “InventoryObject” – “Loot”.
c) Select it and add the property “Scripts” – “TriggerScripts”. Under the new scripts section click on “Add” to the right, and the in the new script listing click on “…” to open the script manager.
d) Make a new script and call it something like “HawkStatuetteStolen” or “StatuetteTheft” or whatever.
- The name is just for you to know what it is; it doesn’t have to be any exact name to match another name or setting.
- The idea is that this script will run when the player grabs the statuette.
e) In “Conditions” add “Frob” – “When I am frobbed by player”
f) In “Action” add “Goals” – “Set Goal [String] to [Enum:eGoalState]”
g) Click on the “[String]” and type in the exact name of your first objective, which is “obj_StealHawkStatuette”
h) Click on “[Enum:eGoalState]” and select “kGS_Success”.
- This means that when you frob the thing the script is attached to (the statuette), it will set your objective (steal the statuette) to completed.
i) Add another Action to this script, another “Goals” – “Set Goal [String] to [Enum:eGoalState]”, but this time set the “[String]” to your second objective which is “obj_EscapeToSewer”, and set the “[Enum:eGoalState]” to “kGS_Pending”.
- This means that at the same time it will also “unhide” the second objective (go to the sewers to escape).
j) Click “OK”, select the new script, and click “OK” below to save and close the scripts (and patiently wait…).
k) In the statuette properties find the new script line, click “Use” to the right, and your new script name (“HawkStatuetteStolen” or “StatuetteTheft”) should show up.
l) Rebuild, save with number, then save as “KomagTut”, export, close editor, start up Thief3Edit/System/T3.exe and see if it works!
- (This is the last time I remind you to do all these steps!)
m) If all goes well, when you grab the statuette you’ll get the “Objective Complete” message and hear the congratulatory sound, and you’ll also get a “New Objective” notice. Look at your goals and you should now see the first one checked off and a new one that just showed up.
10) GO TO LOCATION SCRIPT (xxii. objectives part 1)
[summary]
a) Now let’s set up the second objective, “Escape back to the sewers”.
- Any objectives that have to do with going to a location will usually be done using volumes.
- You’ll simply set up a volume with a script that fires off whenever Garrett enters it (there are other settings you can choose as well, such as when he exits the volume).
b) Bring in your builder brush and set it to be a cube of some normal size. Then create a volume by clicking the blue cube “Volume” operation button and selecting “Volume” at the top of the pop-up list.
c) Move the builder brush away, select your volume, and place it around the entry area of your map (the end of the tunnel in the sewer section).
d) It doesn’t have to be exactly lined up with anything, and it’s a good idea NOT to line it up on top of the walls because then it would hard to select. So just encase that small area for a few feet, letting the boundaries stick out a ways for convenience.
e) Select the volume, add the property “Scripts” – “TriggerScripts”, “Add” a script, click the “…”. Create a new script and call it whatever you want (perhaps “SewersEscape”).
- Add the condition “Volumes” - “When linked volume(s) [LinkFlavor] are breached by [Enum:eObjectCategory]”.
- Change the “[LinkFlavor]” to “[MYSELF]” and the “[Enum:eObjectCategory]” to “[Category_Player]”.
- Add the big condition “Query if all goals are completed or cancelled, exclude hidden [Bool] ? include ‘do last’ goals [Bool] ?”.
- Change the first “[Bool]” to “[TRUE]” and the second one to “[FALSE]”
- Add the action “Goals” - “End Mission [Bool] successfully” and set it to “[TRUE]”.
- Add the action “Goals” – “Set goal [String] to [Enum:eGoalState]”.
- Change the “[String]” to “obj_EscapeToSewer”, and change “[Enum:eGoalState]” to “kGS_Success”.
- Add the action “Scripts” – “Reset script conditions and actions”.
f) With the new script selected, click OK to save and exit the Trigger Script Manager (wait for it to cook). Then “Use” the script into the properties of the volume. That’s it!
11) DO LAST (xxii. objectives part 1)
[summary]
a) When we originally set up this objective in the Conversation Editor we set it to “Do this objective last”. However, that setting alone is not sufficient to avoid problems with the player completing the objective early.
b) The purpose of the “Do…last” setting is to allow the script we just set up to work properly. One of the conditions was to check if all the goals are completed (and only do the actions if they are), but to NOT check whether any “Do this objective last” goals are completed. This makes sense because how could you ever finish the mission if you had to complete the escape objective before you are allowed to complete the escape objective?!?
c) Since we set the escape objective as a ‘do last’ goal, the script will allow it to be uncompleted, but will still make sure everything else is completed, and THEN it will do the actions, one of which is to set the escape objective to completed!
d) By the way, all the objectives you entered into the Conversation Editor will show up in game in the order you put them, except your “Do this objective last” one which will be listed last, even if you typed it first or in the middle.
e) Try it out in game. Hopefully the objectives work great, and after you steal the hawk and come back to the sewer you get the big pop-up asking you if you want to finish.
- If you say no, you should be able to go elsewhere and come back and get the pop-up again (the “Reset” action it the script allows this to repeat forever if you want).
- If you say yes, then you can read your debriefing and feel happy about a job well done!
f) But not quite…
12) FLAG SYSTEM (xxii. objectives part 1)
[summary]
a) We still have to set up the notes and the whole “locked chest and key” thing. So let’s get to it.
b) Add a chest, lock it, and set it to match a certain key (and stick the hawk inside).
c) Add a nobleman (aristocrat with beard, or other noble), attach the key to his belt, and set him patrolling around the crypt (expand the crypt area if necessary).
d) Go to “View” – “Global Variables” – “Flags”. A new window “Flag List” opens up which is very simple, merely a list of flags used in various missions.
- All you can here is “Add” or “Delete” flags.
- If you are going to make a big complex mission or campaign, you perhaps would want to delete all the original flags just to clear up the list for your own viewing ease.
- But if you are just going to make one or two or three flags, then don’t worry about it.
e) Type into the top box “KOMAG_KeyTaken” (or whatever you want) and click on “Add” to make the new flag.
f) Script on key:
- “Conditions – “When I am frobbed by player”
- Actions – “Set flag [KOMAG_KeyTaken] to [TRUE] expires on map change [FALSE] expires on mission [1]”.
g) Script for new note, placed on the nobleman’s journal:
- Conditions – “When I am frobbed by player”
- Conditions – “Query if flag [KOMAG_KeyTaken] is set to [FALSE]”
- Actions – “Set goal [obj_NoteKey] to [kGS_Success]
h) This checks the flag, and if it’s false, then it pops up the new note. But if the flag is true (if the key’s already been stolen) then it does nothing.
13) WORKS GREAT! (xxii. objectives part 1)
[summary]
a) That’s it, all the objectives should work perfectly now!
b) There are a LOT of settings we’ve gone through in the section, so if something’s not working there are a lot of possibilities why.
c) I’m sorry, but you’ll need to just go back and make sure you didn’t miss a step or name something wrong (at the times when the exact name matters), or some other small error.
1) DIFFICULTY OBJECTIVES (xxiii. objectives part 2)
[summary]
a) Your main objectives and note now work, but you still can’t select the difficulty level or have any special rules/goals/limitations regarding difficultly levels such as not killing innocents or stealing a certain percentage of loot.
b) Back when we edited the Entry.unr map we edited the “EnterMissionInfoInn” and “ExitMissionInfoEntry” actors. You may have also noticed the “DifficultyInfoInn” (a brown “D”) at the time.
c) We need to add these three actors to our map as well. They help with the transition between maps, making everything smooth, and keeping track of some different information such as your loot and other stats.
2) THE GAMESYS (xxiii. objectives part 2)
[summary]
a) We need to add these new actors straight from the “Actor Class Browser”, but they also need to be tailored to our mission, which means we have to create them as custom actors first. To do that we’ll be changing the “Thief3Edit\System\T3Gamesys.t3u” file, or simply, the gamesys.
b) Before we begin, make a backup copy of the file and call it “T3Gamesys_ORIGINAL.t3u”.
c) The gamesys contains all the basic items you can use in the game in their default configuration. Whenever you place an item in the world from the browser, it’s set up with the basic scripts and properties defined in the gamesys. After that you can edit the object and add new scripts, change settings, etc (as we have been doing throughout the whole tutorial), in which case you are editing the “concrete” object, as opposed to the gamesys object.
- If you’re a philosopher, consider objects from the gamesys as the “Forms”, whereas when you place an actor in the map it is just an imitation of a Form. Or something like that.
3) ENTER MISSION INFO (xxiii. objectives part 2)
[summary]
a) To edit the gamesys all you need to do is add or delete or make changes to objects within the “Actor Class Browser”, and then save it.
b) Open it up and go to “MetaData” – “Info” – “EnterMissionInfo” – “T3EnterMissionInfo”. Right click on “T3EnterMissionInfo” (not on any of the specific mission versions of it below) and select “New…”.
c) Next to “Name:” change the “MyT3EnterMissionInfo” text to “EnterMissionInfoKomagTut”.
- It should now be listed along with the ones for the other missions, all under the main “T3EnterMissionInfo” section.
d) Select your new “EnterMissionInfoKomagTut” actor and expand its properties to the right. You’ll notice that it’s organized exactly the same as when you look at the properties of concrete objects.
- If you want to see the non-local properties here you’ll need to select “View” – “Show Non Local Properties” in the browser menus.
- If don’t want to do that, you’ll need to “add” all of the following properties before you can change them.
e) Under the bottommost “Properties”, find (or add) the property “EnterMissionInfo” - “EnterMissionBriefingFileName” and set the text to “KomagTut.txt”.
f) Set “EnterMissionBriefingVoiceOverSchemaName” blank, since we don’t have any sound file set up to match the briefing (this is usually when Garrett reads the briefing out loud).
- (Perhaps this can just be ignored as it should already be blank by default.)
g) Set “EnterMissionVisibleObjectivesFileName” to “KomagTut.txt”.
4) EXIT MISSION INFO (xxiii. objectives part 2)
[summary]
a) Go to “MetaData” – “Info” – “ExitMissionInfo”, right click on it, select “New…”, and call it “ExitMissionInfoKomagTut”.
b) Open its properties and set “ExitMissionInfo” – “ExitMissionDebriefingVOSchemaName” blank.
- (Again, perhaps you can just ignore this.)
c) Set “ExitMissionDestMapName” and “ExitMissionDestTeleportName” to match the map and destination teleporter of where you want the player to go after this mission is completed, such as to your next mission (if you make more, as part of a campaign) or to Garrett’s apartment or whatever.
- If you want to just leave them blank that’s fine too, which is actually what I recommend at this point anyway
- But in that case, when the player finishes the map he won’t go anywhere and will just have to exit the game himself).
5) DIFFICULTY SETTINGS (xxiii. objectives part 2)
[summary]
a) Go to “MetaData” – “Info” – “DifficultyInfo” – “T3DifficultyInfo”, right click and add a new one called “DifficultyInfoKomagTut”.
b) Expand its “Properties” – “Difficulty” and here you’ll find all the settings for the different difficulty levels.
c) First of all, set “DifficultyInfoLevelName” and “LevelName” to “KomagTut”.
d) Now for the fun part! You can adjust a lot of parameters here to make things easier or harder or just more interesting.
e) Expand (or “add” first) the four “DifficultyInfo…” properties (such as “DifficultyInfoEasyDiffSettings”.)
- If you have “Show Non Local Properties” on they will already be there in faded light blue, and after you edit any settings in them they will change to solid darker blue.
f) All the difficulty levels have the same possible parameters. The most common settings to adjust might be “LootPercent”, “DontKillNonComb” (NonComb = non-combatants, or civilians/servants/etc), “MaxBlackjack”, “SpecialLoot”, and others.
- You can even set a “TimeLimit”, though it seems there is not a way to check how much time you have left when actually playing because it always says “0 Minutes Remaining”, so it might be frustrating to players.
- Also, notice that if you put “-1” as a setting that means the setting simply isn’t applied, which is most of them.
g) Unique difficulty parameters such as “MinKill” should be used extremely sparingly only as the unique storyline for your mission dictates, because they often force the player into a certain play style (in this case, forcing them to kill at least a certain number of AI) that may not be popular or fun.
h) So go ahead and make all the adjustments you want to the settings (probably not too many).
i) Finally, or go to (or add) “Properties” – “Scripts” – “TriggerScripts” and click on “Empty” to the right to clear out all the various difficulty related scripts for a nice clean slate.
6) SAVE THE GAMESYS (xxiii. objectives part 2)
[summary]
a) Okay, we’re all done with creating these three new actors and adjusting their settings, so it’s time to save the gamesys.
- “File” – “Save Selected Packages”.
- “File” – “Export All Scripts”
b) If you change these actors later (you have to change these gamesys ones to make any difference, not the concrete ones you place in your map) you’ll have to save the gamesys again each time.
7) ADD THE ACTORS (xxiii. objectives part 2)
[summary]
a) Place each of these actors in your map, preferably near the starting area. They are:
- “MetaData” – “Info” – “EnterMissionInfo” – “T3EnterMissionInfo” – “EnterMissionInfoKomagTut”
- “MetaData” – “Info” – “ExitMissionInfo” – “ExitMissionInfoKomagTut”
- “MetaData” – “Info” – “DifficultyInfo” – “T3DifficultyInfo” – “DifficultyInfoKomagTut”
b) Click on the “Create links [SHIFT-click]” mode (below “Camera Movement” and “Vertex Editing”) and select “TriggerScript” (without a “~”).
c) Select “EnterMissionInfoKomagTut”, then hold Shift and select “DifficultyInfoKomagTut”.
- You should see a blue line connecting them now, with the arrow pointing toward “Difficulty…”.
d) Save everything, open back up the “Entry” map, delete the “DifficultyInfoInn”, and replace it with a “DifficultyInfoKomagTut”.
e) Create a “TriggerScript” link from the “EnterMissionInfoInn” to the “DifficultyInfoKomagTut” (there should also already be a link from the “PlayerStart” to the “EnterMissionInfoInn”).
f) Then save and export the entry map again.
8) DIFFICULTY OBJECTIVES TEXT (xxiii. objectives part 2)
[summary]
a) At this point if you test your mission you should now be able to choose different difficulty settings!
- Check the different settings to see if your unique loot requirements and other rules/limitations are properly in place.
- Now you can also restart your mission or save and load it and there shouldn’t be any problems.
b) But we’re not done yet, as you may have just noticed that the text for the difficulty-related objectives still is not being displayed and you can’t complete those objectives. We have to edit all the conversation files that relate to those objectives in order to add our mission to the list of maps they regulate.
c) Go to “View” – “Conversations”, scroll down to “PlayerGarrett” again, and expand it to see the conversation list. You need to edit all the conversations that are NOT “MissionObjectives” (most of which start with “Max…” or “Min…” but there are others).
d) To start out, right click on “DontBlackjackNonComb” and select “Edit”. In the new “Conversation Properties” window you should see a list of missions in the “Usage” section (we want to add KomagTut to the list).
e) Click on “Add Map” below to open the little “Map List Manager” window.
f) Type in “KomagTut” and click on “Add Map” to the right.
- This adds “KomagTut” to the small list.
- Select “KomagTut” and click “OK” down to the right.
g) You should now see “KomagTut” at the bottom of the “Usage” list. That’s it.
h) Next edit “DontKillNonComb”, click “Add Map” below “Usage”, and from now on “KomagTut” is already in the list, so select it and click “OK”.
i) Repeat this for “LootPercent”, “MaxBlackjack”, etc, all the way down the list (except for the “…Objectives” ones).
j) When finished, do:
- “File” – “Save”
- “File” – “Compile”
- “File” – “Export Mission Objectives”
k) Then close the “Conversation Editor”
9) LOOT PERCENTAGE (xxiii. objectives part 2)
[summary]
a) Now the text for your difficulty-related objectives should show up fine, but the loot percentage doesn’t work yet. We need to set the total loot for the mission to the game can calculate the percentage.
b) You may think the game ought to be smart enough to just total it on its own, but there are some unique cases in which this wouldn’t work out best, so we have manual control over the setting, which is fine.
c) To quickly check the total loot value of everything you’ve placed in the map, go to “Tools” – “Report Interesting Items in this Map” (at the bottom).
- This opens the “When do people find my stuff?” window, in which you can get some good info such as a list of all your books, lights, volumes, etc.
d) Click on “Show loot summary” to get a “TOTAL LOOT:####” readout (ignore the breakdown of loot types). Remember or write down that number.
e) Select your original “PlayerStart” actor (not the one you teleport into, although perhaps it doesn’t matter), open its properties, and add a new “TriggerScript”.
f) Go into the “Trigger Script Manager” and create a new script called “Set_KomagStat”.
- In “Conditions” enter “Scripts” – “When map starts, arriving from a different map”.
- In “Actions” enter “Global Variables” – “Set [Global] to [integer]”.
- Change “[Global]” to “[sta_loottotal]”, and change “[integer]” to the total loot in your map which you found out a minute ago, such as “[3125]”.
g) Save the scripts, and add it to the “PlayerStart”.
10) SPECIAL LOOT (xxiii. objectives part 2)
[summary]
a) Wow, we’re almost done with objectives! The last thing we need to do is set up the “Special Loot” objective.
b) For this to work, all you need to do is first decide on three items that you will use for special loot. If you add these items now then don’t forget to adjust your loot total from the previous step.
c) Then you just need to add a couple properties to each of them:
- “Inventory” – “InvType” set to “elT_SPECIAL_LOOT”
- “Scripts” – “TriggerScripts” – “CurrentSpecialLoot”
You can find the special loot script in the “Difficulty” – “Hierarchy” section of the “Trigger Script Manager”.
d) By the way, if you are using a unique item as loot, you may need to add the scripts “CurrentLoot” (found next to “CurrentSpecialLoot”) and “LootSounds” (found in “GameObjects” – “ObjectSounds”) for it to work.
- If it’s a really unique item and you have to adjust all kinds of properties to make it work, then you are already more advanced that this tutorial!
11) MISSION COMPLETE! (xxiii. objectives part 2)
[summary]
a) Okay, WHEW!!! THAT’S IT! Your objectives should now all work perfectly! You’ve just made a complete Thief 3 Fan Mission!!!
b) If you’ve made it this far, it’s like you’re on mile 26 of a marathon, so screw up your remaining faith and courage, and press on to the last step.
c) It’s time to package it up for others to play!
XXIV. FINAL SETUP AND PACKAGING
1) IBT GENERATION (xxiv. final setup and packaging)
[summary]
a) All final missions are mainly played using their ibt files. This is a “cooked” version of your mission that contains all the resources used in the map, such as textures, meshes, etc.
b) Having all the resources in one file speeds up the loading a lot, sometimes up to five times as fast or more, depending on your map size, how many different texture families you used, etc.
c) To make your ibt file, open up your user.ini (in your Thief3Edit main folder) and, under the “[BlockLoading]” section (which already has “;LoadFromResourceBlockFiles=True” that you added in the beginning), add the line:
WriteResourceBlockFiles=True
- You don’t need the line “WriteBlockFiles=True” as has been mentioned by other people, and you don’t need to edit your default.ini file (because anything you put in your user.ini overrides the default.ini settings, which is good)
d) Then, start T3Ed, load your map, and enter game mode to generate the ibt.
- It will take longer than normal to load this time because it’s creating the ibt.
- You don’t have to play the whole mission or anything, you can just exit the game after it starts.
e) You’ll find the ibt in your “My Documents” – “Thief - Deadly Shadows” folder as “autoplay.ibt”.
- You’ll also see some “Kernel” ibts but ignore them for now (some may be necessary to include depending on if you’ve done some advanced stuff in your map).
f) Remember to go back and comment out that line (“;WriteResourceBlockFiles=True”) afterwards, or else you’ll have some problems when testing or playing any other maps after that (AIs won’t have any weapons, possibly some other problems).
2) FILES TO PREPARE (xxiv. final setup and packaging)
[summary]
a) Your readme.txt (format, information, etc). Here is a sample one:
--------------------------------------------------------------------------------------------------
February 25, 2005
--------------------------------------------------------------------------------------------------
Author : Komag (Ben Ramsey)
Contact Info : komagtut@shadowdarkkeep.com
Homepage : www.ShadowdarkKeep.com
Version : 1.0
Date of Release : February 25, 2005
--------------------------------------------------------------------------------------------------
Briefing:
This is the story of the mission
--------------------------------------------------------------------------------------------------
*Playing Information*
Game : Thief 3 - Deadly Shadows
Mission Title : KomagTut
Mission File Name : KomagTut
Difficulty Settings : Yes
Equipment Store : No
Map : Yes
Auto Map : No
New Graphics : No
New Sounds : Yes
New Objects : No
Multi language support : No
Difficulty Level Info : Easy, Normal, Hard, Expert
Known Bugs : None
--------------------------------------------------------------------------------------------------
Video Briefing Length : N/A
Video Briefing Size : N/A
--------------------------------------------------------------------------------------------------
*Construction*
Base : From Scratch
Build Time : 2 months
--------------------------------------------------------------------------------------------------
Notes :
This is just the simple tutorial mission, nothing really exciting, but hopefully not too bad either :-)
-------------------------------------------------------------------------------------------------
Thanks :
Everyone who wrote excellent tutorials, especially Komag of course!
--------------------------------------------------------------------------------------------------
*Loading Information*
Runs from GarrettLoader. Leave the file ZIPPED - DO NOT UNZIP this file, but put the whole zip file into whatever folder/directory on your hard drive where you keep your Thief 3 FMs, then run GarrettLoader and play!
--------------------------------------------------------------------------------------------------
* Copyright Information *
This level is © by Ben Ramsey (Komag)
Distribution of this level is allowed in any way, shape, or manner you wish. You may edit or use this mission however you want. It's all yours
This level was not made and is not supported by Looking Glass Studios or Eidos
Interactive.
--------------------------------------------------------------------------------------------------
b) Your GLTitle.jpg (easy to make, don’t skip this!)
c) Custom loading graphic if desired
3) STUFF TO ZIP (xxiv. final setup and packaging)
[summary]
a) Zip all of the following files up so that the zip directory contains the folder structure as shown here (the zip should NOT have a “Thief3Edit” folder):
- CONTENT\T3\Books\EMObjectives.dat
- CONTENT\T3\Books\English\Briefings\defend.sch
- CONTENT\T3\Books\English\DeBriefings\defend.sch
- CONTENT\T3\Books\English\DeBriefings\defend01.sch
- CONTENT\T3\Books\English\String_Tags\MapRooms.sch
- CONTENT\T3\Books\English\String_Tags\Misc.sch
- CONTENT\T3\Books\English\String_Tags\Quotes.sch
- CONTENT\T3\Conversations\conid.txt
- CONTENT\T3\Conversations\YourMission.com
- CONTENT\T3\Conversations\Database\ NEW DATE FILES
- CONTENT\T3\Sounds\schema\conversations\PlayerGarrett\NEW DATE FILES
- CONTENT\T3\maps\Entry.gmp
- CONTENT\T3\maps\YourMission.gmp
- CONTENT\T3\maps\YourMission.ibt
- Fan Mission Extras\GLTitle.jpg
- Fan Mission Extras\readme.txt
- System\T3Gamesys.t3u
b) If you have any other custom content then include it as well, in the proper directories.
4) SHARING EDITOR BUILDS (xxiv. final setup and packaging)
[summary]
a) In editing stages, if you want to share your work in progress and you have made new scripts, you’ll need to include the script files with the unr file you share.
- Also true for conversations, flags, maybe other (of course any custom materials, objects, textures, etc)
b) (GarrettLoader, by potterr, has some feature to help authors package their missions?)
THE END
CURRENT PROGRESS » 95%
XXV. APPENDIX
3D Window:
LMB+Move slide forward and back and turn on the horizontal plane
RMB+Move look around
LMB+RMB+Move slide around on a vertical plane
Alt+RMB select the texture on the surface (won’t jump to it in the texture window though)
Alt+LMB paint currently selected texture onto the surface (good combo with Alt-RMB)
2D Window:
LMB+Move moves the view around
RMB+Move moved the view around faster
Mouse wheel zooms in or out
LMB+RMB+Move zooms in or out bassackwardsly
Any Window:
Ctrl+W duplicate item or brush (or set of items or brushes)
Shift+B with a brush surface selected, this will select all the surfaces of the brush
H hide/unhide everything but bsp brushes
W hide/unhide static meshes, actors, physical lights, etc
I hide/unhide all icons (lights, effects, patrol points, etc)
B hide/unhide the Builder Brush
GENERAL CONTROLS TIPS:
Quick view navigation:
If you want to jump to a location in the view windows, go to that location in one of them and right-click on an actor and select “Obsolete” – “Align Cameras”. Then move one of the views a tad and voila, they’re all focused on that object! (Too bad it doesn’t work – the “Obsolete” is grayed out!)
3D Movement Object View
To see the objects and meshes when moving in the 3D view, toggle "Hide Actors during Pan" by clicking the little video camera icon next to the purple circle.
Lighting:
If you have done a recent “Build All” then you will be able to immediately notice the effects of changing light color or brightness or other aspects without having to do a new build after each little change.
Resizing brushes:
Vertex Editing is the only good way to resize brushes. There is a “Brush Scaling” mode but it is somewhat “broken” as it gives you horrible control! Plus it might make your brushes go off the grid snapping, so just pretend that mode doesn’t exist.
Align brush to grid:
Sometimes even when you try to select “Snap to Grid” on a brush it doesn’t want to cooperate. One way to make it work is to snap each corner in Vertex Editing mode. Select one vertex at a time and right-click on the little white square to snap it.
More options:
The interface has a lot more options not mentioned in the tutorial. For instance, you can unlock and freely position the four view windows, or select from some other preset window layouts.
OTHER:
Copy part of mission:
If you want to reuse some BSP you saw in another mission (one of the original missions), select the brushes you want. You might try drawing a multi select box with Ctrl+Alt and then selecting or deselecting a few brushes to get it right. When you have them highlighted, go up to the “Brush” menu and select “Intersect” to make your shape. Then do “Brush” – “Export” as save it as a t3d file. Then open your map and select “Brush” – “Import” and find your t3d file you just made. You should have your shape! It might be on the Builder Brush, so you’ll have to use it from there.
Tiny spaces:
To move, Garrett requires 2 feet (32 unreal units, or “uu”) of width, and 4 feet (64uu) height.
To mantle up, Garrett needs 2.5 feet (40uu) width and 5 feet (80uu) height in the upper area
Tutorial Format:
The original word.doc used to write this tutorial was written with margins set to 0.8 inches on all sides.
i. INGREDIENTS
ii. INTRODUCTION
3. what you get
5. faith
I. INSTALLING THE EDITOR
5. install t3ed
6. change exes
7. edit ini
11. cower in fear
II. MAKING SURE IT WORKS
1. open t3ed
2. load a map
3. play the map
4. trouble
5. no sound
III. BASIC CONTROLS
2. buttons
4. odd behavior
6. camera speed
9. no worries
10. brush movement
11. brush sliding
12. brush axis
IV. YOUR FIRST ROOM
1. subtracting
3. look in room
4. look again
5. add light
9. paint more
11. test the room
V. STARTING INVENTORY
2. add arrows
VI. LIGHTING
1. add torches
VII. STATIC MESHES
1. mesh browser
4. add barrels
5. cheat
6. add shadows
VIII. EXPANDING THE AREA
3. add stairs
IX. AI, PATROLS, AND NAVMESH
6. add a guard
7. navmesh
X. LOOT!
1. static meshes vs. actor meshes
9. add a purse
10. attach the purse
XI. DOORS
2. add a door
7. sliding door
XII. RAMPS, STAIRS, AND LADDERS
2. make it turn
6. add a ladder
XIII. ZONING
XIV. TEXTURING
1. art
3. new method
4. grabbing
5. alignment
8. blank
XV. SKYBOX
1. set it up
XVI. WATER AND FOG
2. water mesh
3. water volume
4. flow
7. add fog
XVII. DETAILING AND OPTIMIZATION
1. good so far
XVIII. SOUND
1. sound advice
5. ambient list
6. other sounds
7. add a sound
8. add eax
XIX. READABLES
1. add a book
2. book tips
XX. SCRIPTS
1. power
2. shortcut
3. be organized
2. komagtut
3. briefings
4. other texts
5. backup entry
6. edit entry
8. test mission
XXII. OBJECTIVES PART 1
2. two kinds
3. planning
5. add a goal
6. more goals
8. test and fix
11. do last
12. flag system
13. works great!
XXIII. OBJECTIVES PART 2
2. the gamesys
10. special loot
XXIV. FINAL SETUP AND PACKAGING
3. stuff to zip
XXV. APPENDIX
iii. FULL OUTLINE